
The Skull (Joseph Theophilus)
Preview:
This study examines the human skull, which forms the structure of the head and foundation of the face. My favorite bone group to draw—though I find its symbolism with death or witchcraft rather satirical.
Synonyms: Cranium; Braincase; Noggin; Head bone
Summary
The skull (Latin: Cranium) is a bone group made of 22 interlocking bones that protect the head. It houses and safeguards the brain, eyes, and inner ear. The skull has two main parts: the cranium which encloses the brain, and the facial skeleton which forms the face. It protects vital organs, provides attachment points for facial and chewing muscles, and supports sensory organs. The skull connects to the spine at the first neck vertebra for head movement, and to the lower jaw for jaw function in speech and eating.
Basics
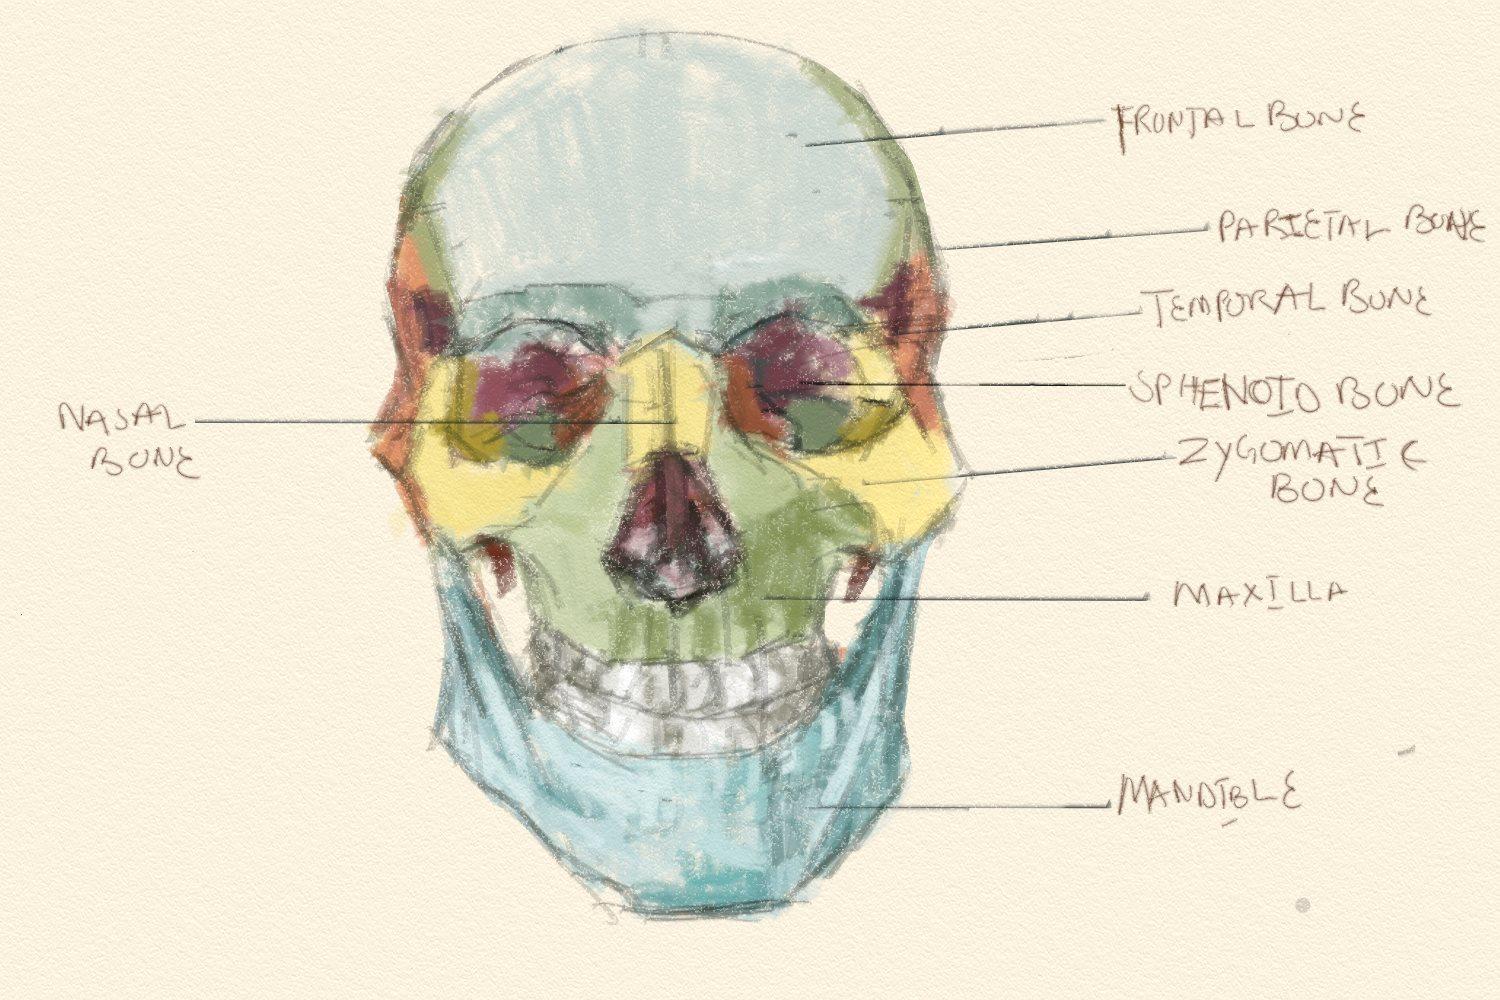
The skull is a complex bone group that form's the protective casing for the brain and the structural framework of the face. From an anterior (front) view, you can see how different bones fit together like puzzle pieces, each with distinct shapes and colors in this study.
The cranial vault, shown in blue-green tones, includes the frontal bone forming the forehead and the parietal bones creating the rounded top of the skull. The temporal bones (in maroon/purple) sit on either side at the temples, housing the ear structures.
The facial skeleton is equally intricate. The sphenoid bone (yellow, behind the eye orbits) acts as a keystone connecting many cranial and facial bones. The zygomatic bones (cheekbones, in yellow) give the face its width and form the outer edges of the eye sockets. The small nasal bone (yellow) forms the bridge of the nose, while the maxilla (upper jaw, in green-white) holds the upper teeth and forms much of the mid-face structure.
Finally, the mandible (lower jaw, shown in turquoise) is the only movable bone in the skull, articulating with the temporal bones to allow for chewing, speaking, and facial expressions. Notice how it's completely separate from the rest of the skull, highlighting its unique mobility.
Connections
The skull is considered a bone group because it's made up of multiple bones that are fused or joined together to protect the brain and sensory organs. These bones connect through fixed joints called sutures (in adults) or soft spots called fontanelles (in infants), which lock together like puzzle pieces to create a strong skull.
Which other bones does the skull connect to?
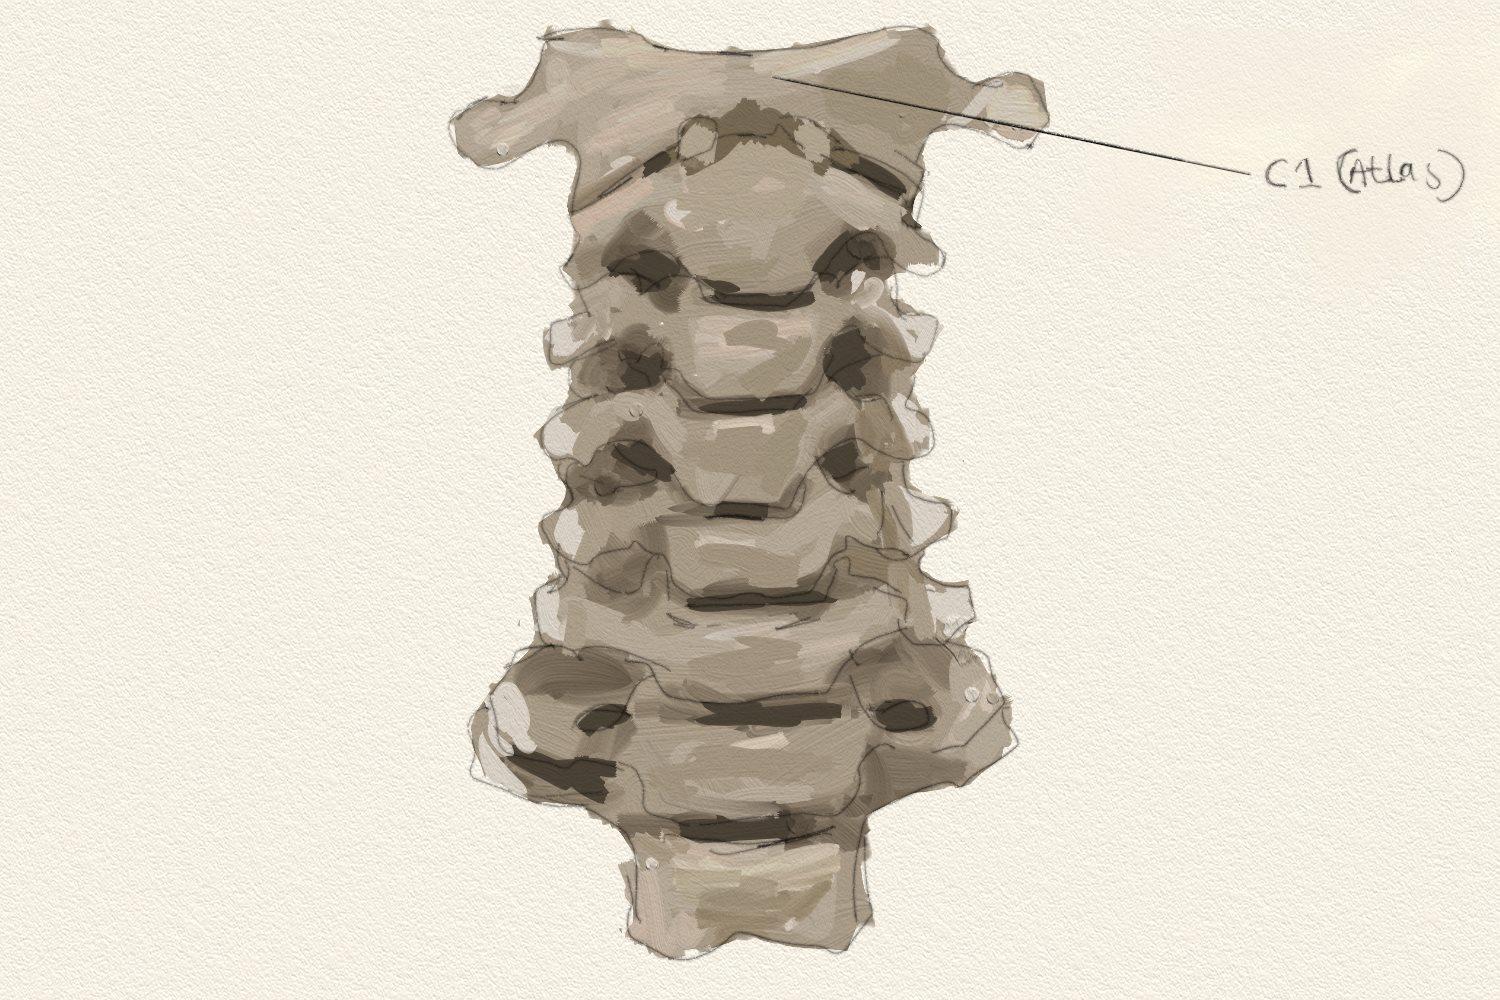
The skull connects to the spine at the first neck bone (atlas), which allows the head to nod up and down. It also connects to the lower jaw (mandible), which is the only movable joint in the skull and allows for chewing and talking.
Which important body parts or muscles connect to the skull?
Many muscles attach to the skull, including:
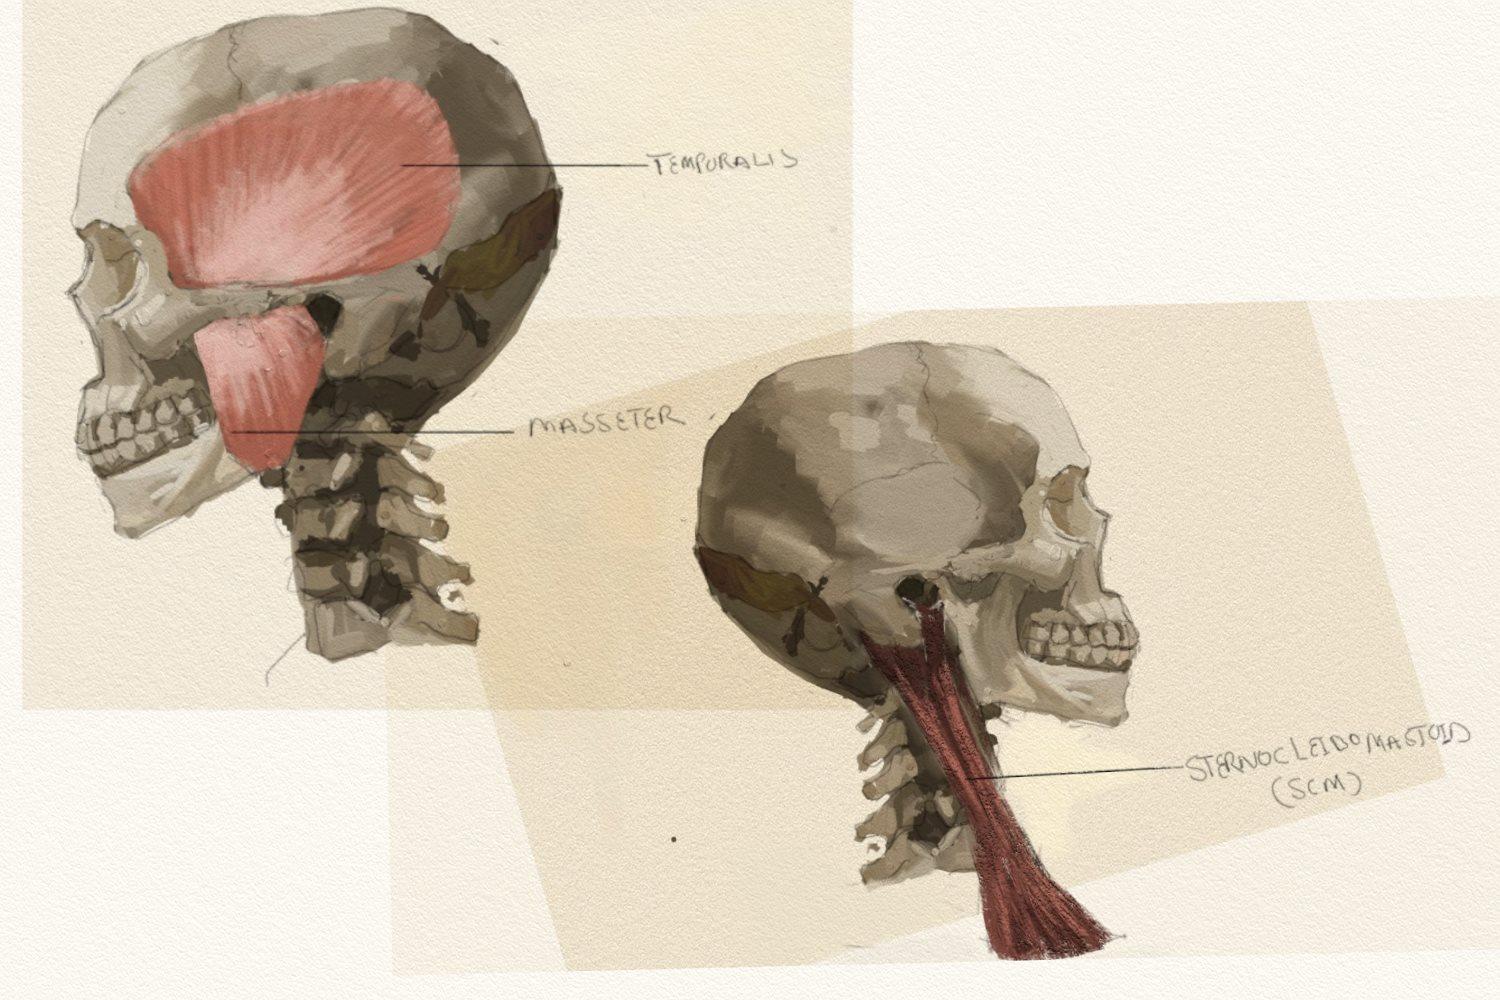
- Chewing muscles that connect to the jaw and sides of the skull.(Temporalis and masseter)
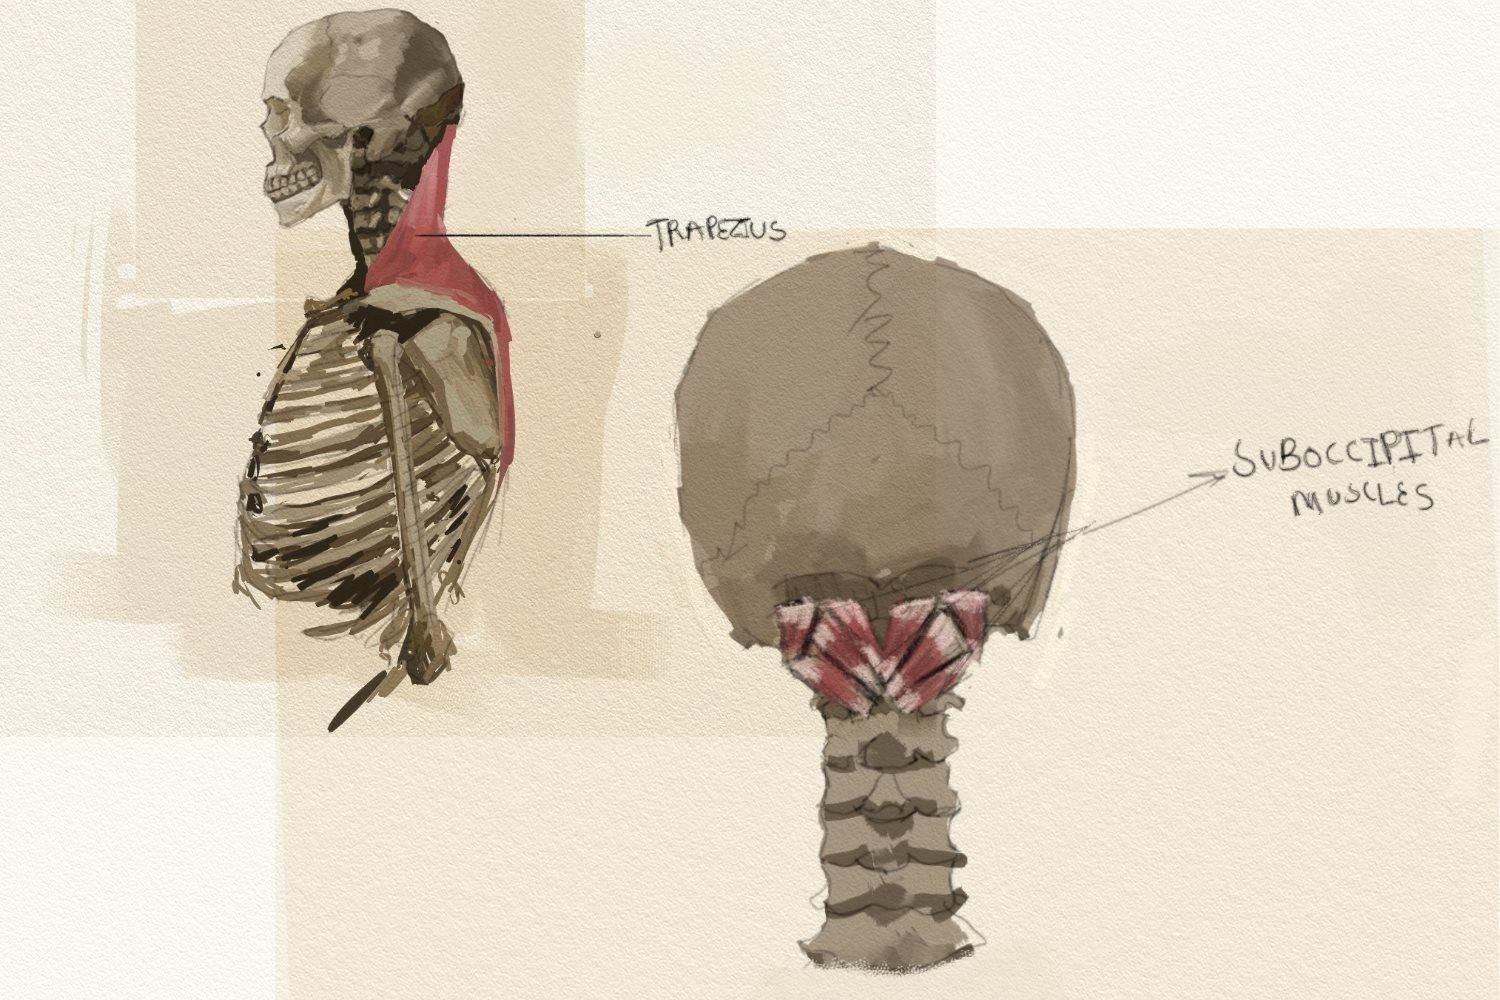
- Neck muscles that connect to the back and base of the skull for head and neck movement(Suboccipital, SCM, Trapezius muscles)
- facial muscles that attach to various skull bones for facial expressions.
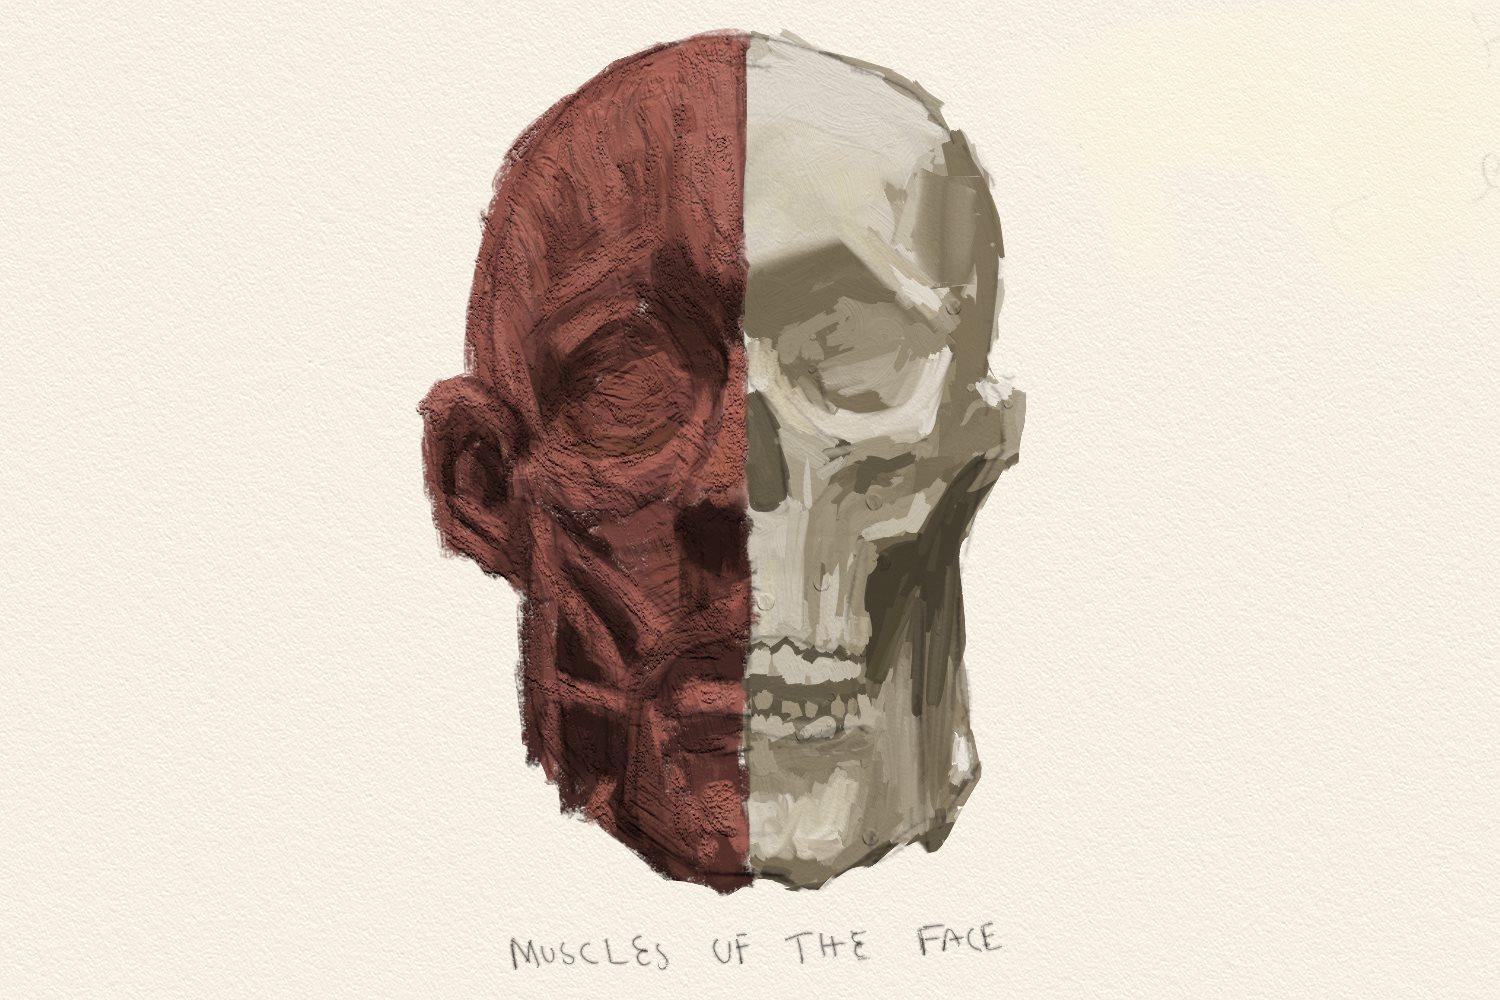
for more information on muscles of the face (see previous page)
Functions
What is this bone / bone group used for? Why do we have it?
The skull has three main jobs:
Protection - It protects the brain, eyes, and inner ear from injury. The hard bone acts like a helmet for these delicate organs.
Structure - It gives the head its shape and provides a framework for the face and facial features.
Attachment - It provides anchor points for muscles used in chewing, facial expressions, and head movement.
The skull also contains openings that allow nerves and blood vessels to pass through, connecting the brain to the rest of the body.
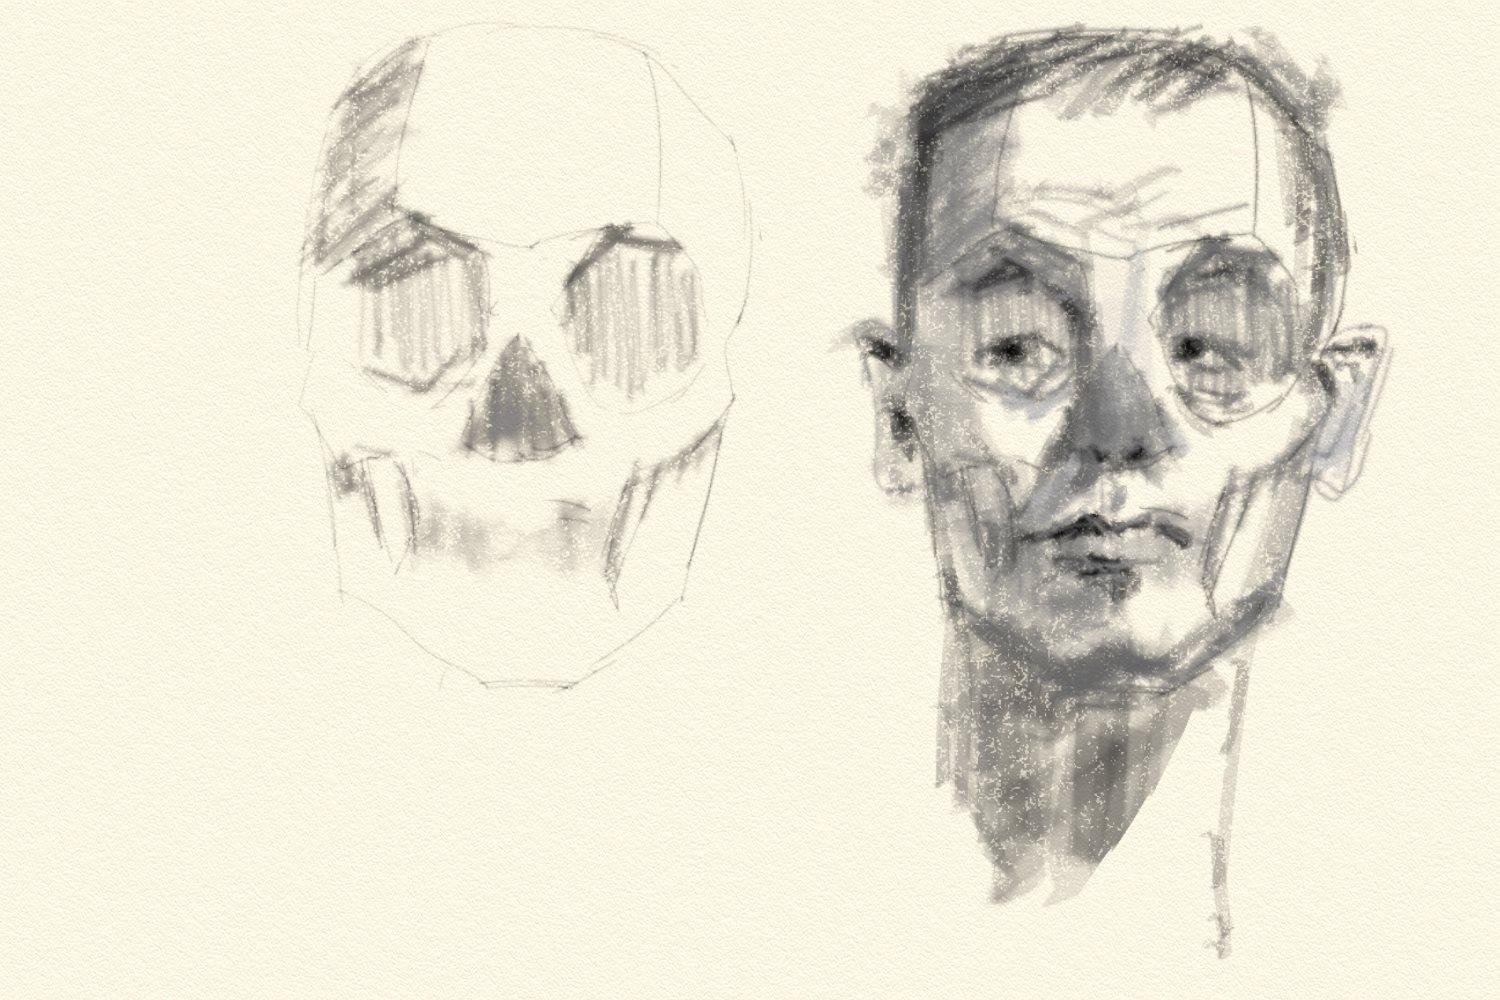
How to draw the bone / bone group
Whenever I draw anything, I usually break it down into really simple shapes, then add the details from there. The skull can also be broken down into really basic shapes. Here is a step-by-step process of how I draw the skull - hope this helps
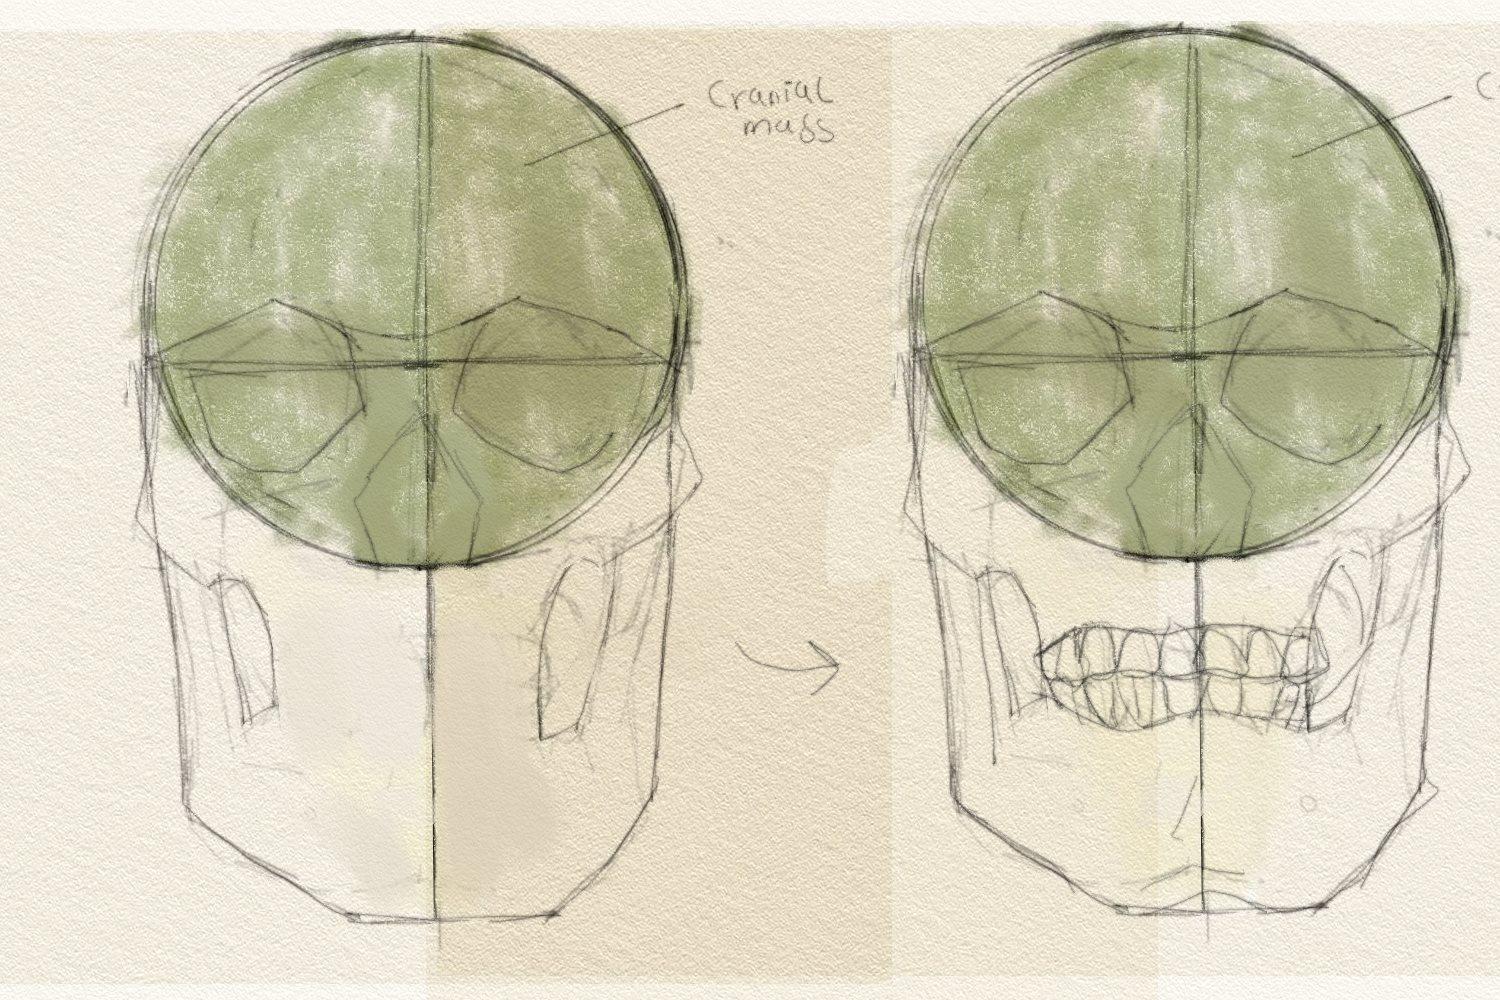
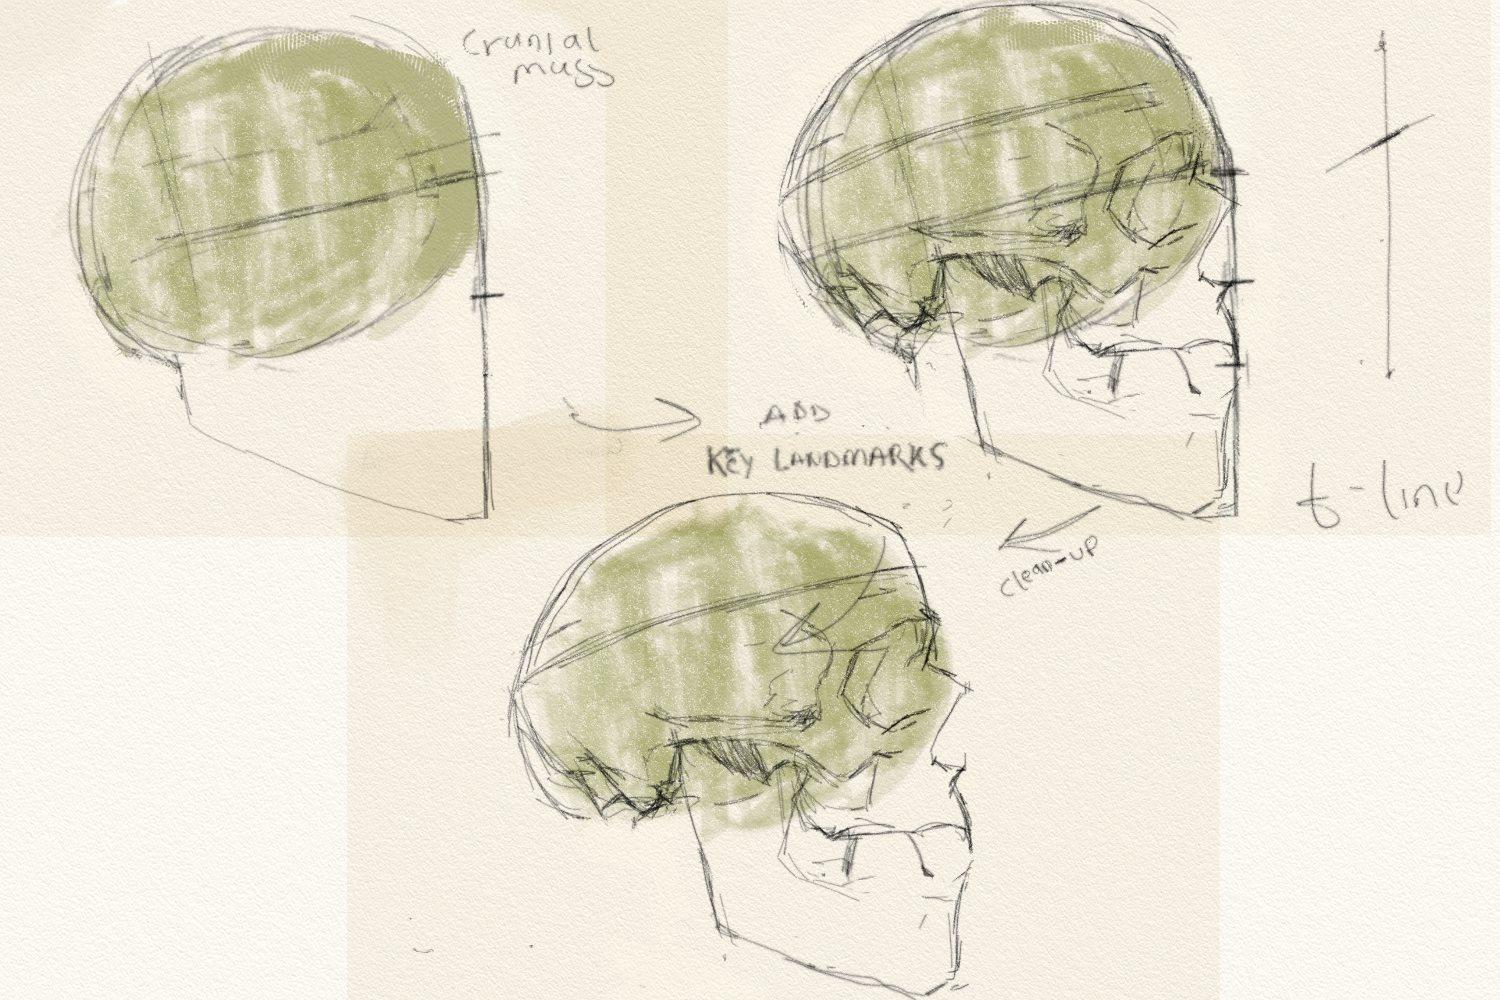
Step 1: Start out by drawing a sphere or circle. The sphere here represents the cranium, which is 2/3 of the entire skull.
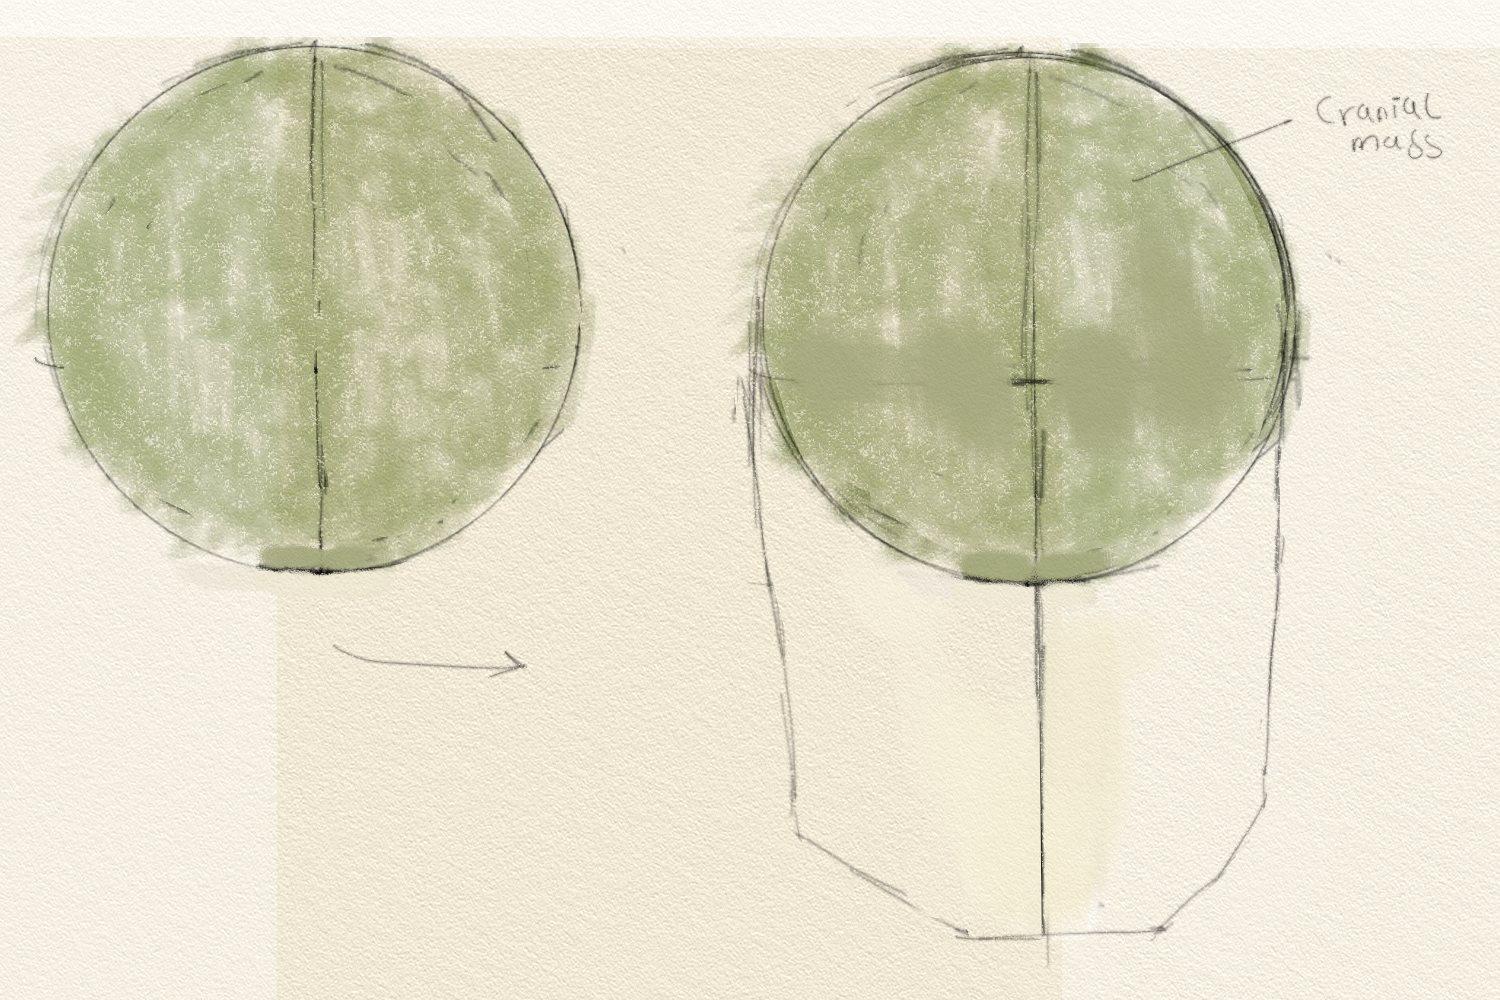
Step 2: Draw a straight vertical line through the center of the cranial mass (now highlighted in green). This helps with the positioning of the skull. The axis of this line is determined by the perspective of the skull. Introduce the jaw by extending the lines of the cranial mass.
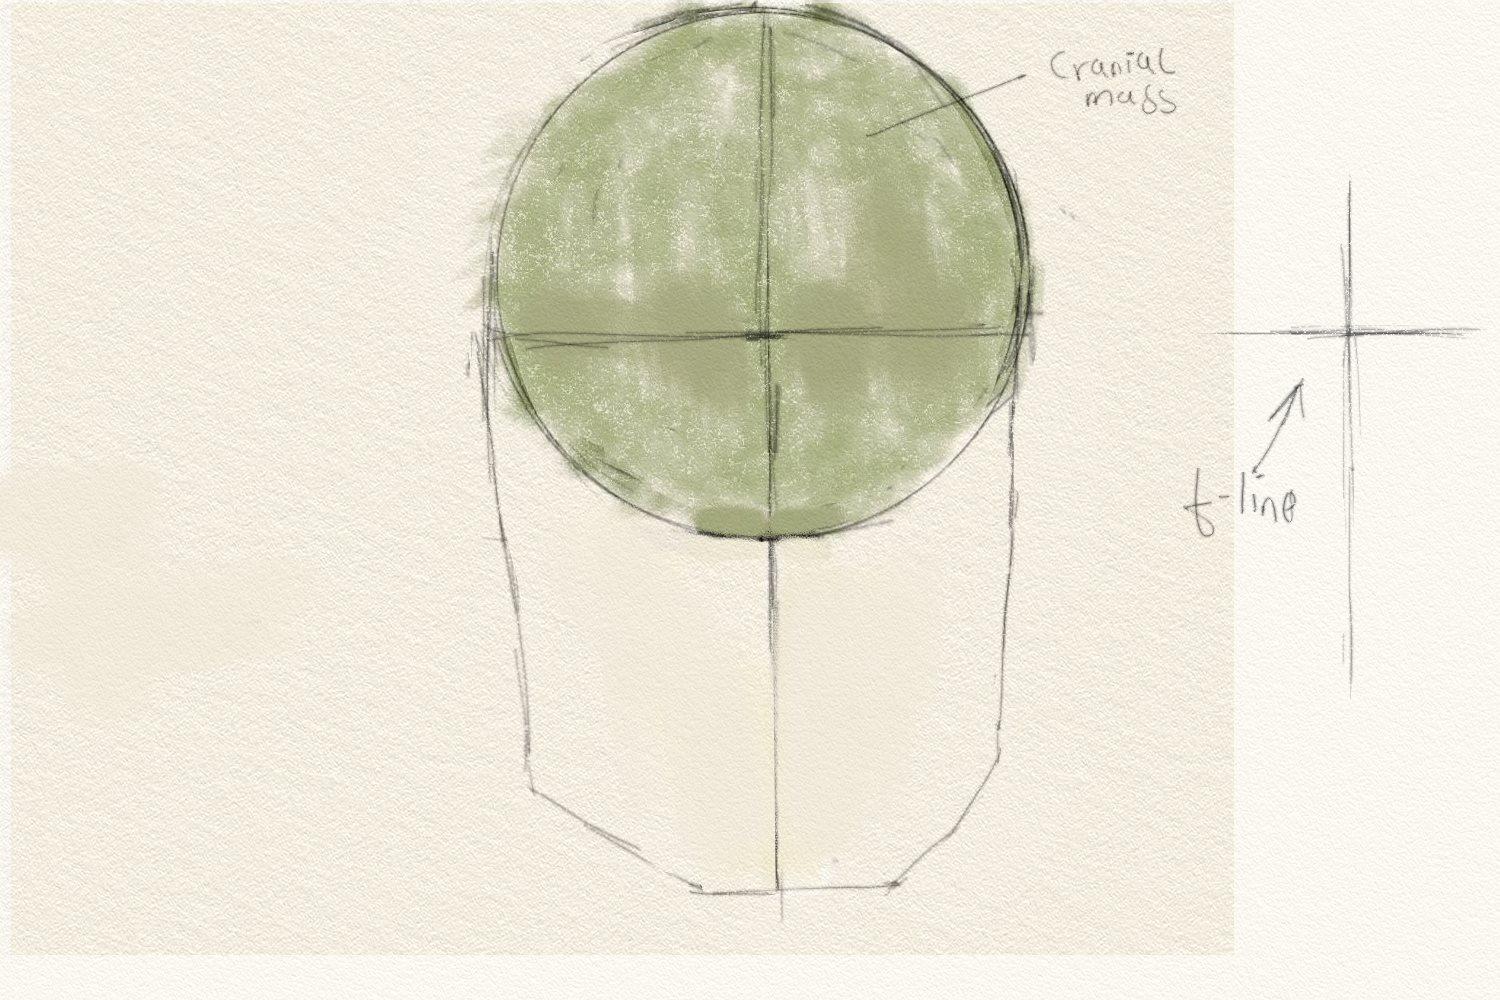
Step 3: Add a horizontal line across the cranial mass. This line represents the eye socket line, which lies halfway down the skull. Notice that this creates a "t" shaped line. The "t" line is the line of symmetry of the skull; the vertical line divides the skull into two equal parts.
Step 4: Draw the key landmarks: the eye sockets, cheekbones (zygomatic arch/bone), teeth line, jaw angle, and nasal opening. Try not to draw every single bone—keep it simple. Then add details.
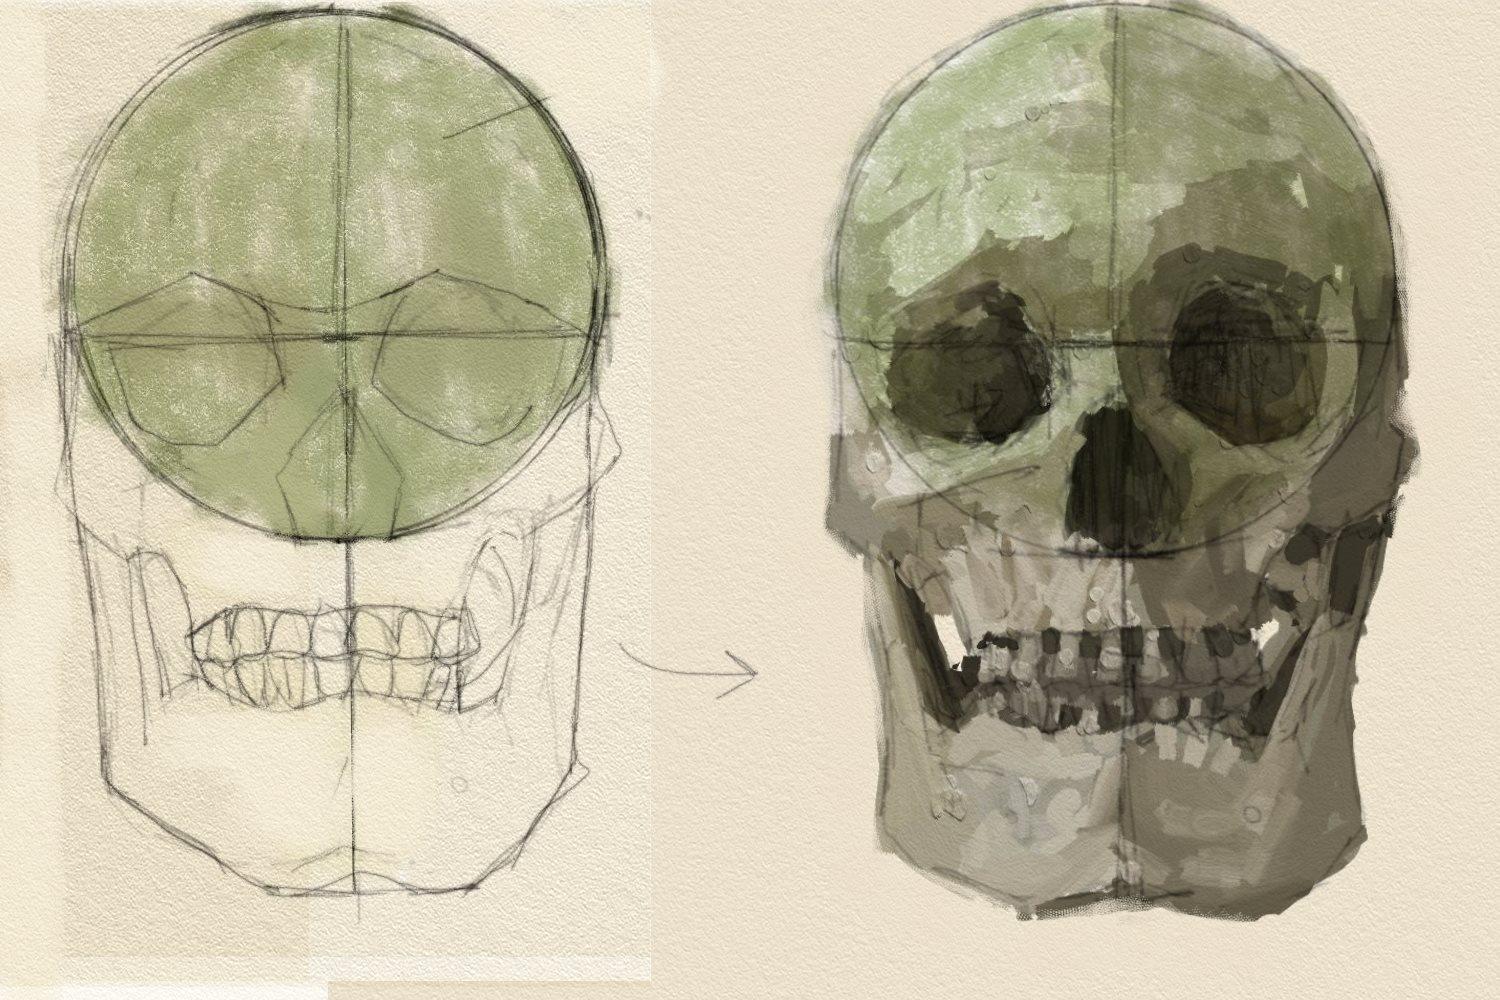
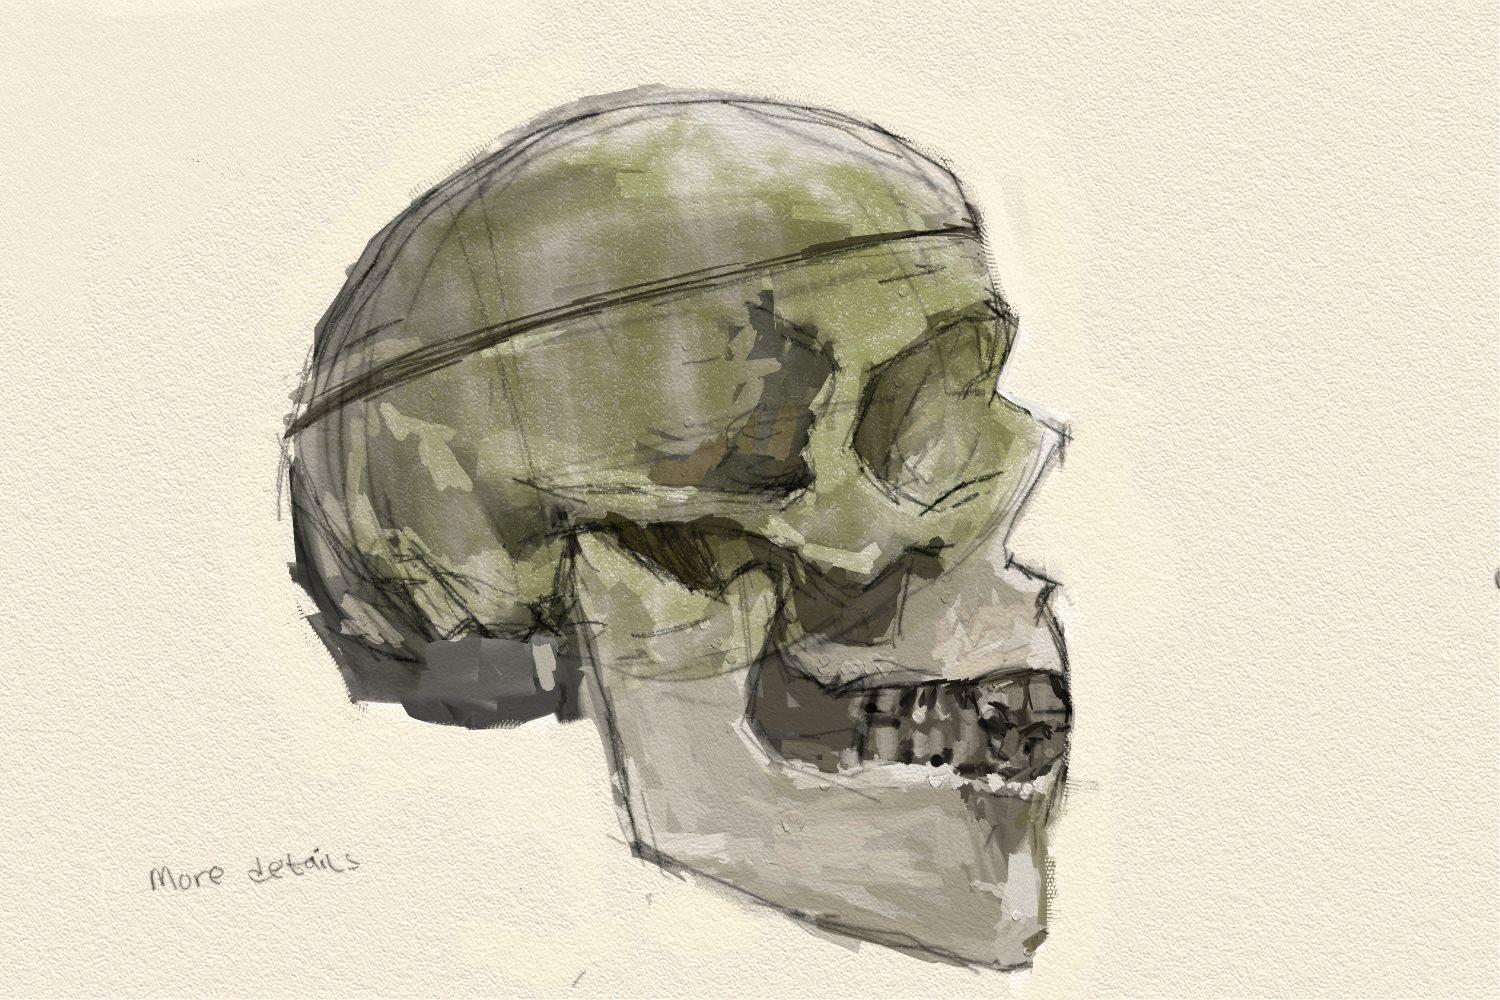
Step 5: Add more details.
Advanced
Applying the same steps, one can try drawing the skull in different angles or perspectives.
Add more details.
Study Tips
- Simplify the structure - Start with basic shapes: sphere for cranium, wedge for face, box for jaw. Build complexity gradually.
- Key proportions - Eyes sit halfway down the skull. Nasal opening starts at two-thirds. Entire skull is roughly 3.5 "heads" tall including jaw.
- Key landmarks - Master the eye sockets (orbits), cheekbones (zygomatic arch), nasal cavity, and temporal lines. These define everything and translate directly to portrait work.
- Multiple angles matter - Side and three-quarter views teach structure better than front views alone. The profile especially reveals how much the face projects forward.
- Planes over details - The cranium is rounded; the face has angular planes. Understanding this distinction helps your rendering. Deep shadows in eye sockets and nasal cavity are your friends.
- Common mistakes to avoid - Placing features too high, making the cranium too small, drawing the jaw too narrow, and over-detailing before nailing proportions(always keep it simple).
- Best practice - Do timed studies: 2 minutes for gesture/overall shape, 10 minutes for proportions and major landmarks, 30+ minutes for detailed rendering. The quick studies train your eye faster than you'd expect.
Use photo references initially, then graduate to studying real skulls or high-quality casts for true three-dimensional understanding.
Everything beyond
Understanding the skull shows you where features sit - eyes at mid-skull, nose length from nasal bone to upper teeth, cheekbone height from zygomatic arch width. The skull's flat surfaces (forehead plane, cheekbone plane, jaw plane) help you light faces right and create solid volume, which helps when drawing heads tilted, turned, or seen from weird angles without reference. Wide vs narrow skulls, big vs flat cheekbones, strong vs weak jaws create different faces and character designs, and knowing what's bone vs soft tissue helps you draw aging faces since the skull stays the same while skin sags. The skull is where facial muscles attach, so understanding brow ridges, cheekbones, and jaw structure shows you why expressions create certain wrinkles and shadows. Every face you draw is the skull plus soft tissue - learn the skull well, and you can build any head from imagination, making it the base of all portrait and character work.
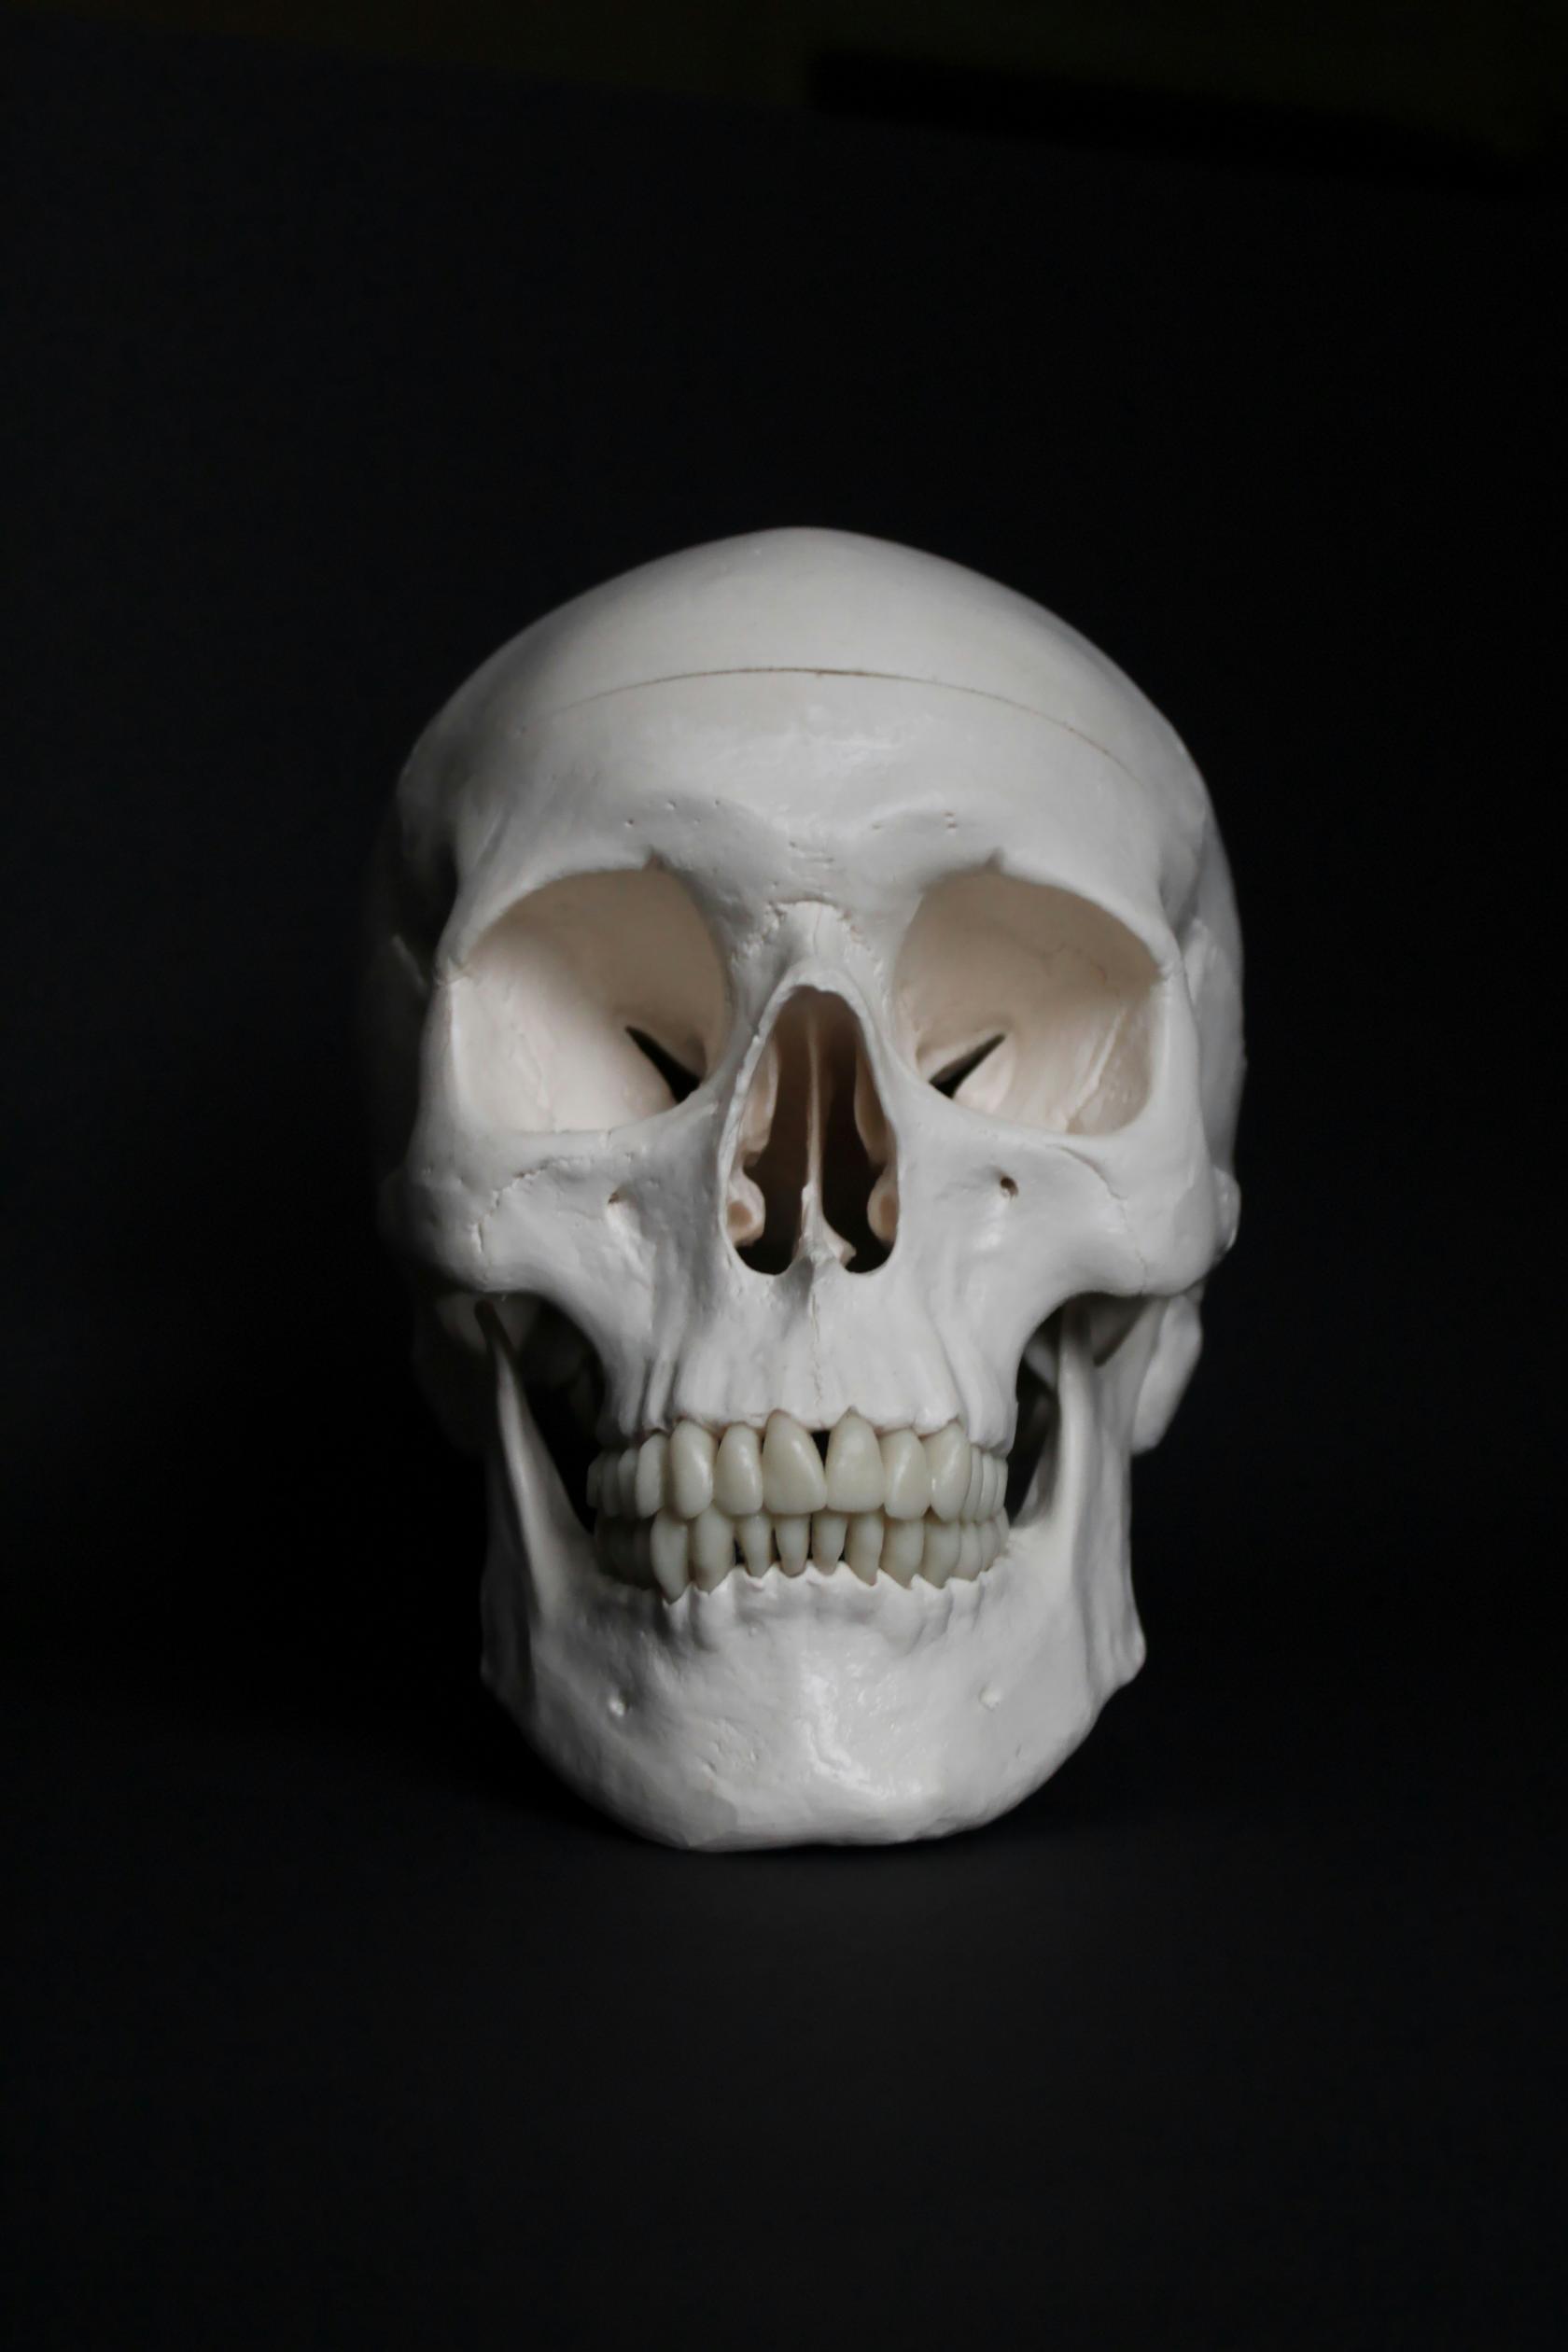
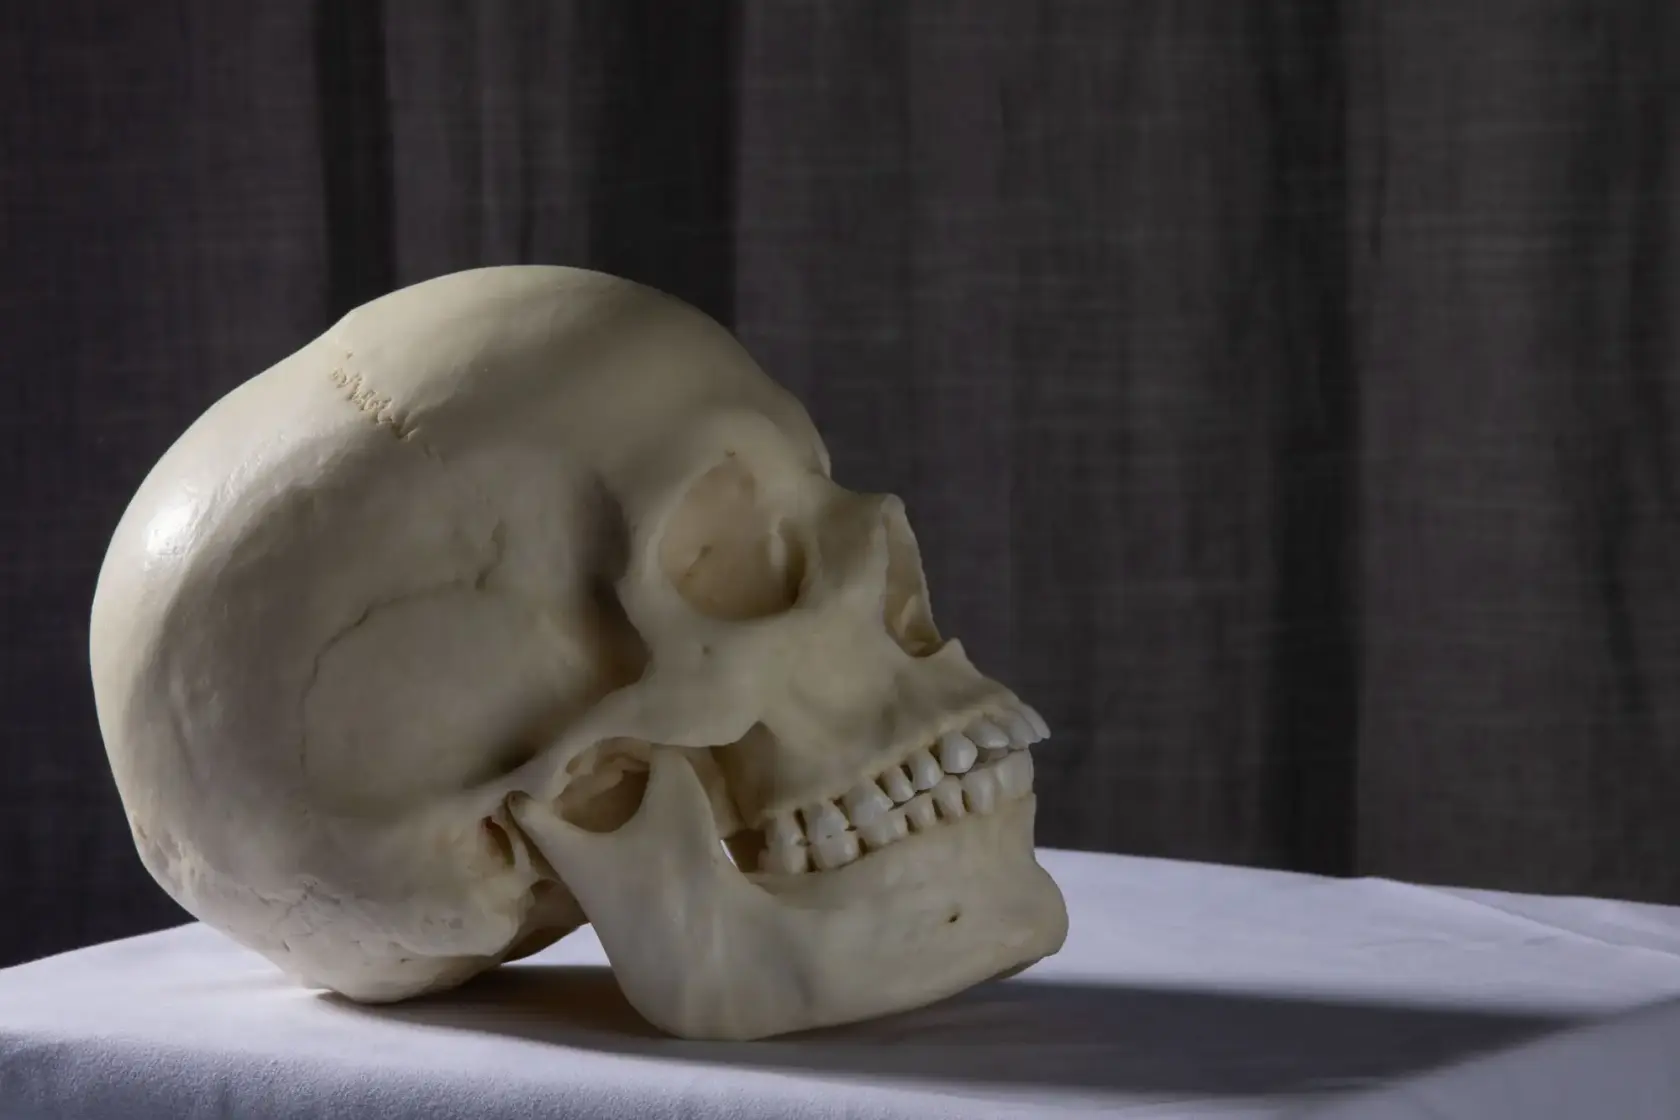
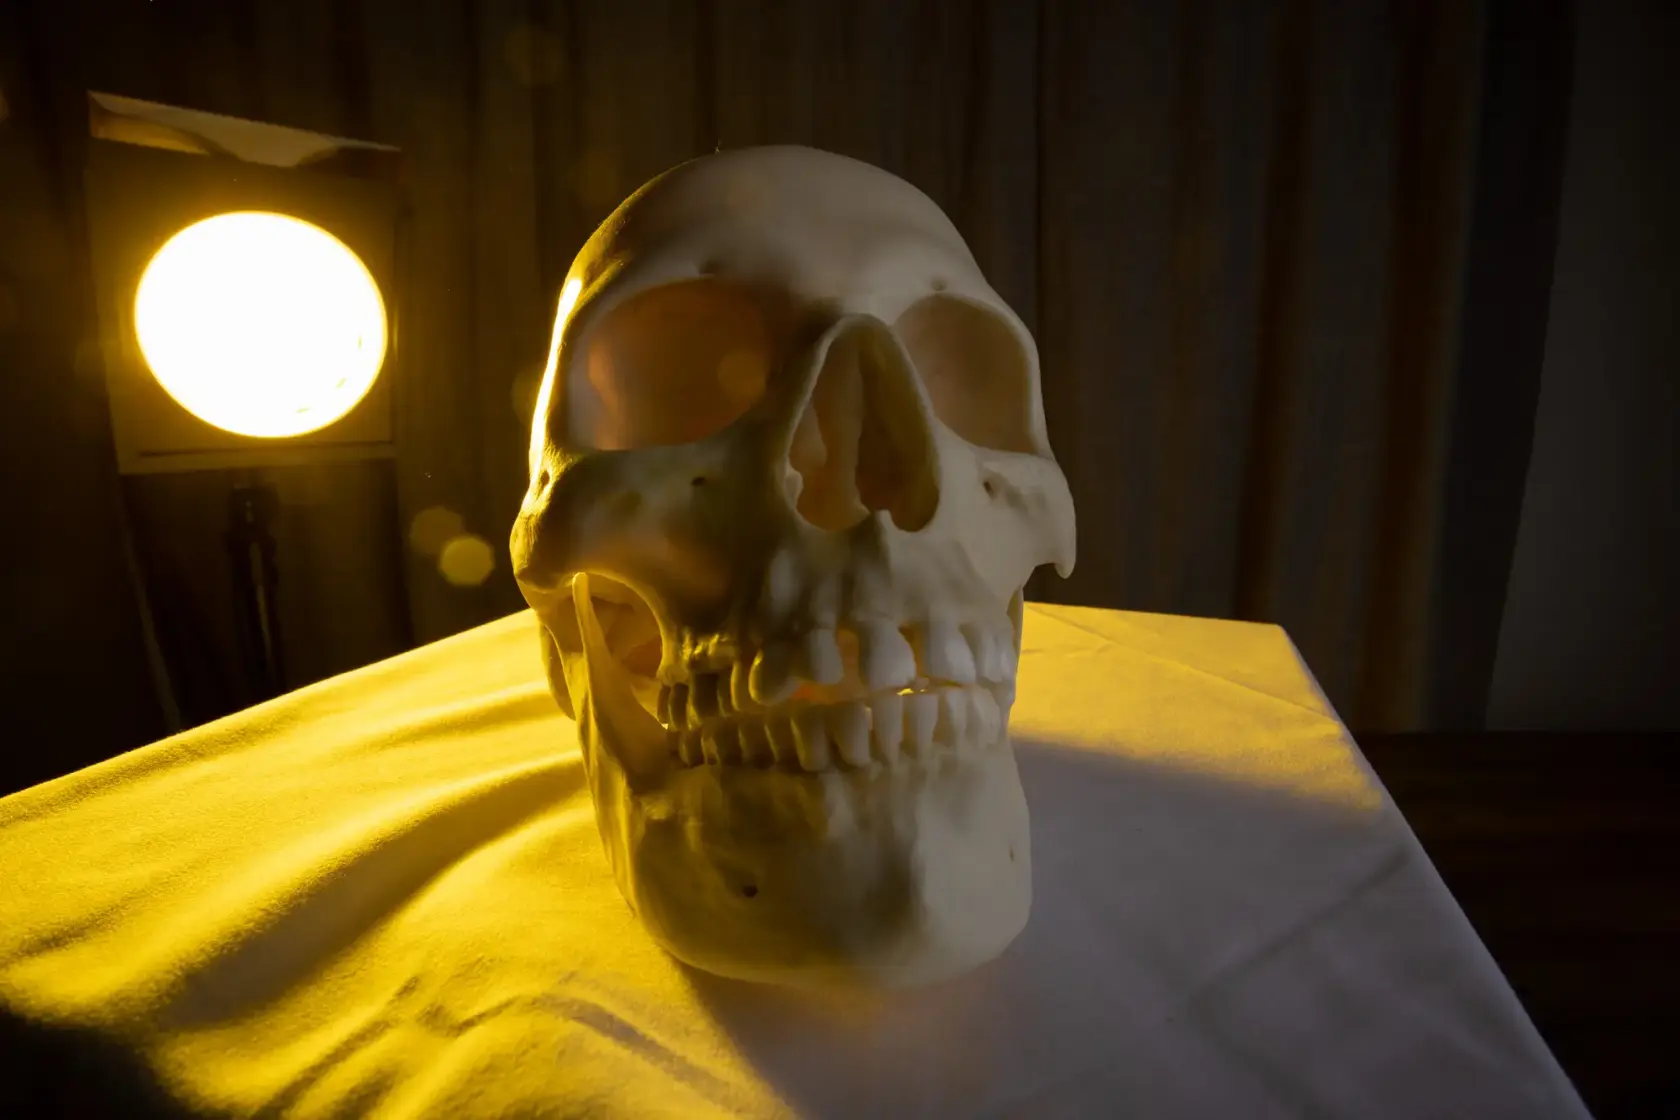
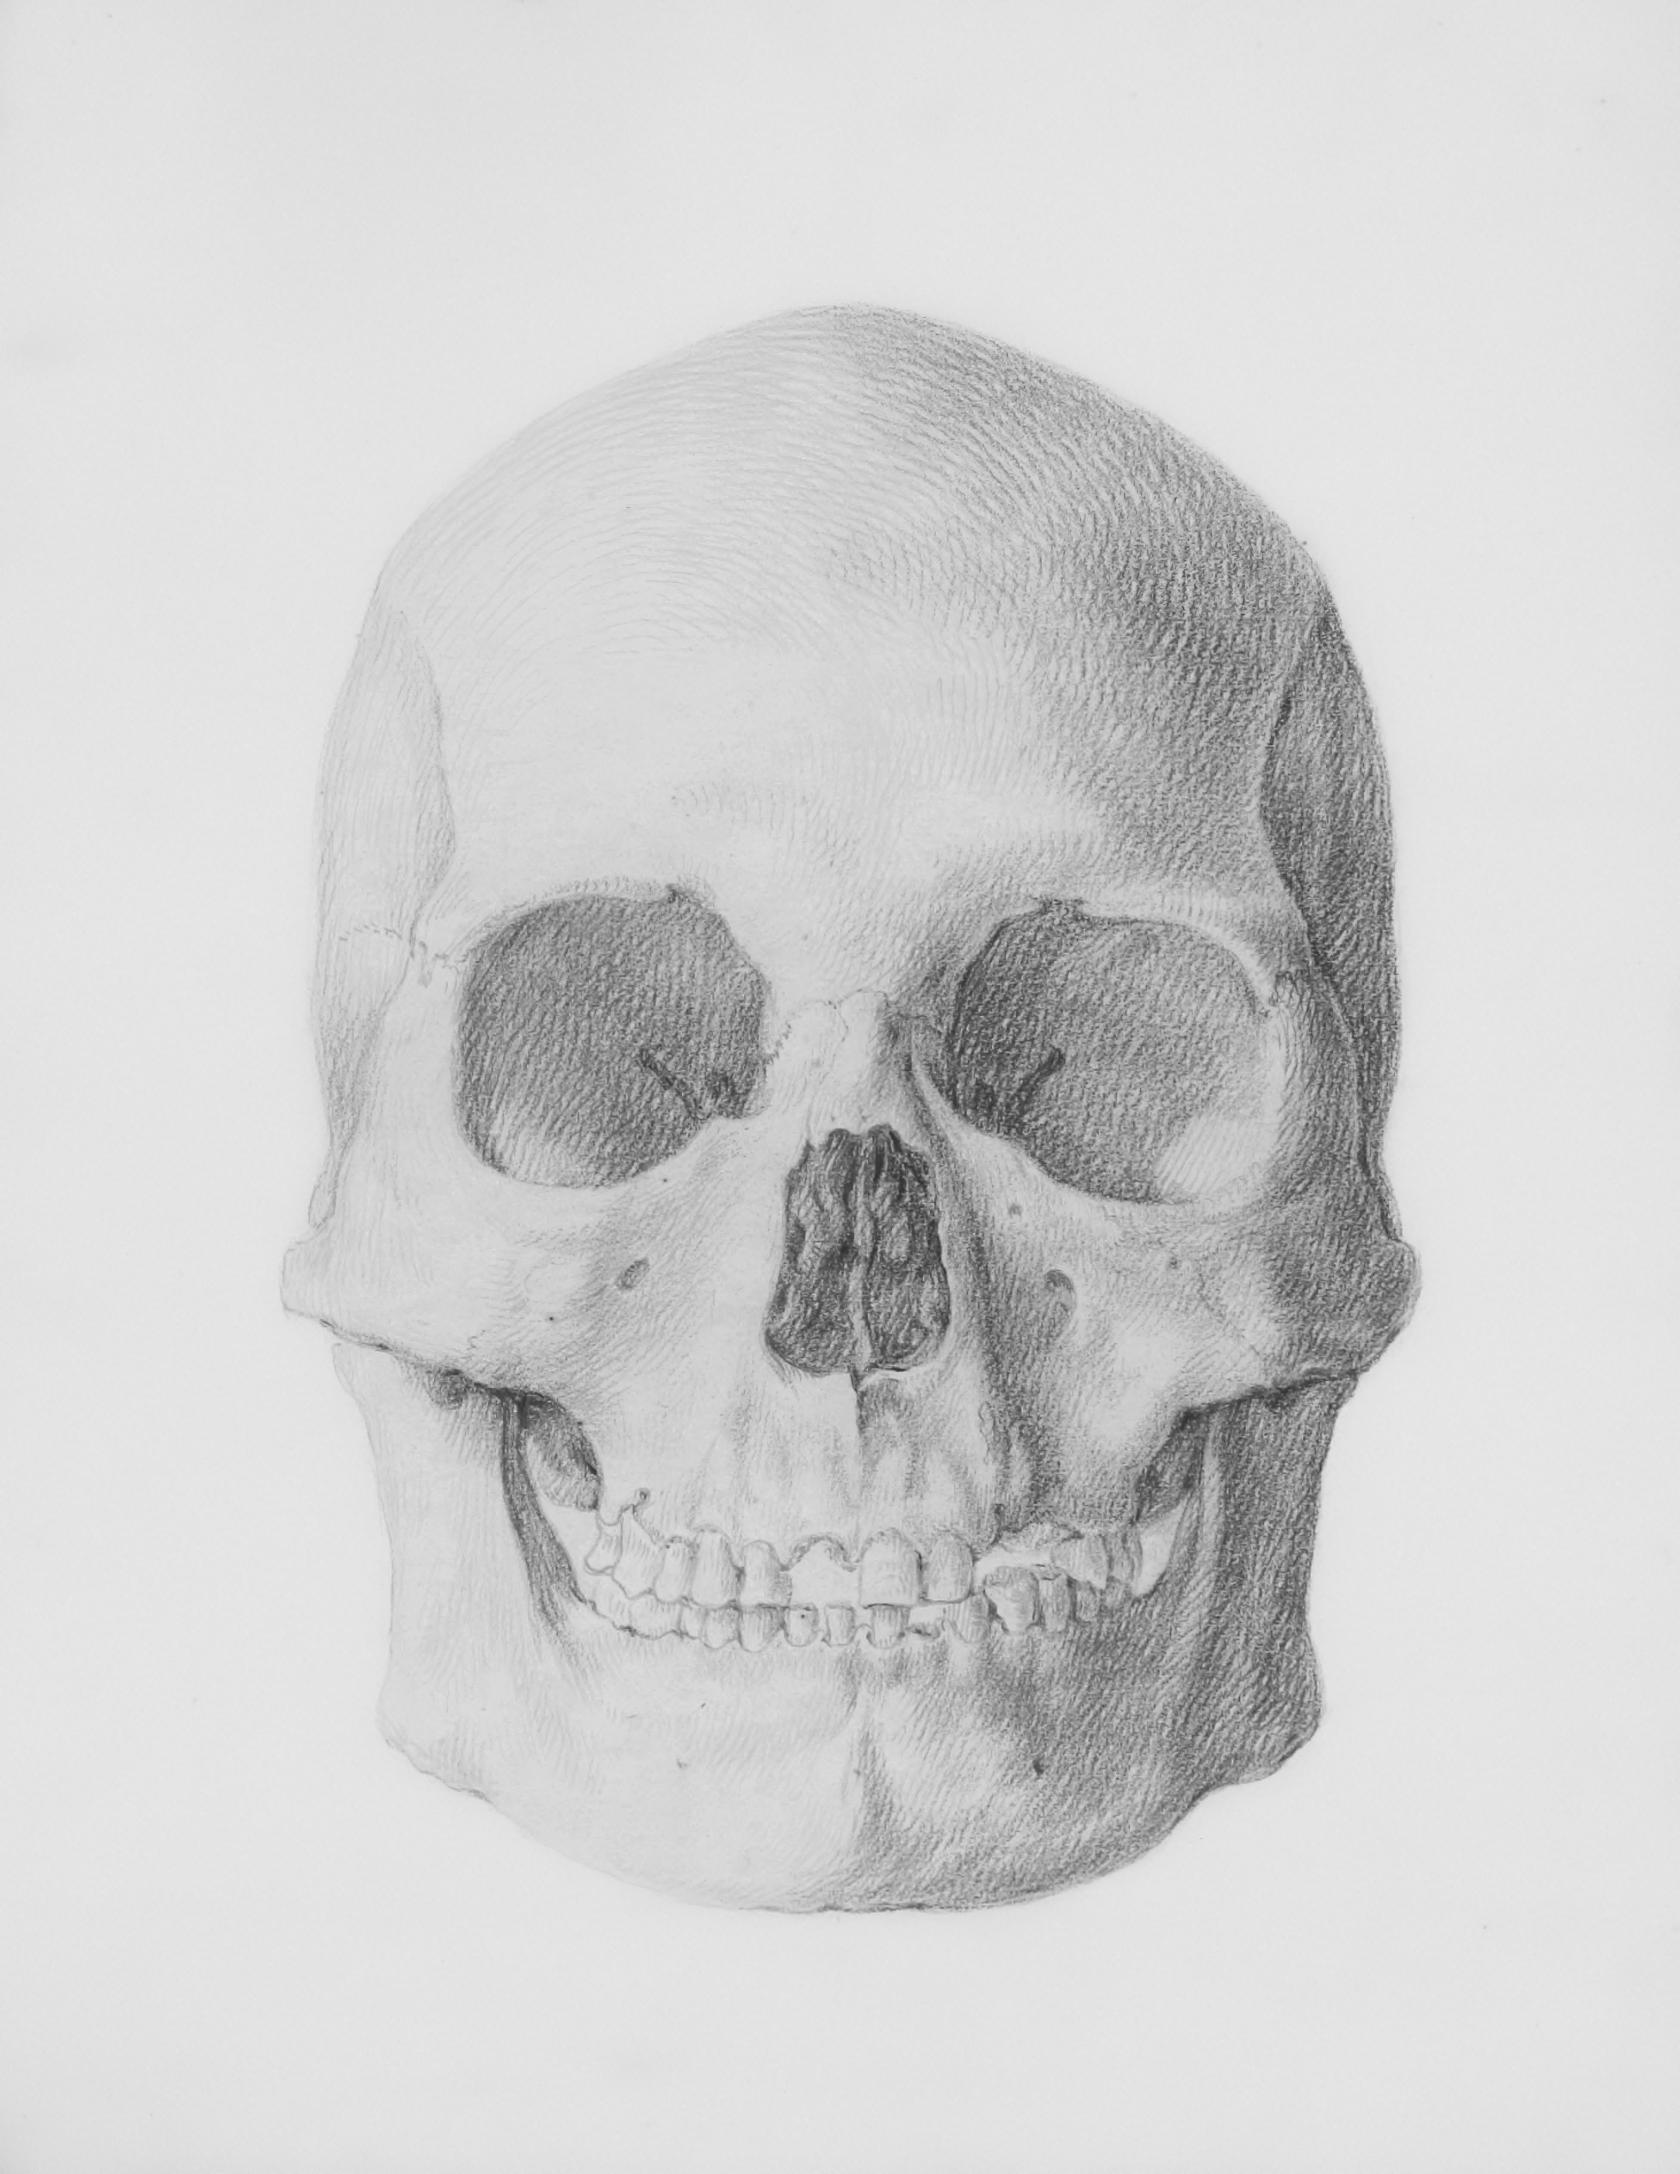
Reference Pictures (for study only)
from Reference.Pictures and Unsplash
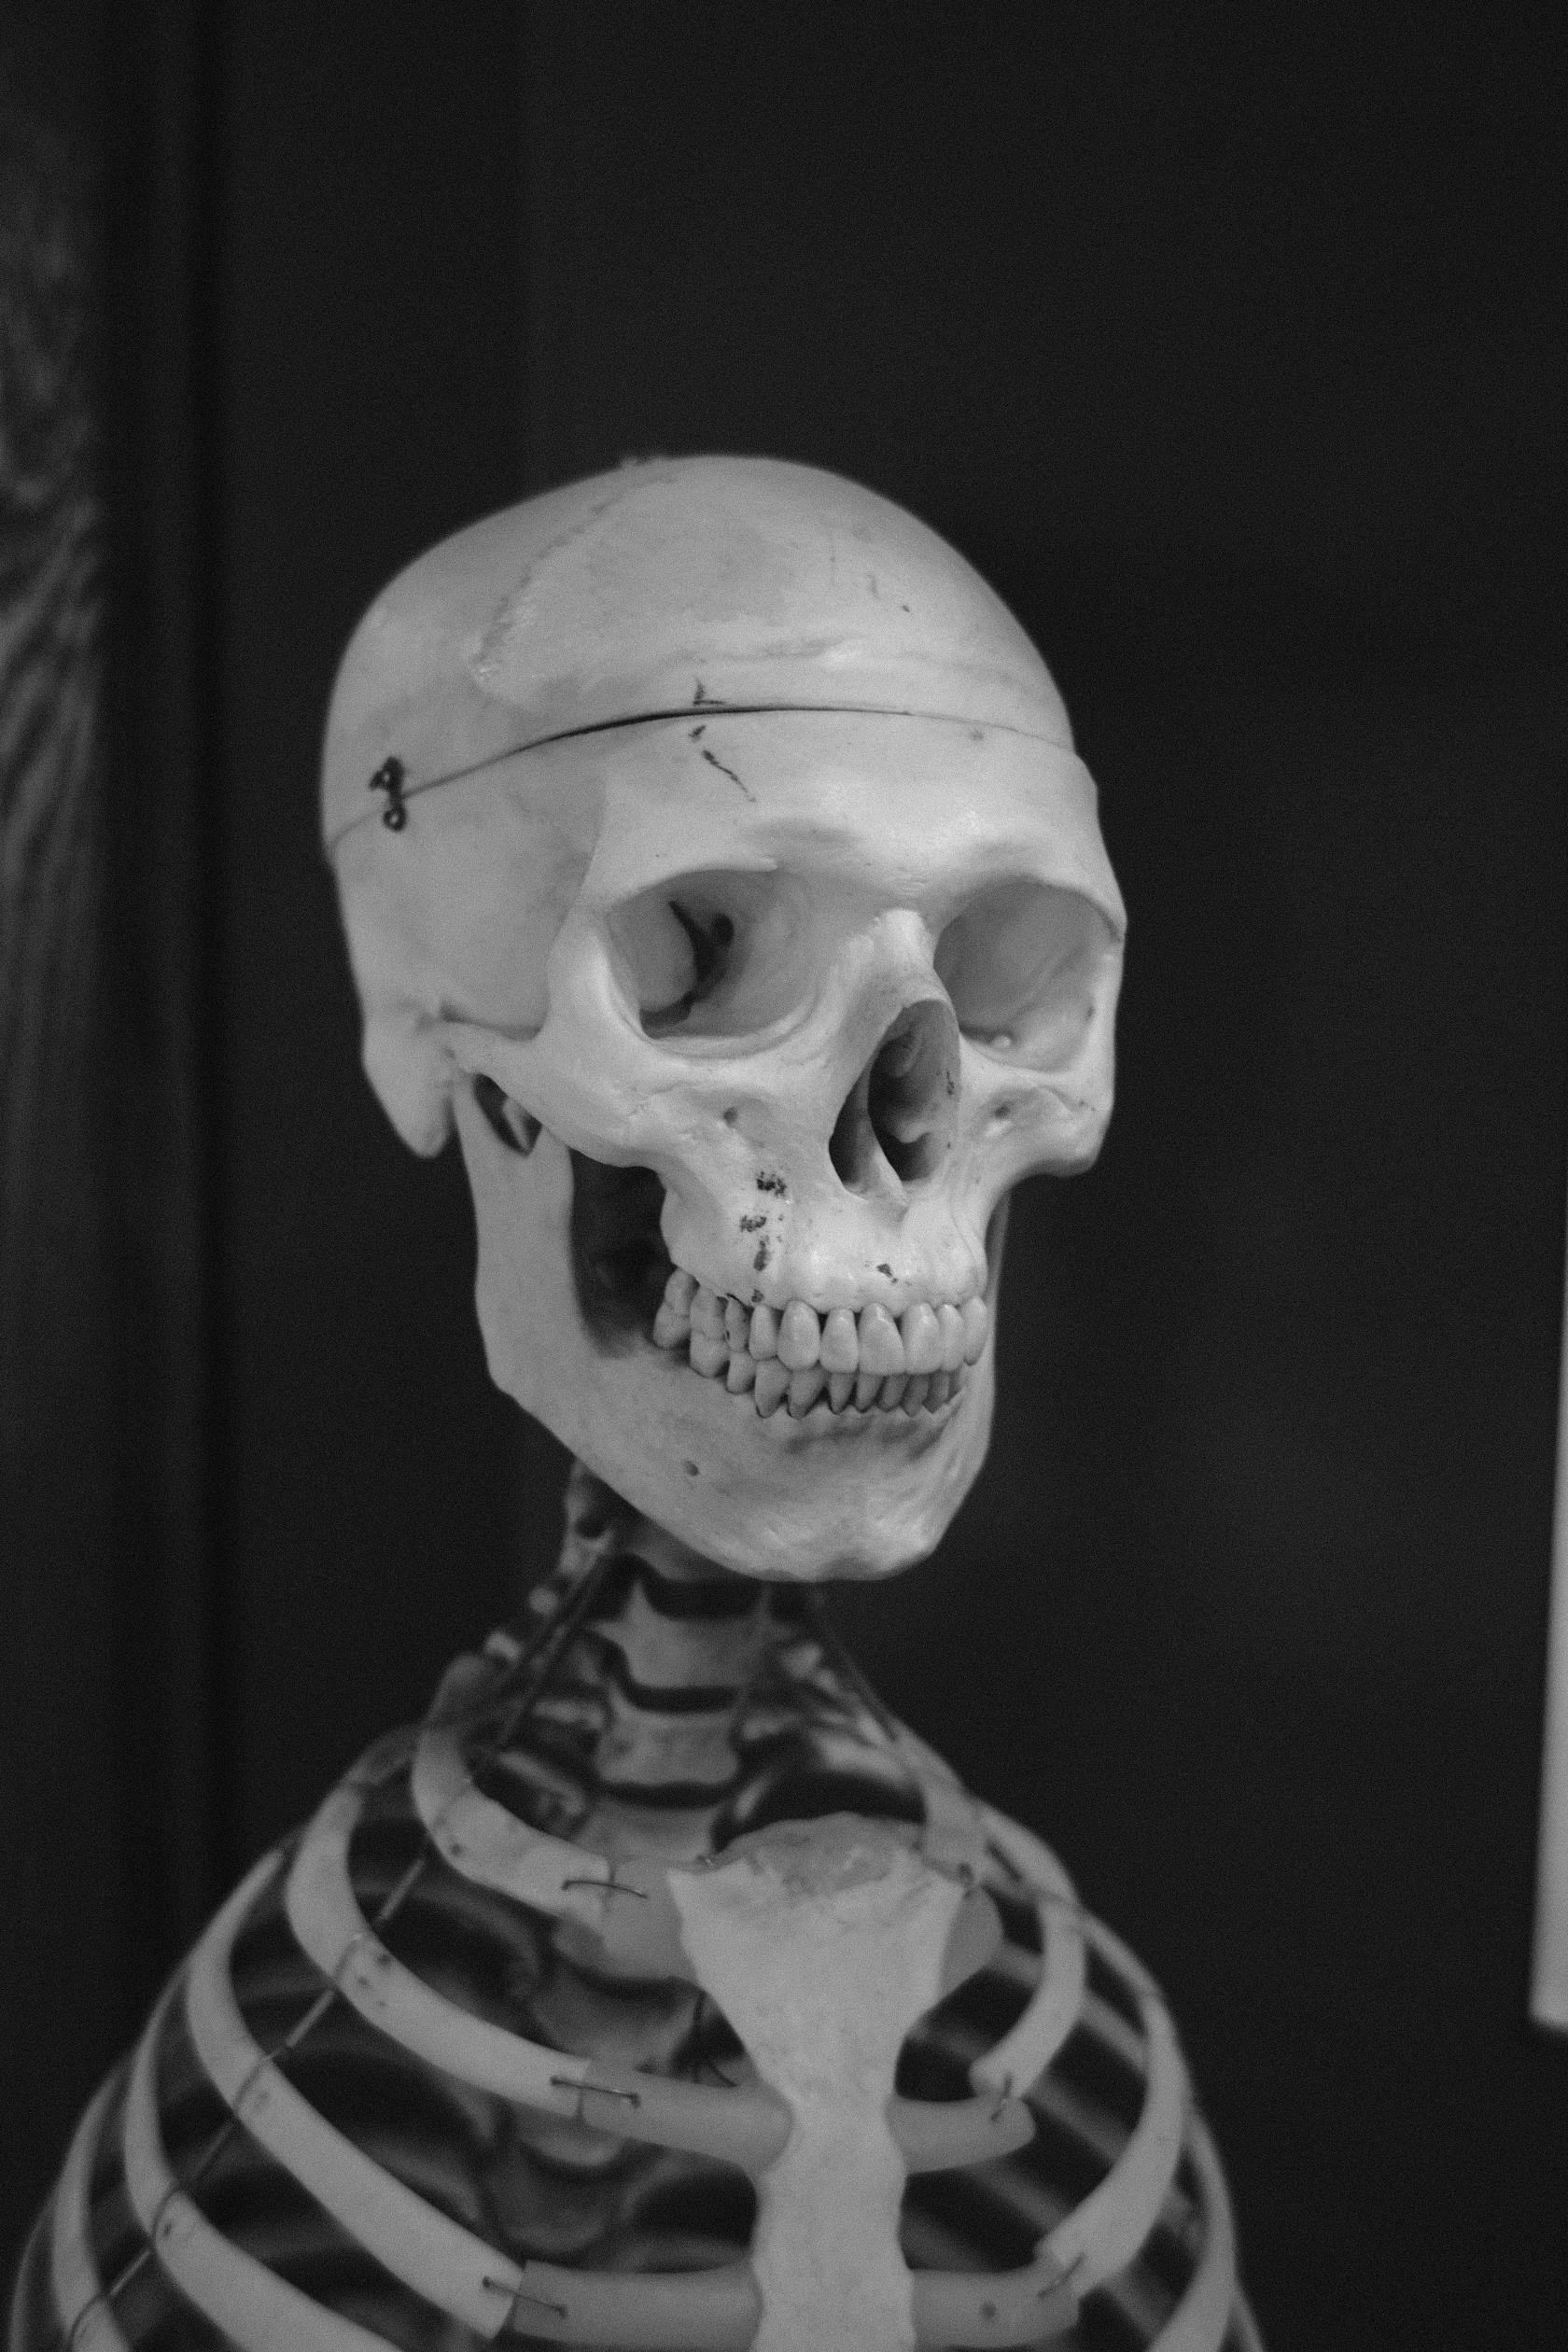
credit to: Reference.Pictures

credit to: Reference.Pictures
credit to: Reference.Pictures

Hope this tutorial helps!
If you're interested, you can see more of my work at https://linktr.ee/arts_of_a_felllow_weeb
very educative
No comments to display
No comments to display