# Upper Body Dorsal

(back)

# Whole Body Parts

*for example: arm, leg, finger, nose*

# Male Torso | Back (NightEdog21)

<details id="bkmrk-this-line-will-be-vi"><summary>Preview:</summary>

This page will show you how to draw the male back step by step. This is a more muscular and buff back to show off the muscle groups a bit better.

</details>**Synonyms: Torso; Frame; Build; Figure; Form; Dorsal trunk; Upper back; Lower back; Guts physique; Guts body; Guts back**

---

### **Summary**

The upper body dorsal (back) corresponds to the posterior thoracic wall, while the lower back refers to the lumbar region, posterior to the abdominal cavity. The back houses many muscle groups just like the front.

#### **Basics**

**On the left side is the complete drawing of the front male torso. On the right is a color coded key of what each muscle group is called.**

[![Art commission 2 (BACK).jpg](https://www.anatomyarchive.org/uploads/images/gallery/2025-09/scaled-1680-/art-commission-2-back.jpg)](https://www.anatomyarchive.org/uploads/images/gallery/2025-09/scaled-1680-/art-commission-2-back.jpg)

#### **Functions**

<span style="white-space: pre-wrap;">The back has many functions such as housing and protecting the spinal cord, holding the body and head upright, bearing the weight of the upper body, and facilitating the movements of the upper and lower limbs. </span>

#### **How to draw the body part**

This is a step by step reference sheet for how I draw the male back. Whenever I draw anything, I like to break everything down to basic shapes and then detail from there. For each step you would draw the red lines to progress the drawing. The green lines are there to let you know when you should erase certain lines because we won't be needing every line we draw. I tried to make it as simple as I could without using too many steps so I hope this helps!

<span style="white-space: pre-wrap;">Step 1: First we start with a vertical line going down to use as a middle point for the back. Then a horizontal line going across the top to use as a collar bone line. I know we can see the collar bone line since that's on the front, but its a helpful base for the trapezoids. Then from the two edges of the horizontal line we will curve them down to the middle line. This will act as our basic structural shape for the back which we will add onto later. </span>

Step 2: Next we will make a trapezoid shape at the top where our imaginary collar bone line is and this will be our basic outline for the top of the trapezoids. We will also make two lines coming down to represent the width of the neck. At the bottom we will make a slight "M" shape which will be the bottom of the back right above the butt. Then from the ends of that "M" shape, we will draw two line curved to the outside on each side.

Step 3: Next up is the rest of the trapezoids and shoulders/arms. Start by making a "W" shape in the middle and then extend the ends to where the trapezoid shape we just made ends. From there we will draw the shoulders which are kind of a weird shape that I don't really know how to describe so just try to make it look like that lol. After the shoulders we will do the basic outline of the upper arms.

Step 4 (Red lines): Next up can be a little confusing. For now lets just focus on the red parts. First lets start at the bottom of that "W" shape we made. We're going to extend those line down and curve them slightly outwards as we go down. Then from where we just ended, we are going to curve the lines outward and into the halfway-ish point of the upper arms. This will be outer outline of the back. Then from where those lines end, we are going to curve them back into the midway point of the "W" shape we made. Next is the diamond shape which is centered where the horizontal and vertical lines intersect at from the first step. After that we are going to make the trapezoids at the top look a little more natural, so we're going to curve the top in a little and then end it at the same place.

Step 4 (Green lines): Now we will erase the lines highlighted in green on the example. So the horizontal line from step one at the top gets erased. Most of the bottom of the first step gets erased and some of the vertical line gets erased in the diamond up by the trapezoid.

Step 5: Next we are going to add the rhomboid major and the teres major muscle lines which are those 4 lines at the top. Next we will draw those 4 lines at the bottom which represent the gludeous medious and the external oblique. Then just erase the green line in the middle.

Step 6: This is kind of an optional step, but all we do here is add in the spine.

Step 7: Then you can shade and you're done!

[![Art Commission Back step by step.jpg](https://www.anatomyarchive.org/uploads/images/gallery/2025-09/scaled-1680-/art-commission-back-step-by-step.jpg)](https://www.anatomyarchive.org/uploads/images/gallery/2025-09/scaled-1680-/art-commission-back-step-by-step.jpg)

### **Advanced**

<details id="bkmrk-everything-beyond-th"><summary>Everything beyond the basics</summary>

<span style="white-space: pre-wrap;">The muscles of the back can be arranged into 3 categories based on their location: superficial back muscles, intermediate bake muscles and intrinsic back muscles. </span>

<span style="white-space: pre-wrap;">The superficial back muscles are the muscles found just under the skin. Within this group of back muscles you will find the latissimus dorsi, the trapezuis, levator scapulae and the rhomboids. The muscles are abele to move the upper limb as they originate at the bertebral column and insert onto either clavical, scapula or humerus. </span>

The intermediate muscles of the back work to elevate and depress the rib cage. There are two major muscles within this category. The serratus posterior superior and the serratus posterior inferior.

<span style="white-space: pre-wrap;">The intrisnic muscles of the back can be further subdivided into their own superficial, intermediate and deep layers. These muscles collectively work to help movements of the vertebral column and to also control posture. </span>

</details>#### **Reference Pictures (for study only)**

<details id="bkmrk-name-the-source-%28web"><summary>From Pinterest</summary>

[![image.png](https://www.anatomyarchive.org/uploads/images/gallery/2025-09/scaled-1680-/KpNimage.png)](https://www.anatomyarchive.org/uploads/images/gallery/2025-09/KpNimage.png)

<span style="white-space: pre-wrap;">Reference: </span>[Pinterest](https://www.pinterest.com/pin/94786767152534220/)

[![image.png](https://www.anatomyarchive.org/uploads/images/gallery/2025-09/scaled-1680-/FK7image.png)](https://www.anatomyarchive.org/uploads/images/gallery/2025-09/FK7image.png)

<span style="white-space: pre-wrap;">Reference: </span>[Pinterest](https://www.pinterest.com/pin/9007268002191958/)

</details>

# Muscles

# Musculus trapezius (xlas)

<details id="bkmrk-this-line-will-be-vi"><summary>Preview:</summary>

simple/clean drawings; arm movements included; lots of additional info (+latin names)

</details>*Synonyms: Traps; Trapezius muscle; Trapezius; Neck muscle*

---

### **Summary**

The *Musculus trapezius* is the **biggest neck muscle** (surface area) we have and very relevant in several **head and arm movements**. Its name giving shape, the trapezoid, significantly shapes the upper back, especially around the neck and the shoulder blades (*scapulae*). There are **3 parts** to the trapezius (top part, middle part, bottom part) and each one pulls in a slightly different direction.

#### **Basics**

[![visual intro.jpg](https://www.anatomyarchive.org/uploads/images/gallery/2025-04/visual-intro.jpg)](https://www.anatomyarchive.org/uploads/images/gallery/2025-04/visual-intro.jpg)l*eft: general view (white parts = tendons); right: the 3 parts of the muscle + pull direction*

[![trapezoid shape both.jpg](https://www.anatomyarchive.org/uploads/images/gallery/2025-04/trapezoid-shape-both.jpg)](https://www.anatomyarchive.org/uploads/images/gallery/2025-04/trapezoid-shape-both.jpg)two *ways of interpreting the name: **1.** muscle shape, viewed from the back; **2.** front view: trapezius muscle and clavicles form a trapezoid*

#### **Origin**

- **Occipital bone** (*Os occipitale;* lower back of the skull)
- **Cervical vertebrae** (spine, neck part)
- Down to the 12th **thoracic vertebra** (spine, chest part)

Originating from a vertebra means the tendons connect to the **spinous process** (little bumps you can feel on your spine) of each vertebra.

#### **Insertion**

- **Spine of the shoulder blade** (*Spina scapula*)
- **Acromion** (*Pars transversa*) = highest part of the shoulder blade
- **Clavicle** (clavicula)

[![origin and insertion.jpg](https://www.anatomyarchive.org/uploads/images/gallery/2025-04/scaled-1680-/origin-and-insertion.jpg)](https://www.anatomyarchive.org/uploads/images/gallery/2025-04/origin-and-insertion.jpg)*origin and insertion; back and front view*

#### **Functions**

- **Top part:**
    - Lifting the shoulder
    - Twisting the shoulder blade (*scapula*)
    - Tilting and turning the head, also leaning the head backwards
- **Middle part:** 
    - Pulling the shoulder back
    - Twisting the shoulder blade (*scapula*)
- **Bottom part:**
    - Pulling the shoulder/shoulder blade (*scapula*) down

#### **How to draw the muscle**

[![viewpoints red.jpg](https://www.anatomyarchive.org/uploads/images/gallery/2025-04/scaled-1680-/viewpoints-red.jpg)](https://www.anatomyarchive.org/uploads/images/gallery/2025-04/viewpoints-red.jpg)*muscle is marked in red; notice how the muscle varies with arm movement*

[![viewpoints realistic.jpg](https://www.anatomyarchive.org/uploads/images/gallery/2025-04/scaled-1680-/viewpoints-realistic.jpg)](https://www.anatomyarchive.org/uploads/images/gallery/2025-04/viewpoints-realistic.jpg)*a more realistic view; only a few parts of the muscle are visible on average*


### **Advanced**

<details id="bkmrk-everything-beyond-th"><summary>Everything beyond the basics</summary>

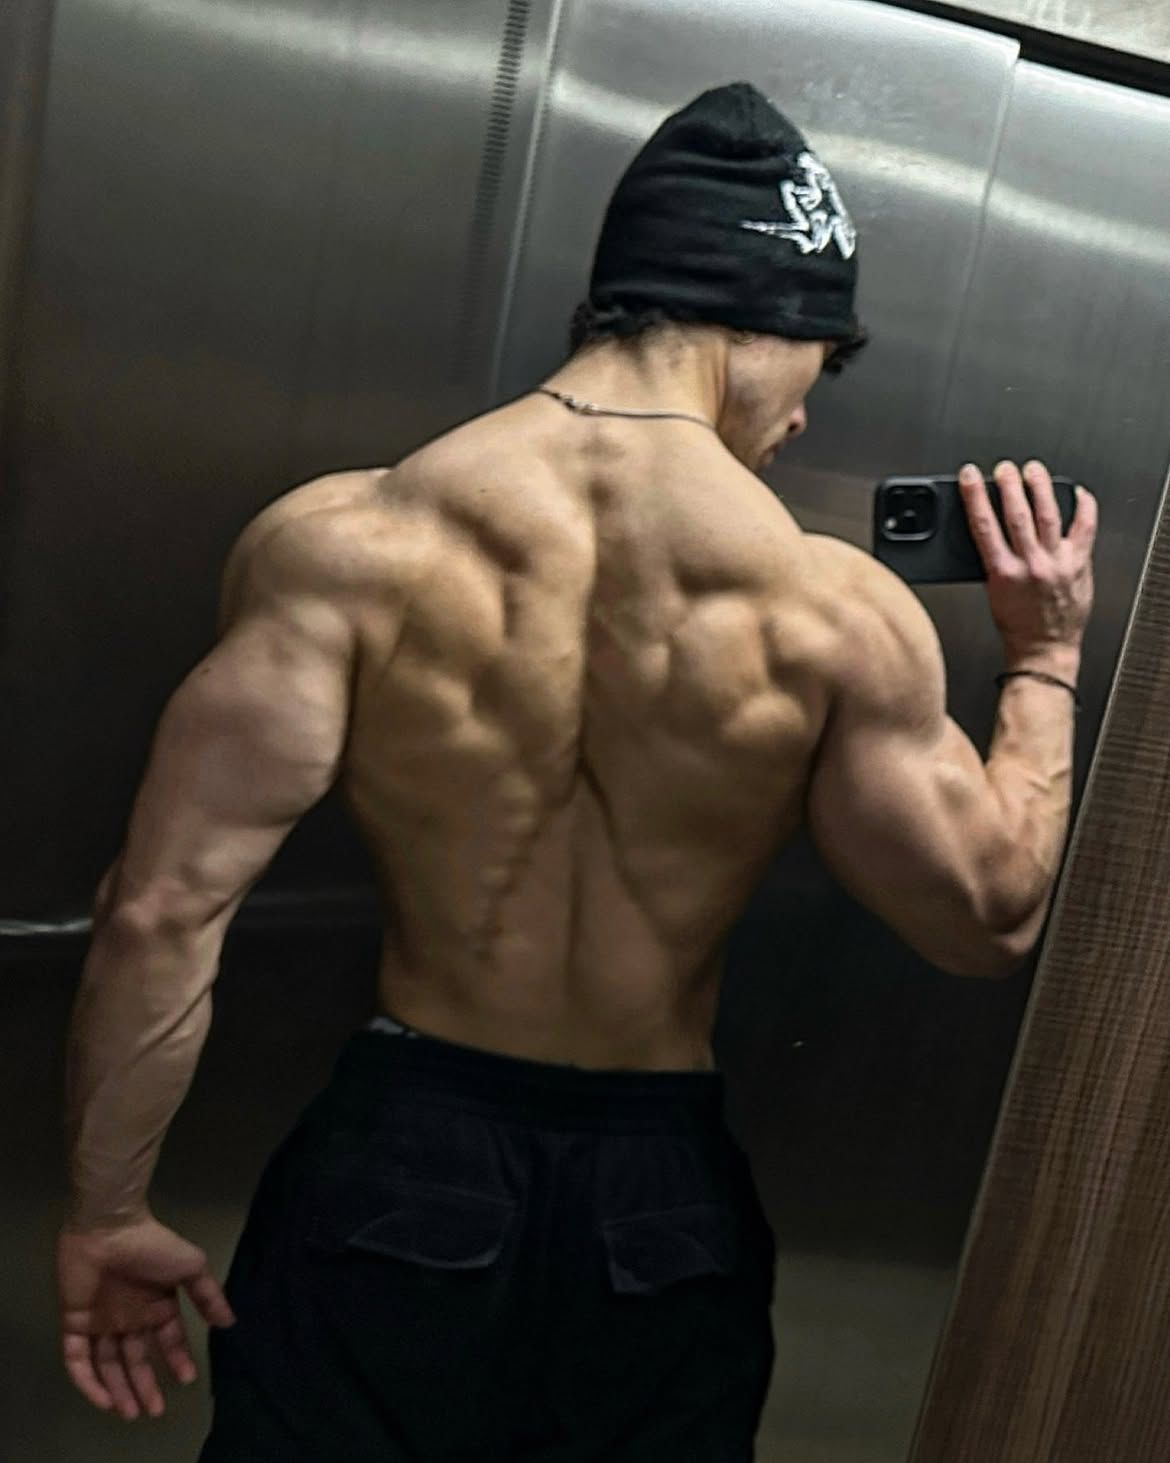
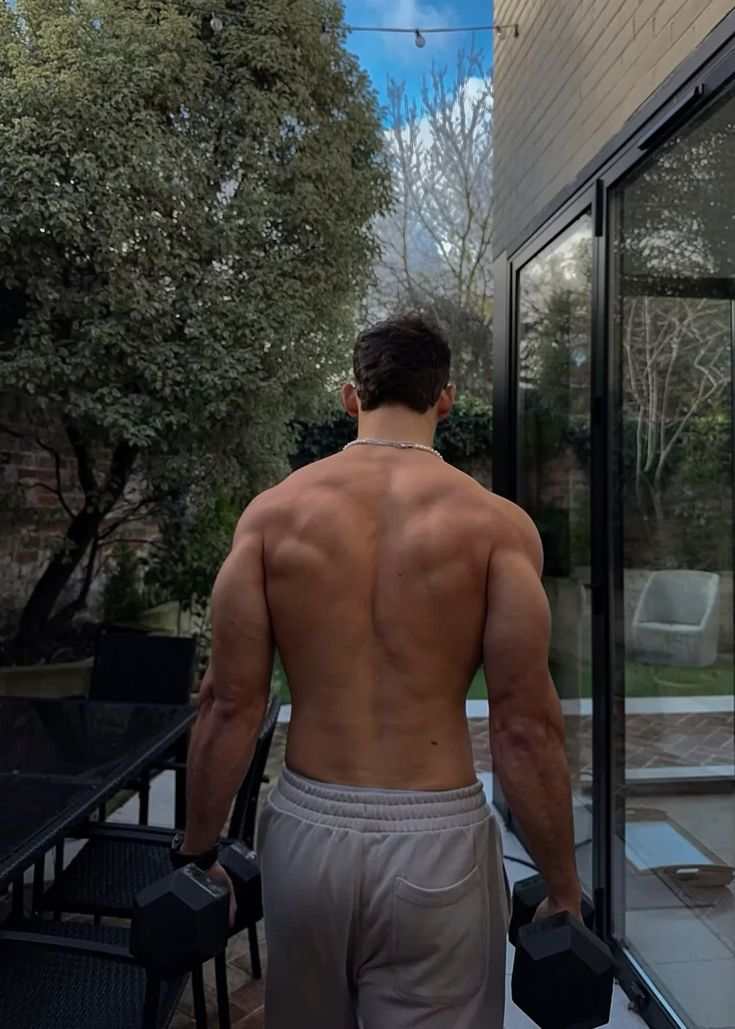
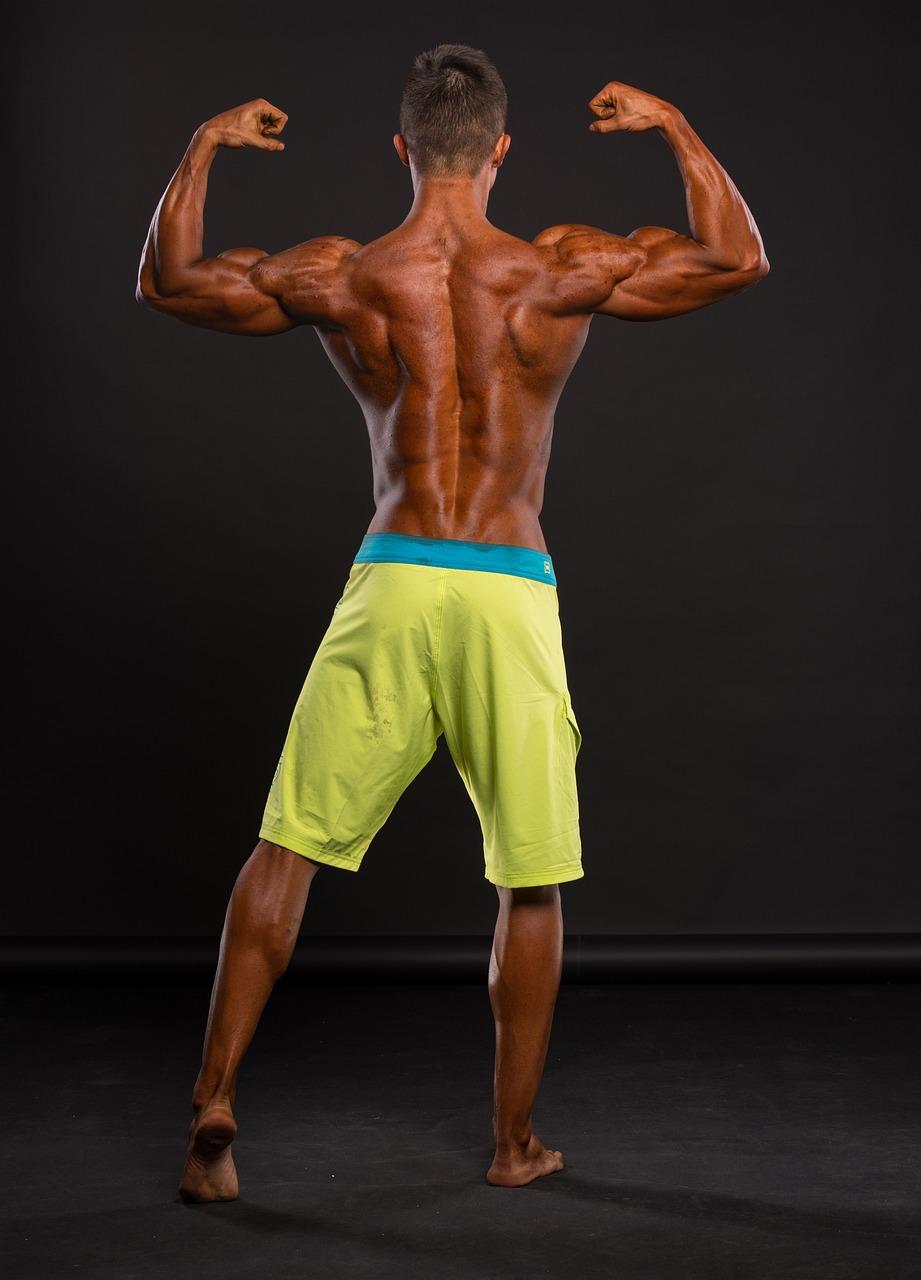
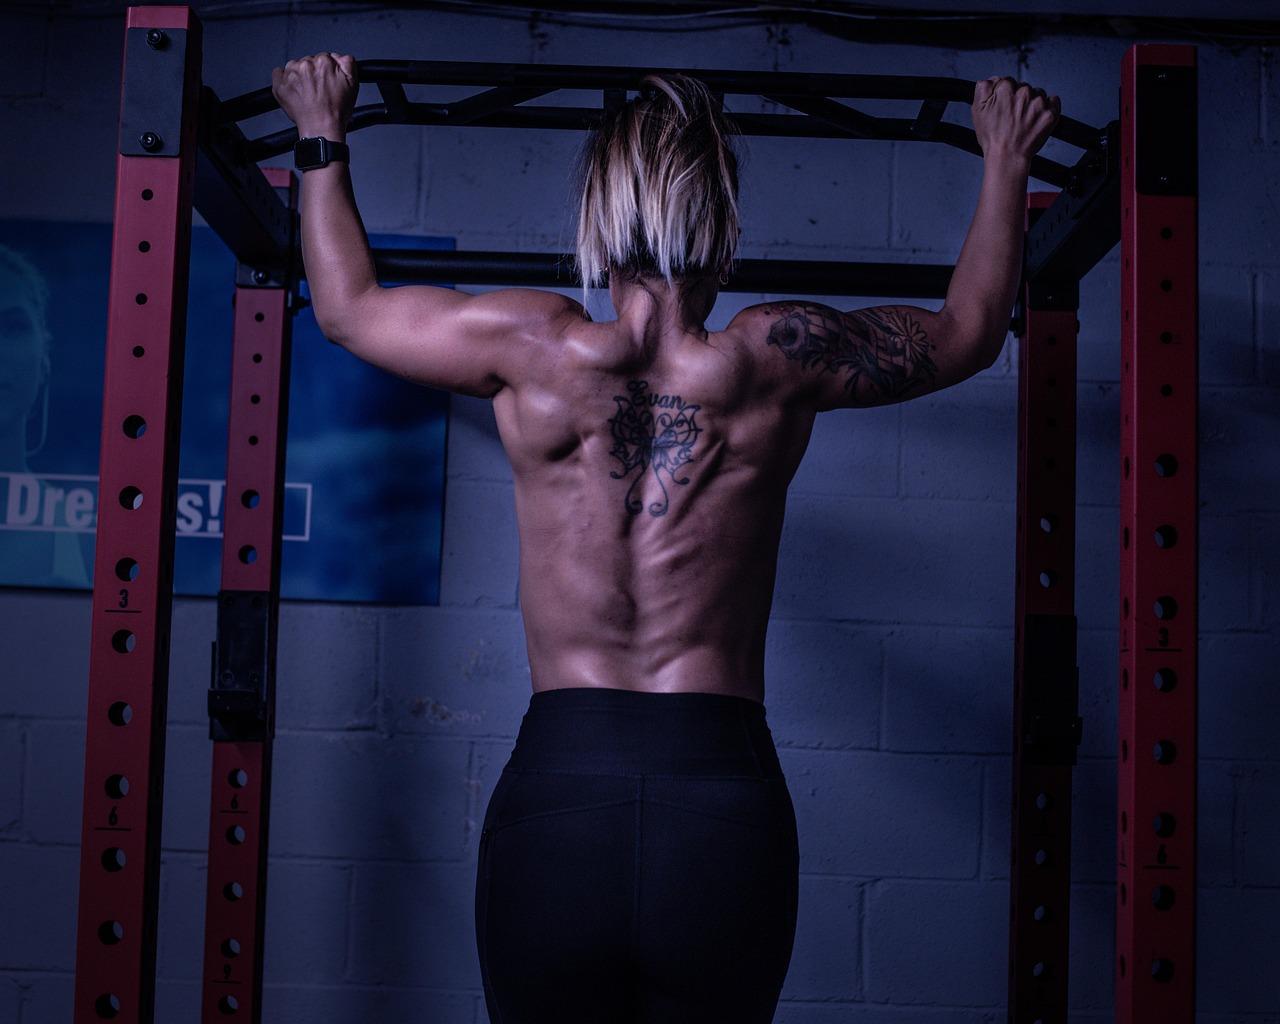
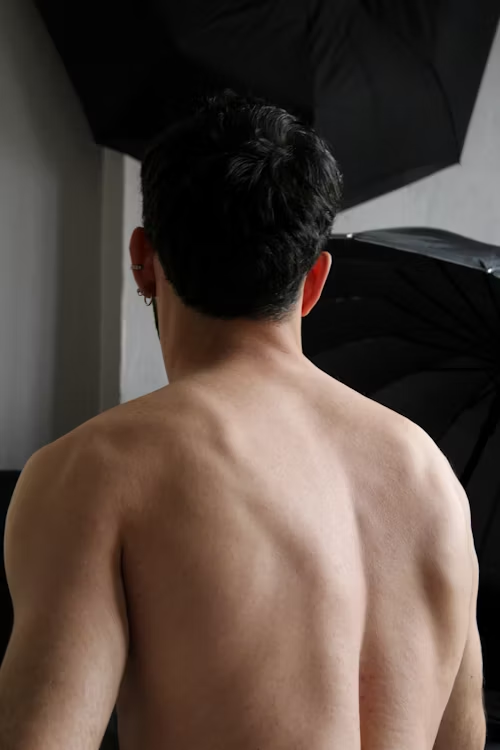
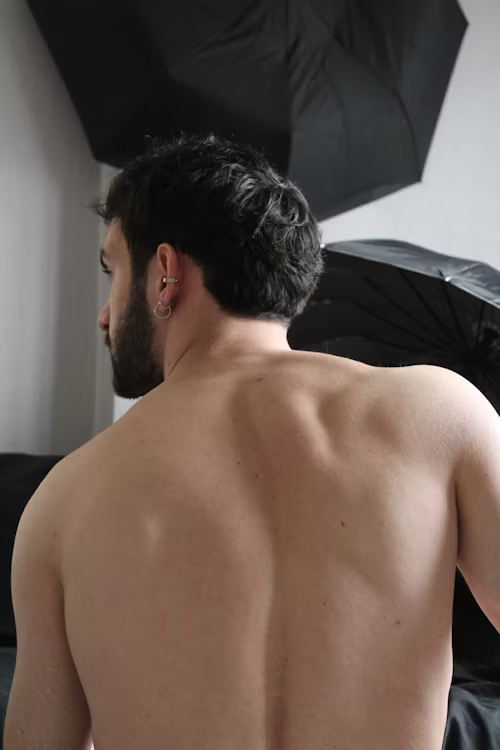
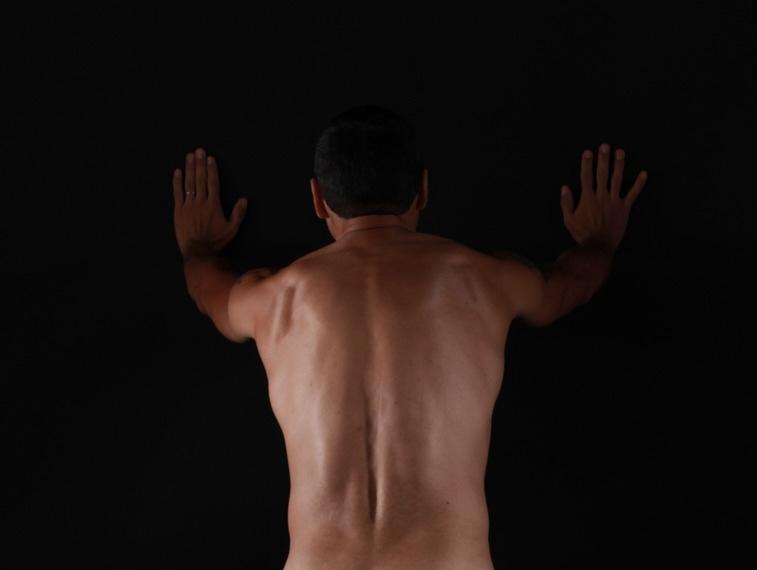
There is one **vertebra, that sticks out** at the center of the trapezius. This is the **seventh cervical vertebrae**, the last neck vertebra before the thoracic vertebrae start.

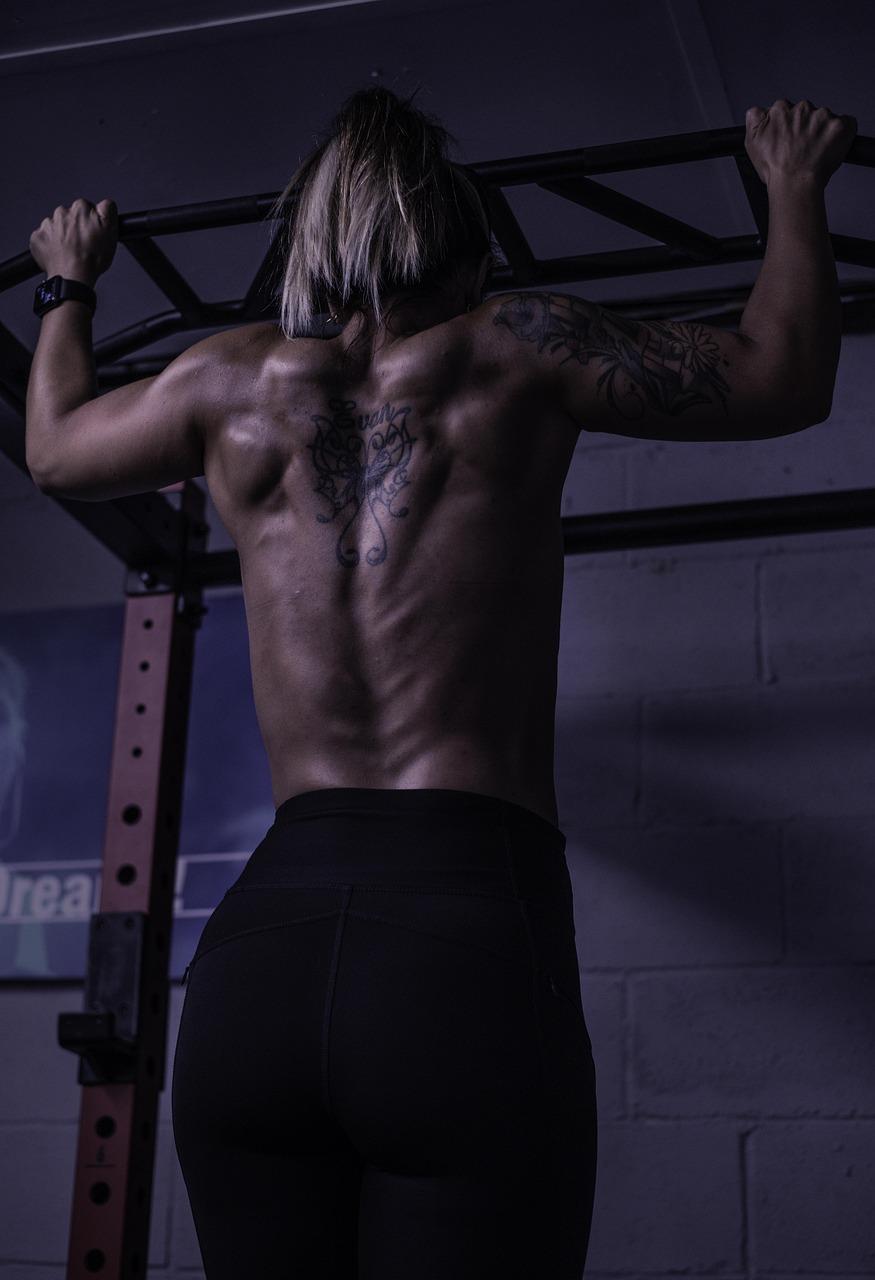
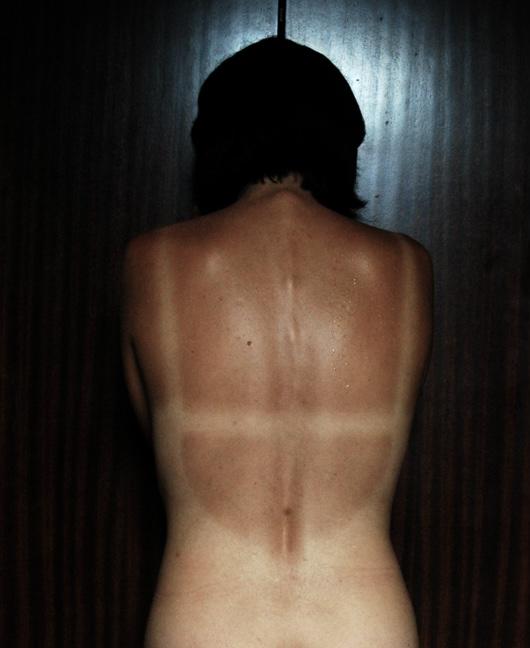
Drawing the trapezius for a **woman** you should always consider that the **subcutaneous fat layer** is thicker. This means that bumps and depressions caused by muscles, bones, etc. are less visible on women. **Concentrate on the main depression**, the corner where the trapezius meets the shoulder blade, and don't go for too many details to make it look convincing. Of course there are exceptions. The same goes for the average man (especially if the **body fat is high**), focus on the shoulder blade depression.

On many people the significant areas of the trapezius **aren't visible at all**.

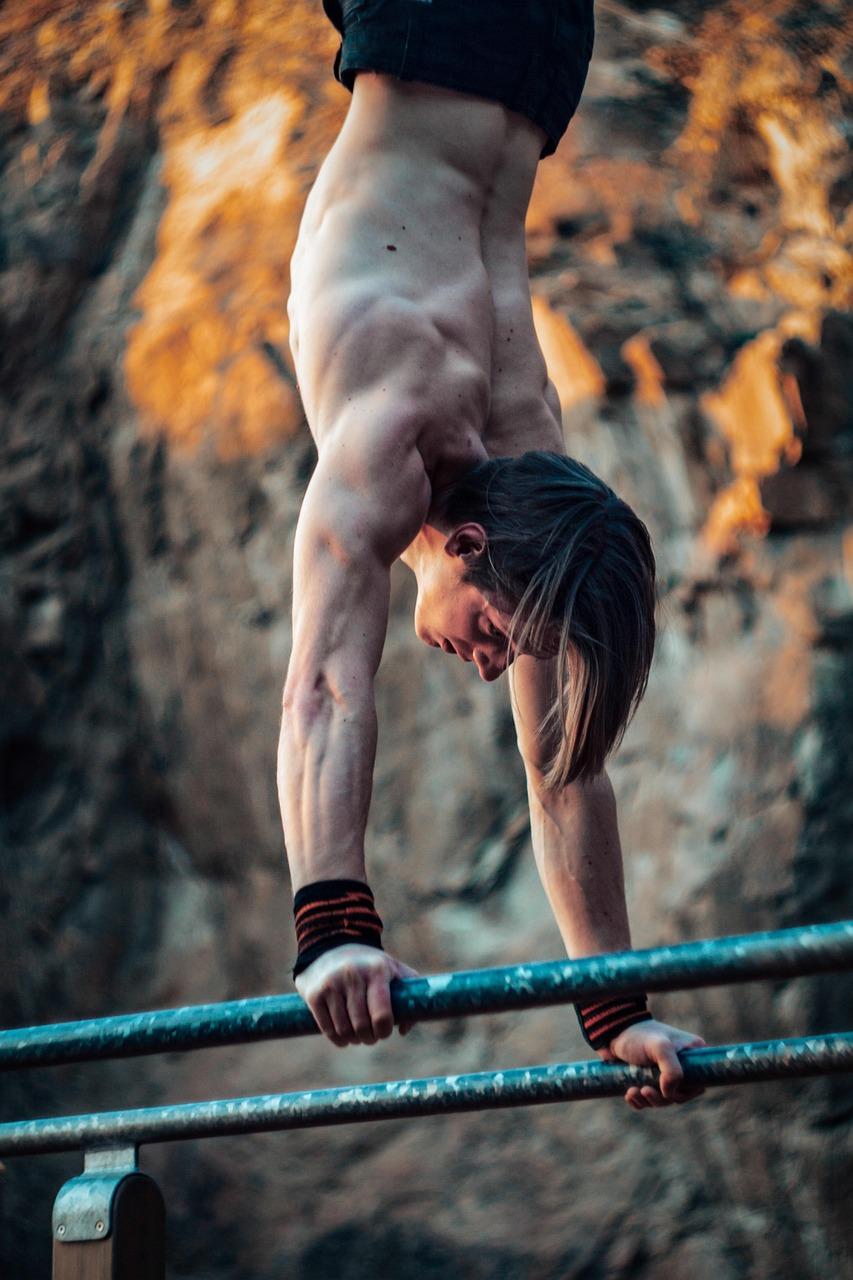
The trapezius is also used when the **shoulder blade needs to be pressed against the body**, for example in a **handstand**. Chest muscles (+ serratus anterior) and back muscles, including the trapezius (mostly the middle part) contract at the same time to achieve that.

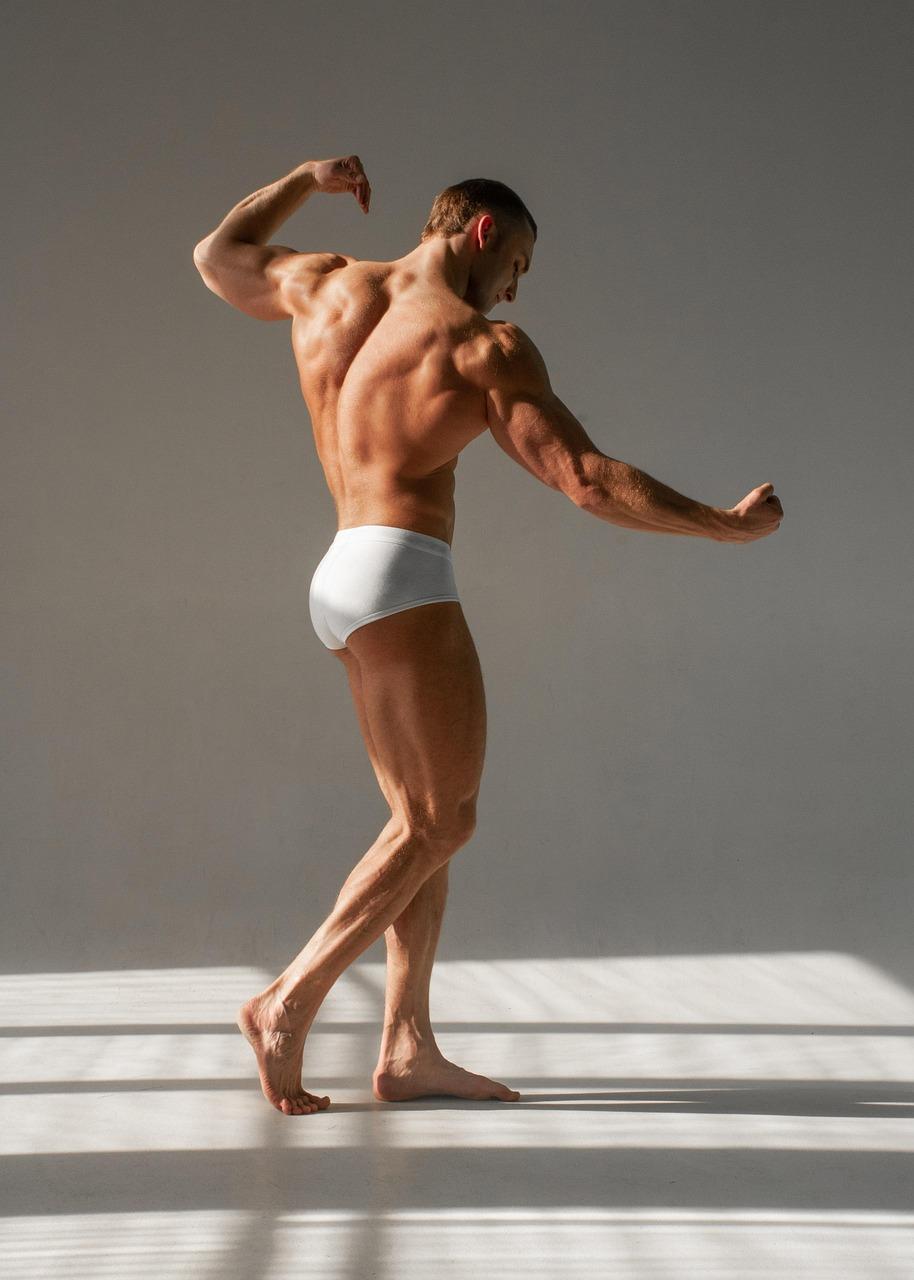
The **rhomboids** often contract simultaneously with the trapezius. They pull in a similar direction with the top and middle part of the trapezius and have similar origin and insertion. The bottom part of the trapezius on the other hand pulls down, so its kinda opposite to the rhomboids. The rhomboids are located below the trapezius, so you **cannot see them** on a person usually. However with very particular shoulder movement both muscles can be visible at the same time - at the very bottom of the trapezius.

The **rhomboids** are partly causing the **middle part of the trapezius** to look relatively big.

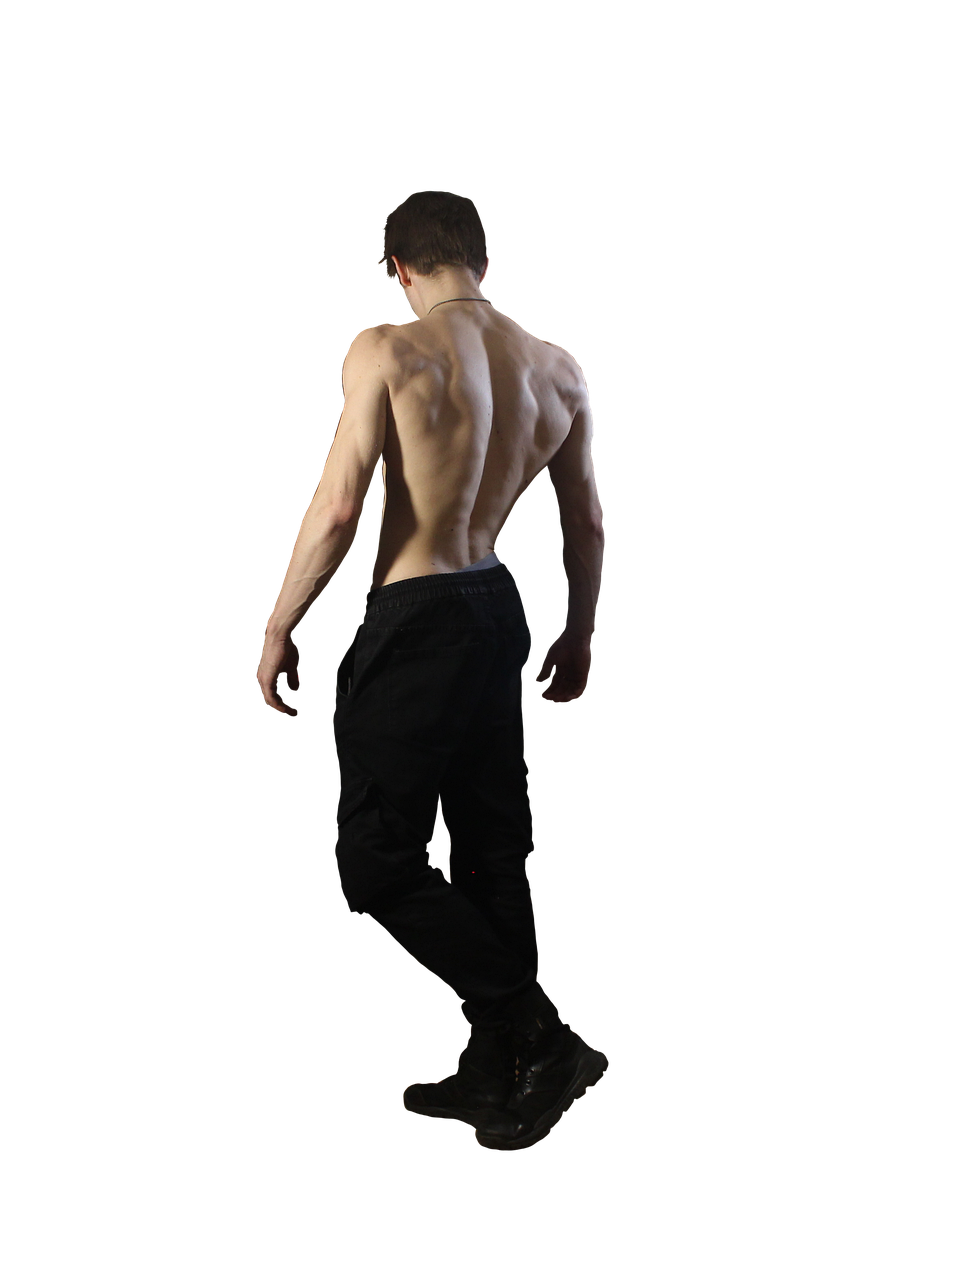
On first sight one could think that the trapezius has a large **diameter**, but thats not true. The trapezius is large in surface area but its cross-section shows that its relatively thin. In the following drawing I compare the **cross section of the trapezius and the Musculus erector spinae** (lower back muscle for straightening your upper body) to give you a comparison.

</details>#### **Reference Pictures (for study only)**

<details id="bkmrk-from-wikimedia-commo"><summary>From Wikimedia, Pixabay, Unsplash</summary>

[![man-2378993_1280.jpg](https://www.anatomyarchive.org/uploads/images/gallery/2025-05/scaled-1680-/man-2378993-1280.jpg)](https://www.anatomyarchive.org/uploads/images/gallery/2025-05/man-2378993-1280.jpg)

[![fitness-5370749_1280.jpg](https://www.anatomyarchive.org/uploads/images/gallery/2025-04/scaled-1680-/fitness-5370749-1280.jpg)](https://www.anatomyarchive.org/uploads/images/gallery/2025-04/fitness-5370749-1280.jpg)

*credit to: [Harmony412](https://pixabay.com/users/harmony412-5725184/)*

[![fitness-5370750_1280.jpg](https://www.anatomyarchive.org/uploads/images/gallery/2025-04/scaled-1680-/fitness-5370750-1280.jpg)](https://www.anatomyarchive.org/uploads/images/gallery/2025-04/fitness-5370750-1280.jpg)  
*credit to: [Harmony412](https://pixabay.com/users/harmony412-5725184/)*

*[![KÜRŞAT GÜNEY 1.png](https://www.anatomyarchive.org/uploads/images/gallery/2025-05/scaled-1680-/kursat-guney-1.png)](https://www.anatomyarchive.org/uploads/images/gallery/2025-05/kursat-guney-1.png)*

*credit to: [KÜRŞAT GÜNEY](https://unsplash.com/de/@kursatgu)*

*[![KÜRŞAT GÜNEY 2.png](https://www.anatomyarchive.org/uploads/images/gallery/2025-05/scaled-1680-/kursat-guney-2.png)](https://www.anatomyarchive.org/uploads/images/gallery/2025-05/kursat-guney-2.png)*

*credit to: [KÜRŞAT GÜNEY](https://unsplash.com/de/@kursatgu)*

*[![model-7093397_1280.png](https://www.anatomyarchive.org/uploads/images/gallery/2025-05/scaled-1680-/model-7093397-1280.png)](https://www.anatomyarchive.org/uploads/images/gallery/2025-05/model-7093397-1280.png)*

*credit to: [Raman\_Spirydonau](https://pixabay.com/users/raman_spirydonau-11910217/)*

[![Gould_Pyle_183.jpg](https://www.anatomyarchive.org/uploads/images/gallery/2025-04/scaled-1680-/gould-pyle-183.jpg)
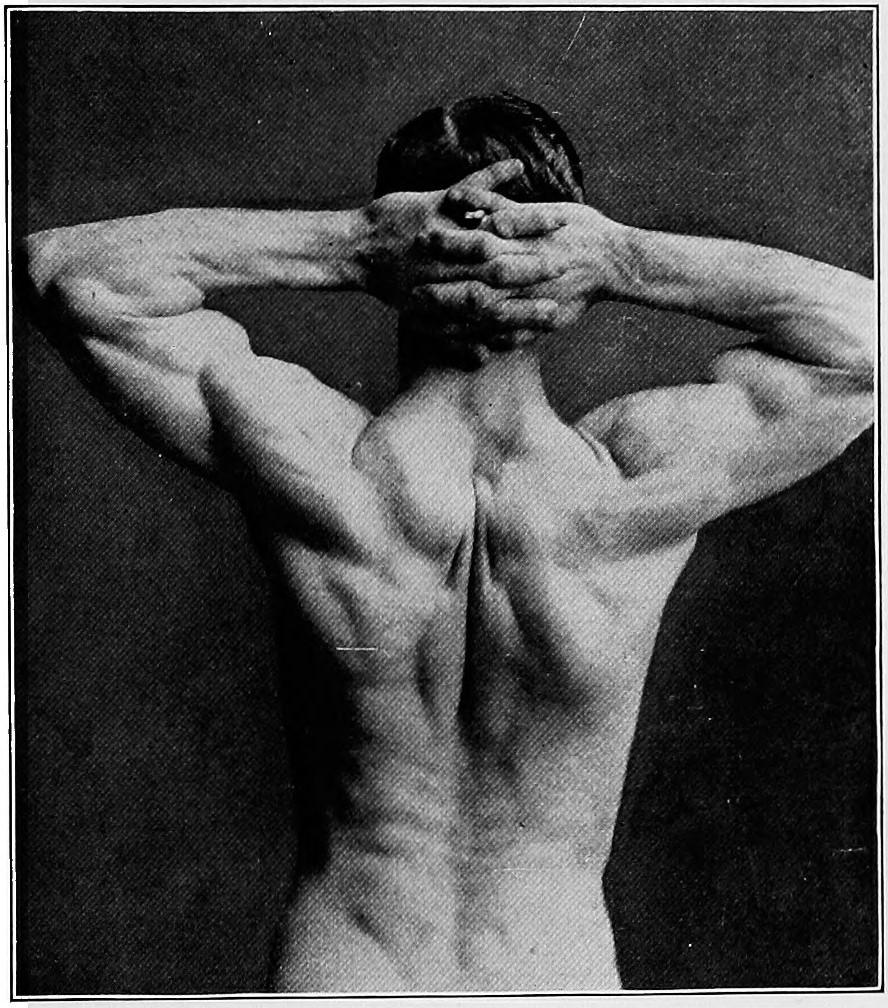
](https://www.anatomyarchive.org/uploads/images/gallery/2025-04/gould-pyle-183.jpg)

*credit to: [George M. Gould and Walter L. Pyle](https://commons.m.wikimedia.org/wiki/File:Gould_Pyle_183.jpg)*

[![Back.jpg](https://www.anatomyarchive.org/uploads/images/gallery/2025-04/scaled-1680-/back.jpg)
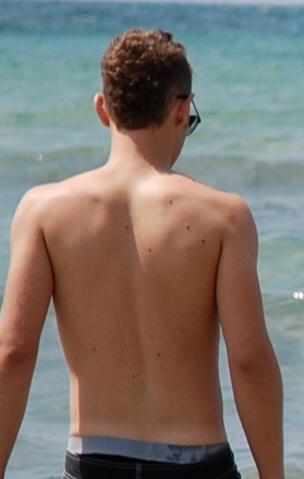
](https://www.anatomyarchive.org/uploads/images/gallery/2025-04/back.jpg)

*credit to:[ אנדר-ויק](https://commons.m.wikimedia.org/wiki/File:Back.JPG)*

[![Blue_Jeans_from_the_rear.jpg](https://www.anatomyarchive.org/uploads/images/gallery/2025-04/scaled-1680-/blue-jeans-from-the-rear.jpg)
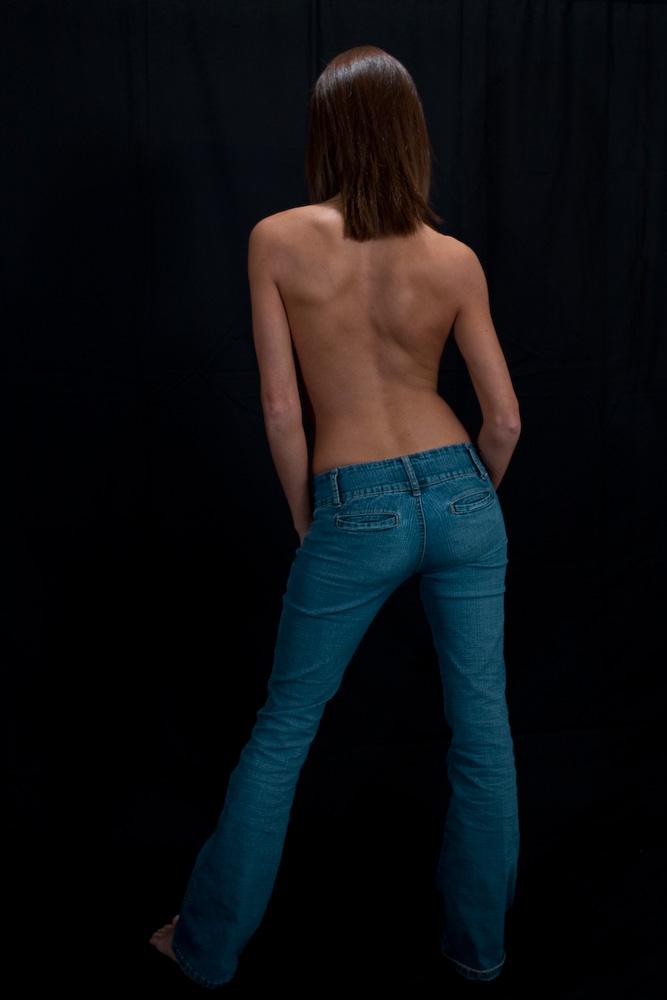
](https://www.anatomyarchive.org/uploads/images/gallery/2025-04/blue-jeans-from-the-rear.jpg)

*credit to: [<bdi>Max Rebo Band</bdi>](https://commons.m.wikimedia.org/wiki/File:Blue_Jeans_from_the_rear.jpg)*

*[![IMG_0051.jpeg](https://www.anatomyarchive.org/uploads/images/gallery/2025-04/scaled-1680-/img-0051.jpeg)
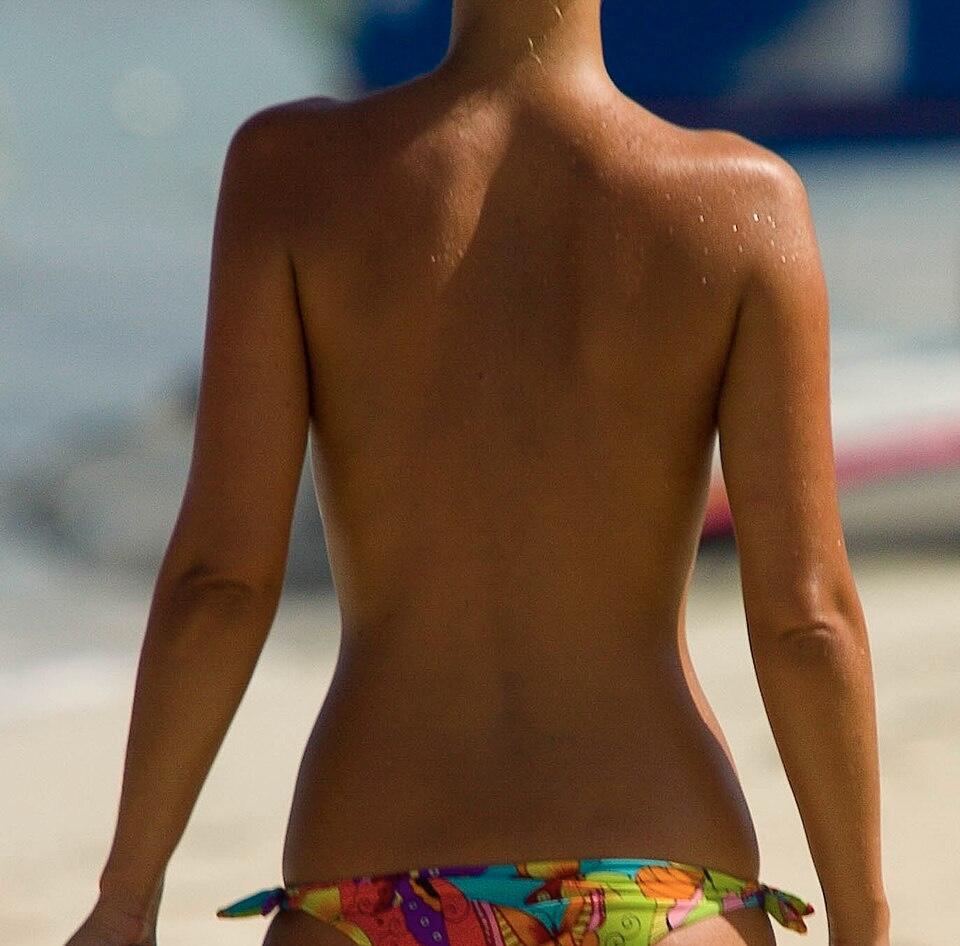
](https://www.anatomyarchive.org/uploads/images/gallery/2025-04/img-0051.jpeg)*

*credit to: [Vox Efx](https://commons.m.wikimedia.org/wiki/File:A_woman_with_a_suntan_wearing_a_bikini_(1)_(cropped).jpg); this image is modified (cropped)*

*[![IMG_0052.jpeg](https://www.anatomyarchive.org/uploads/images/gallery/2025-04/scaled-1680-/img-0052.jpeg)](https://www.anatomyarchive.org/uploads/images/gallery/2025-04/img-0052.jpeg)*

*credit to: [Elements Of This World](https://commons.m.wikimedia.org/wiki/File:Adult_Woman_Back_With_Tan_Lines.png); this image is modified (cropped)*
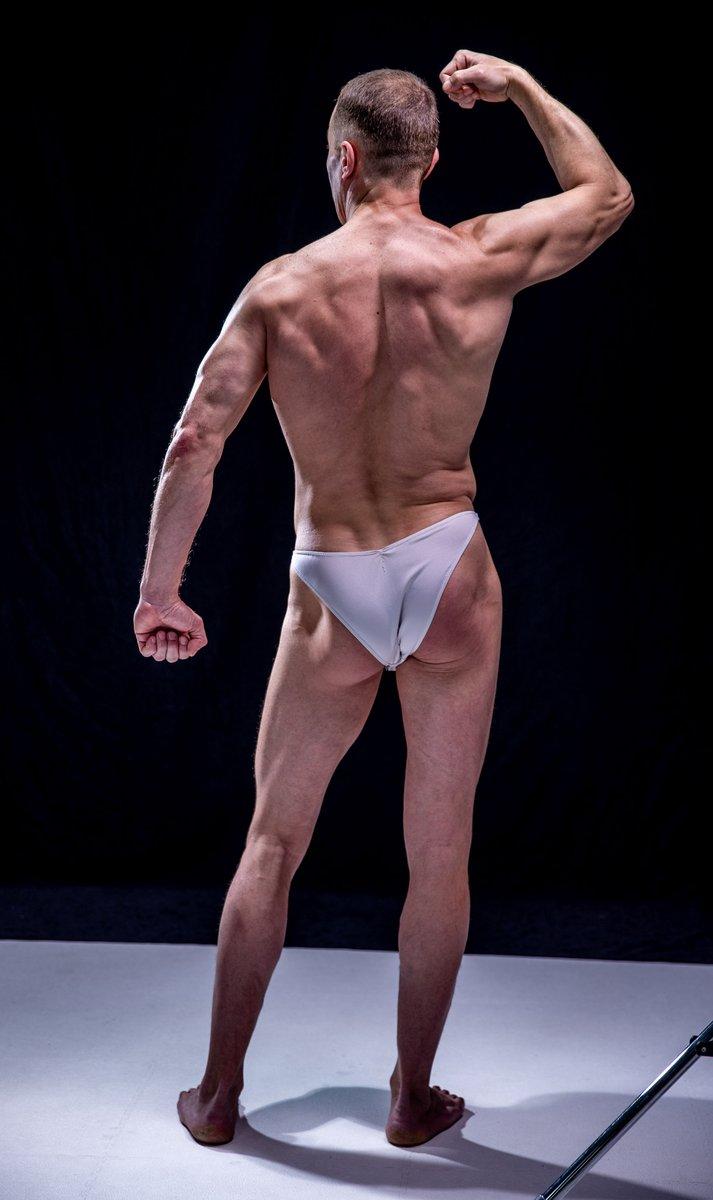
*[![bodybuilder-6919631_1280.jpg](https://www.anatomyarchive.org/uploads/images/gallery/2025-04/scaled-1680-/bodybuilder-6919631-1280.jpg)](https://www.anatomyarchive.org/uploads/images/gallery/2025-04/bodybuilder-6919631-1280.jpg)*

*credit to: [vishstudio](https://pixabay.com/photos/bodybuilder-bodybuilding-fitness-6919631/)*

[![IMG_0053.jpeg](https://www.anatomyarchive.org/uploads/images/gallery/2025-04/scaled-1680-/img-0053.jpeg)](https://www.anatomyarchive.org/uploads/images/gallery/2025-04/img-0053.jpeg)

*credit to: [capsulanudes](https://pixabay.com/photos/man-back-body-muscles-legs-skin-6768174/); image is modified (cropped)*

[![sport-6820849_1280.jpg](https://www.anatomyarchive.org/uploads/images/gallery/2025-05/scaled-1680-/sport-6820849-1280.jpg)](https://www.anatomyarchive.org/uploads/images/gallery/2025-05/sport-6820849-1280.jpg)

*credit to: [Raman\_Spirydonau](https://pixabay.com/users/raman_spirydonau-11910217/)*

</details>

# Back and Shoulder Muscles (Alizz Art)

<details id="bkmrk-this-line-will-be-vi"><summary>Preview:</summary>

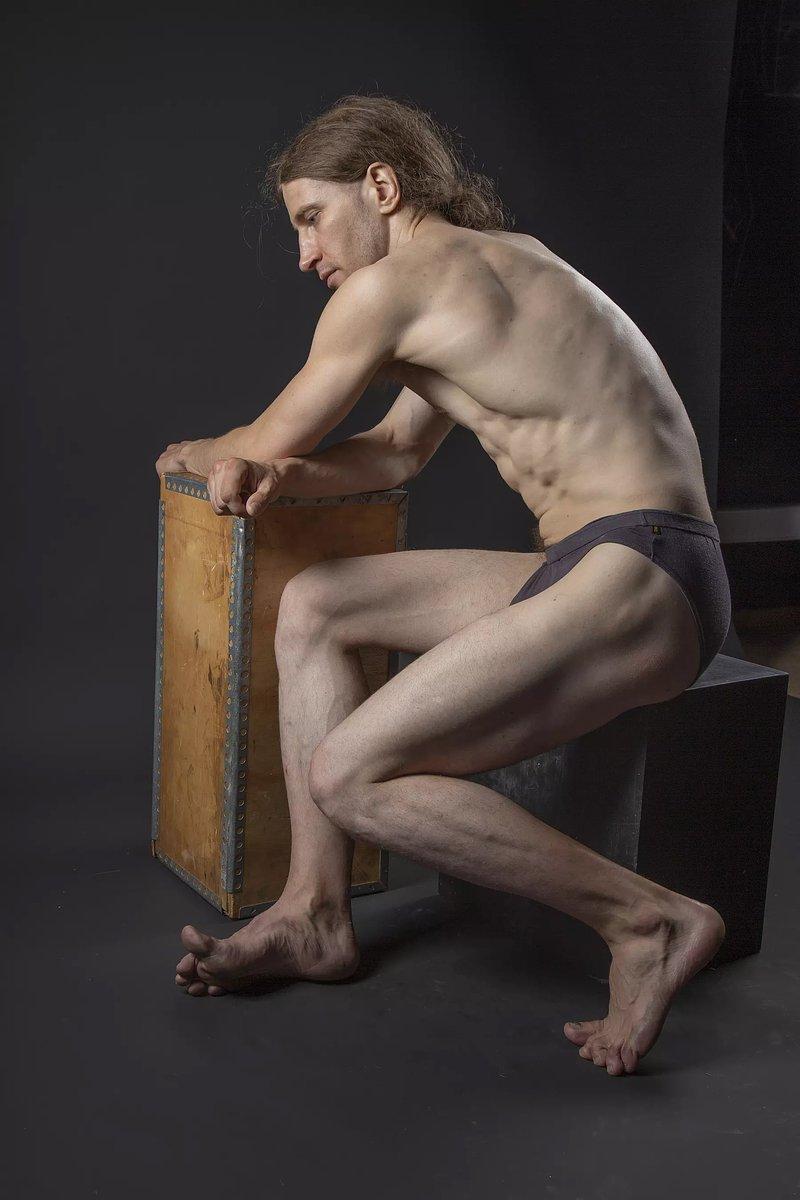
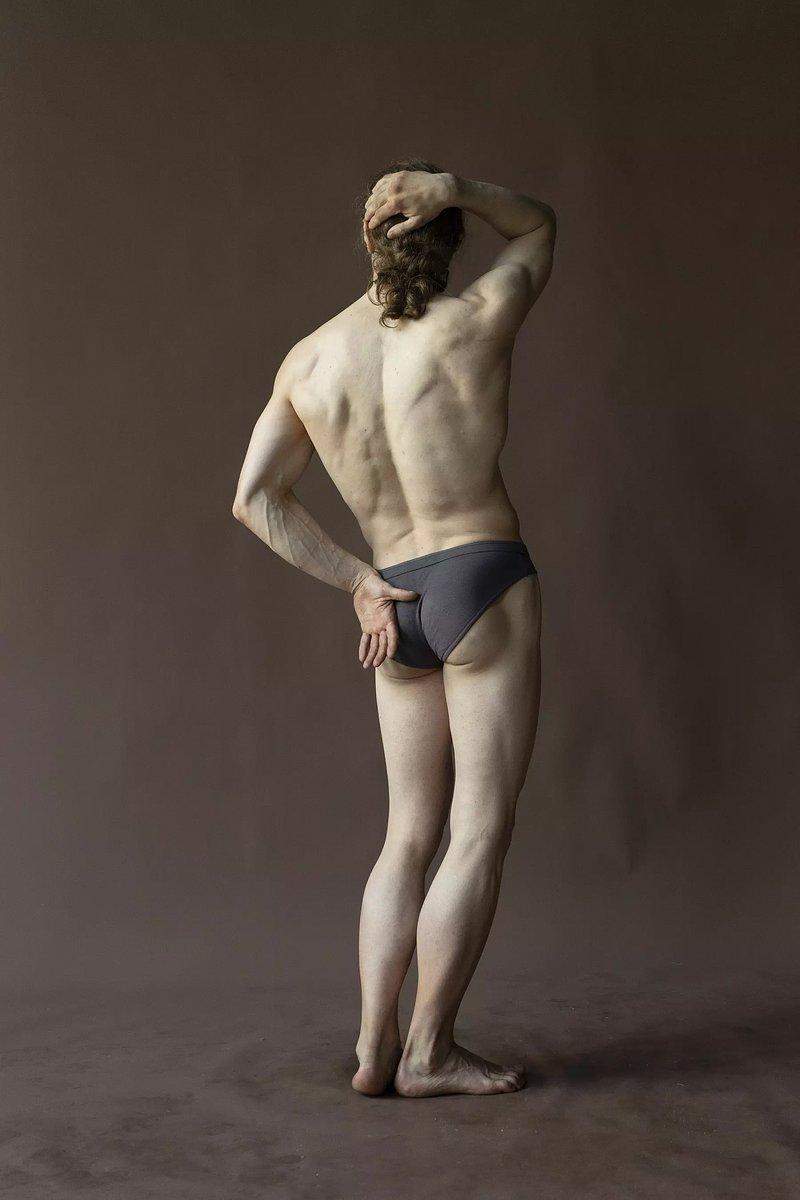
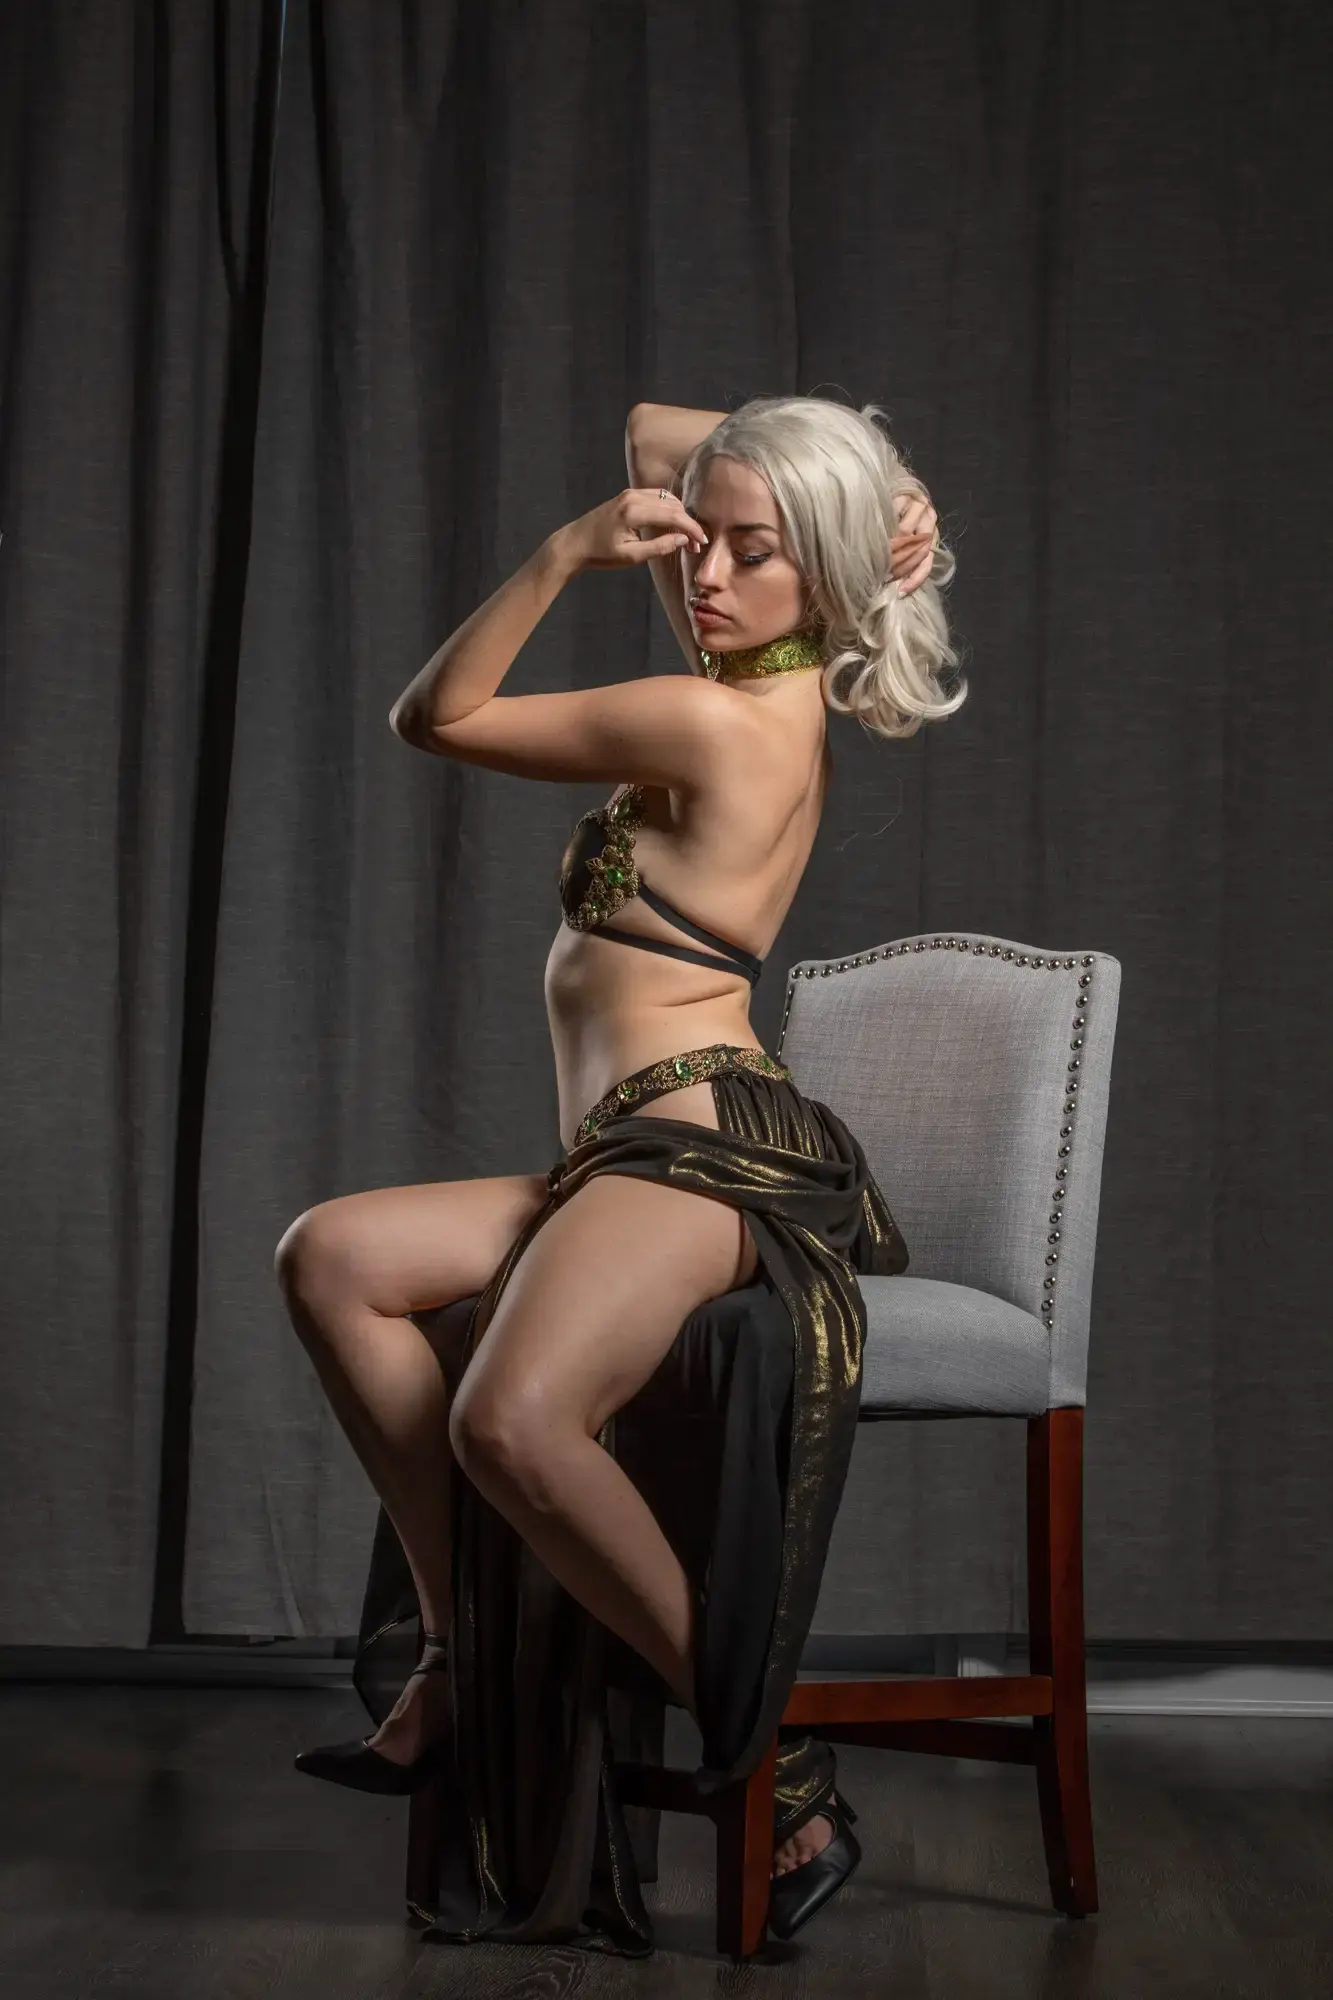
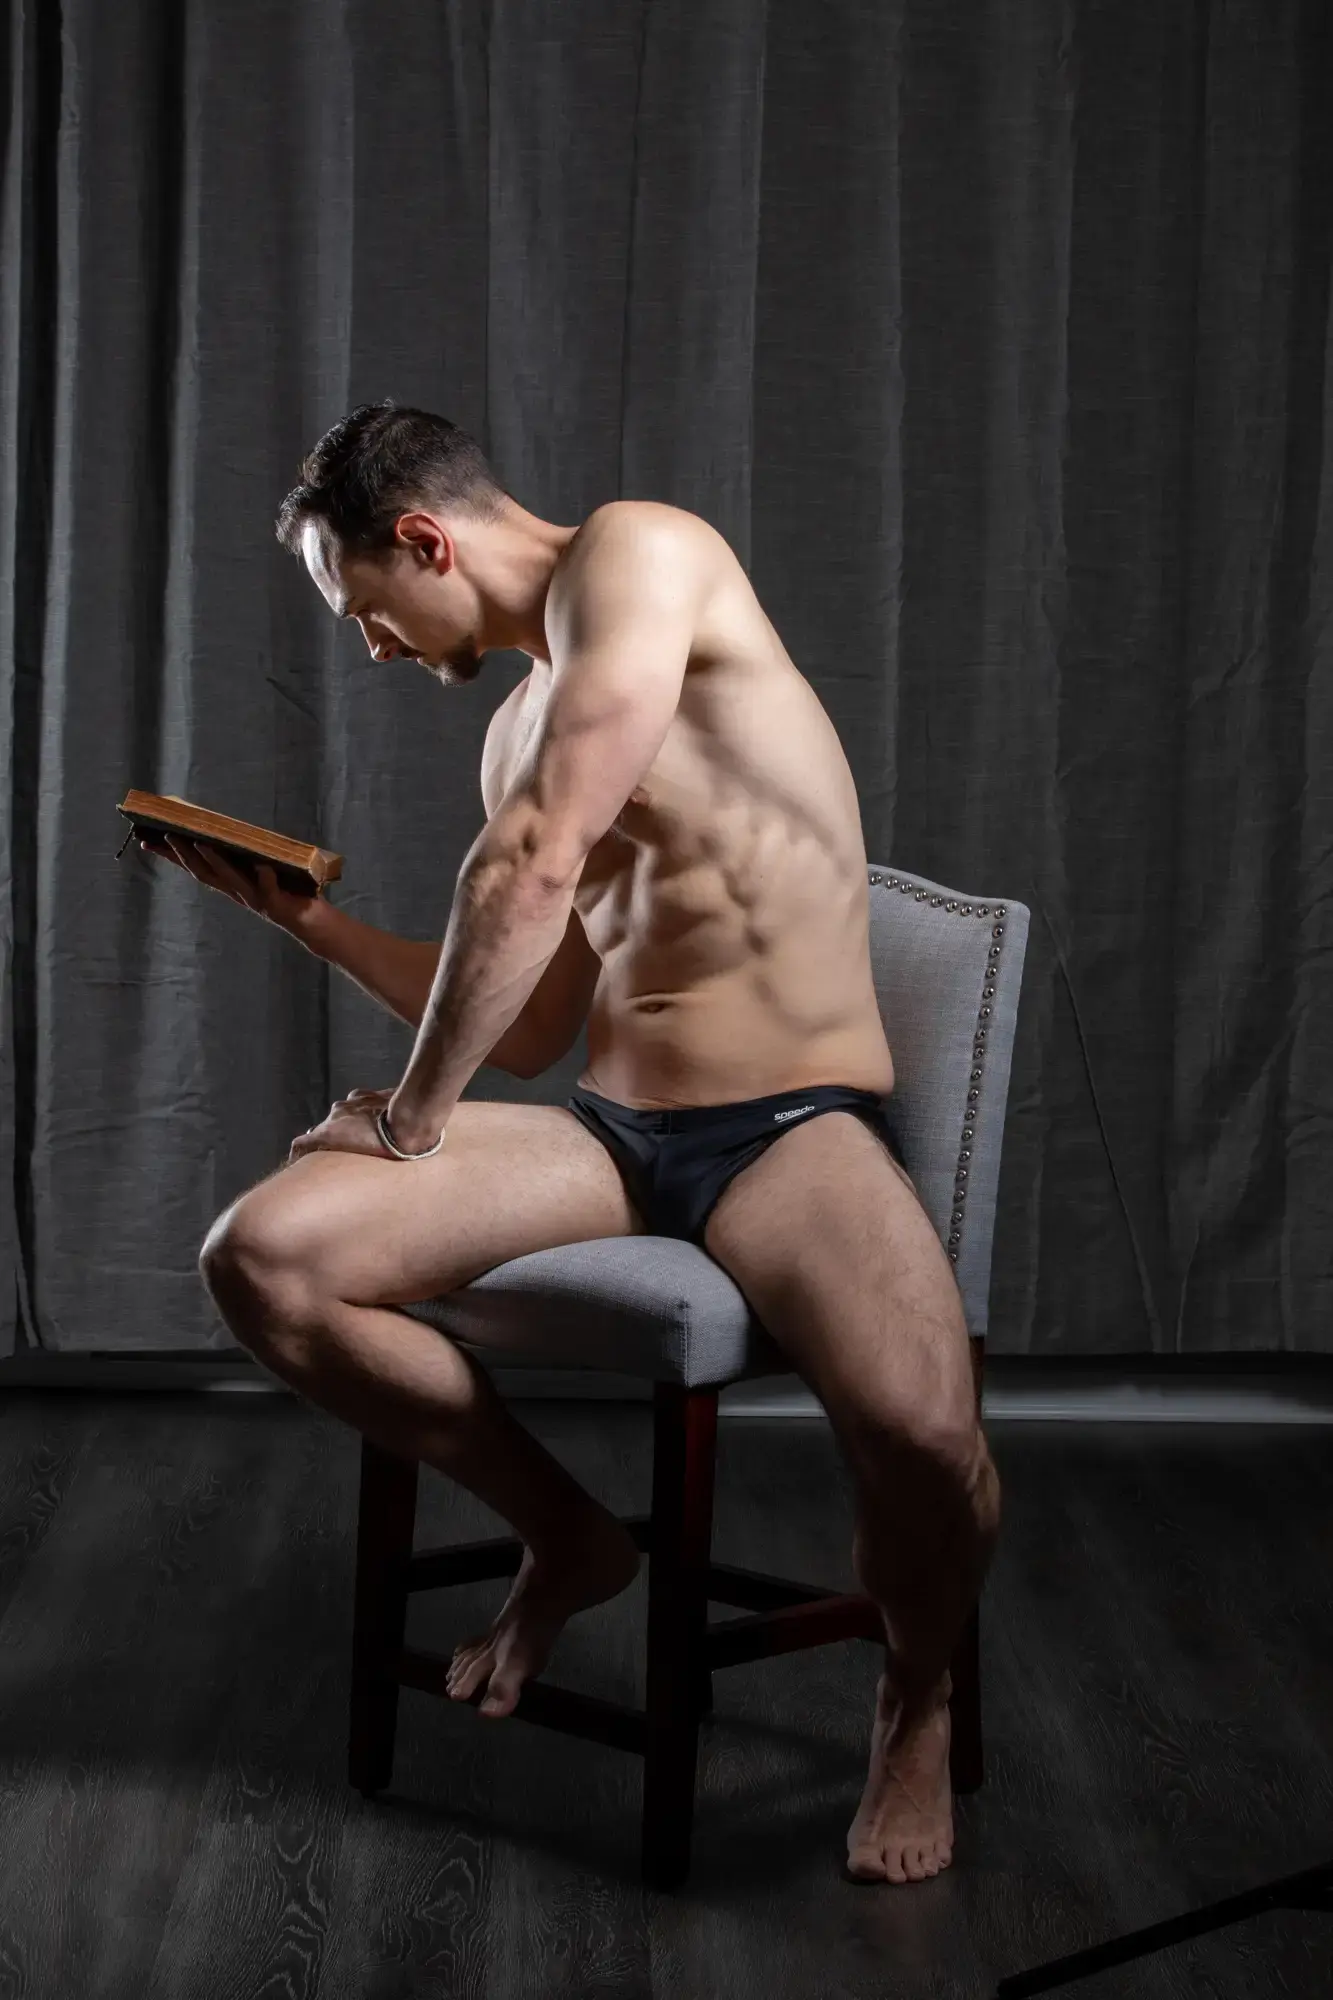
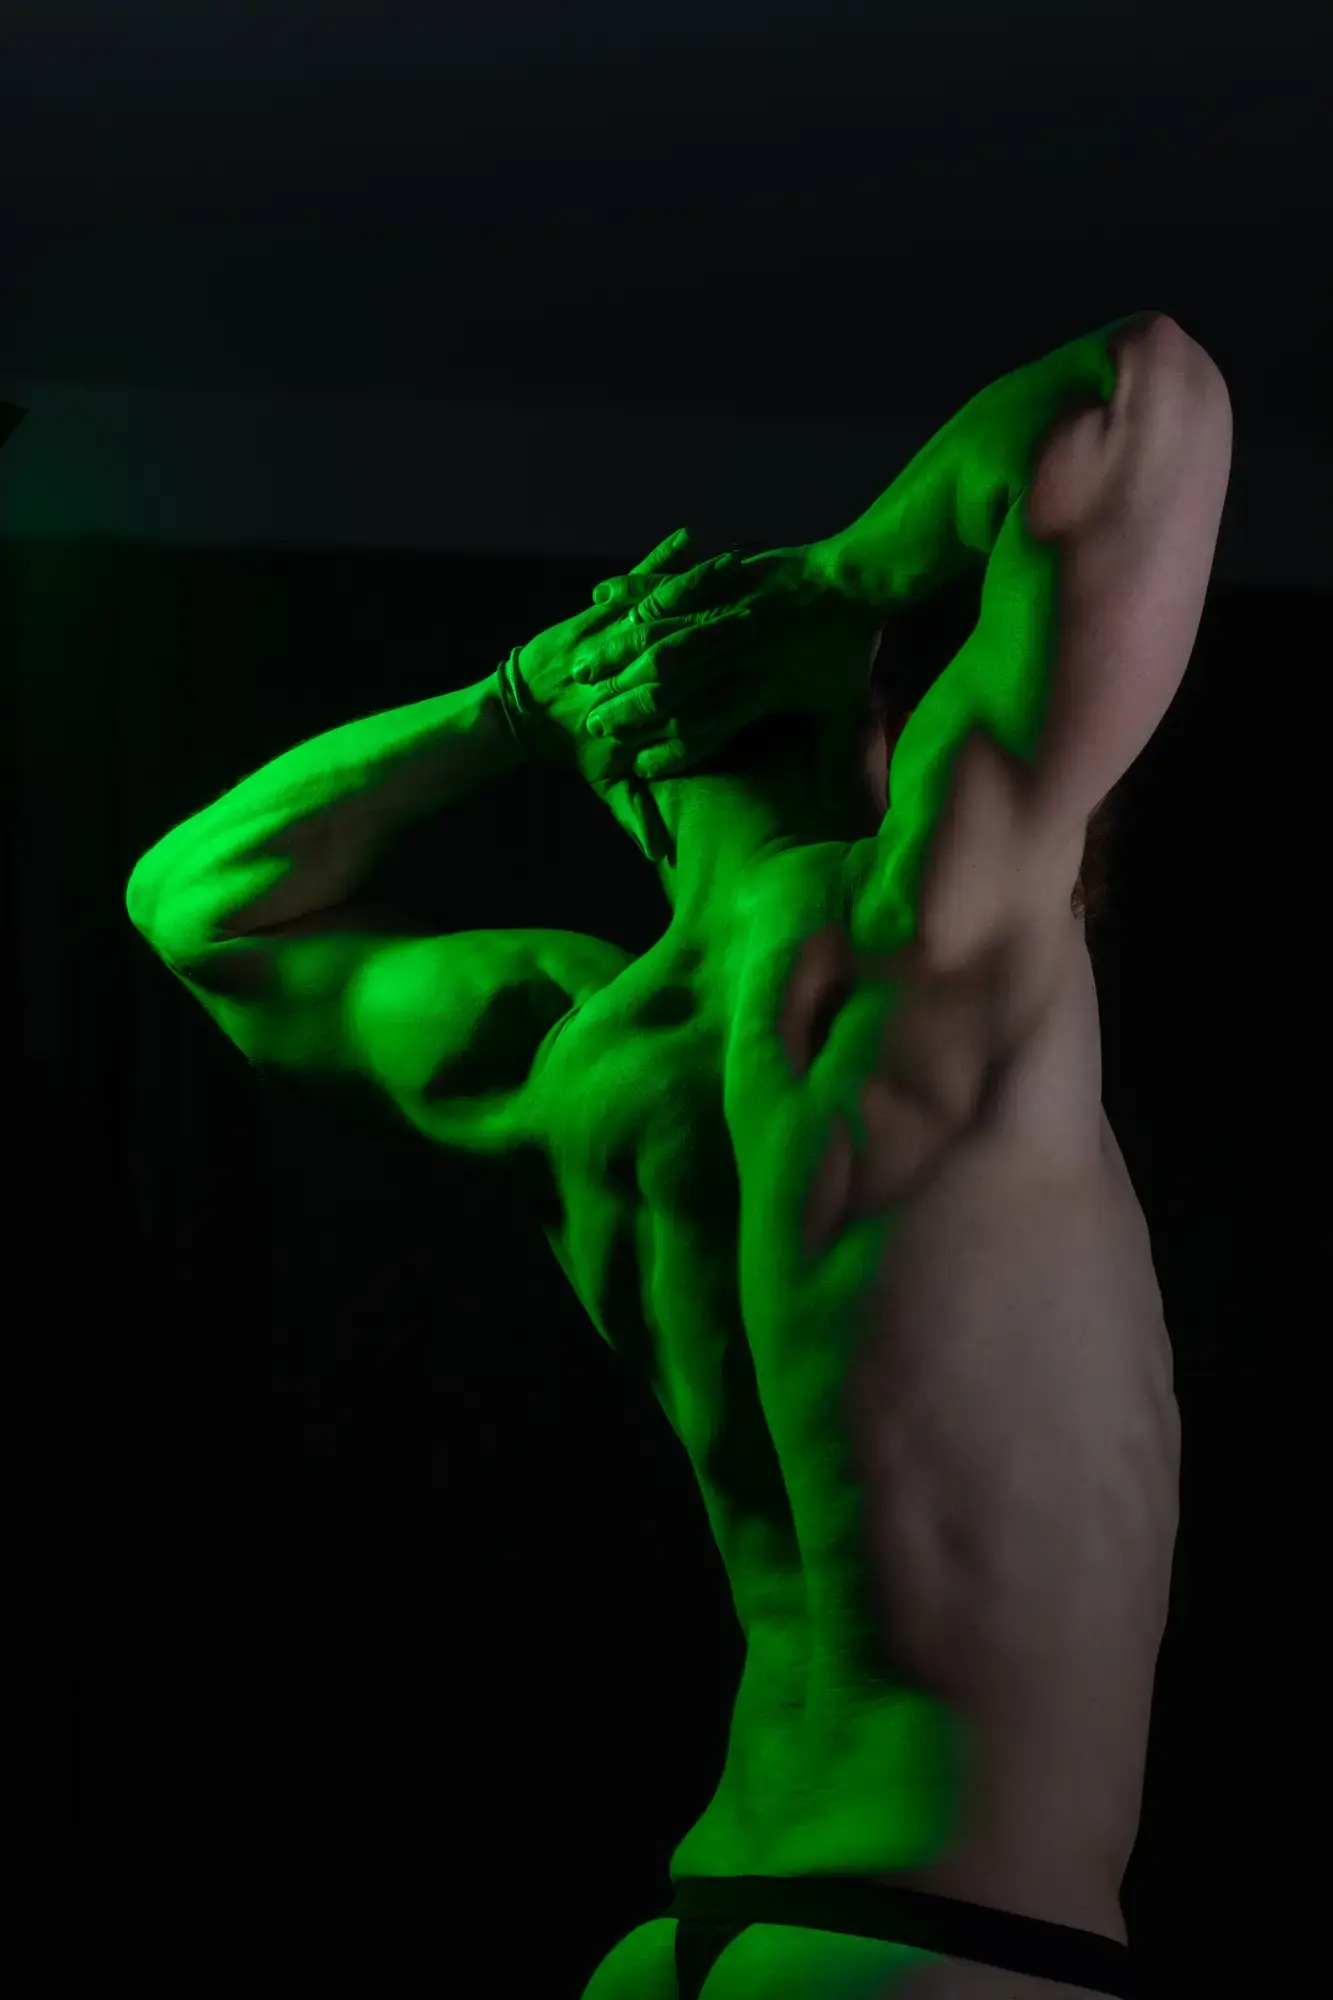
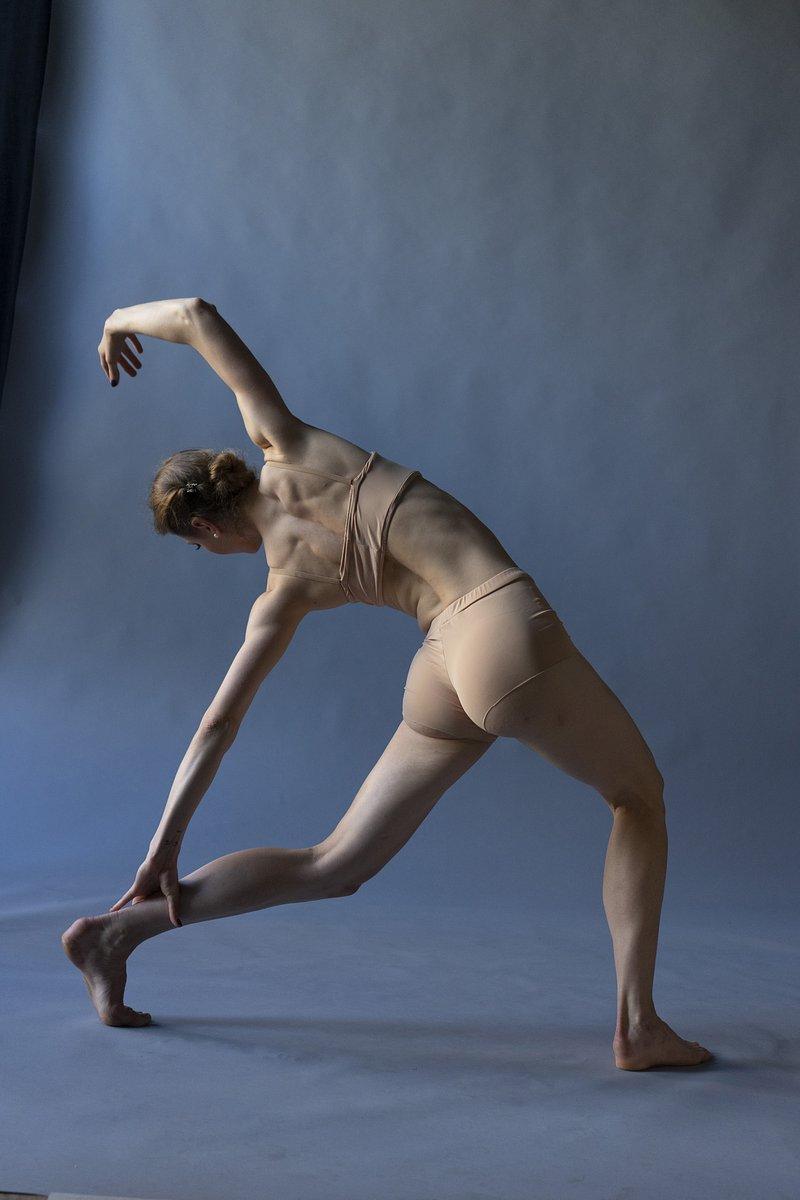
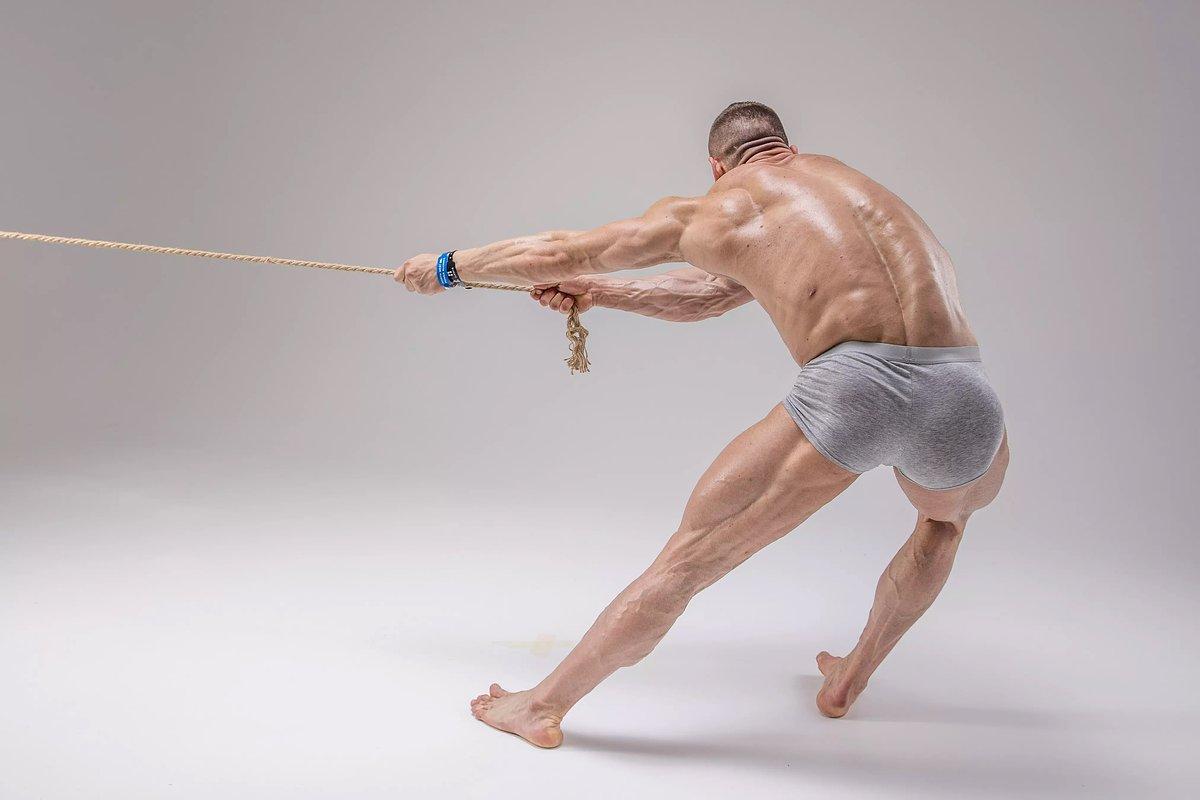
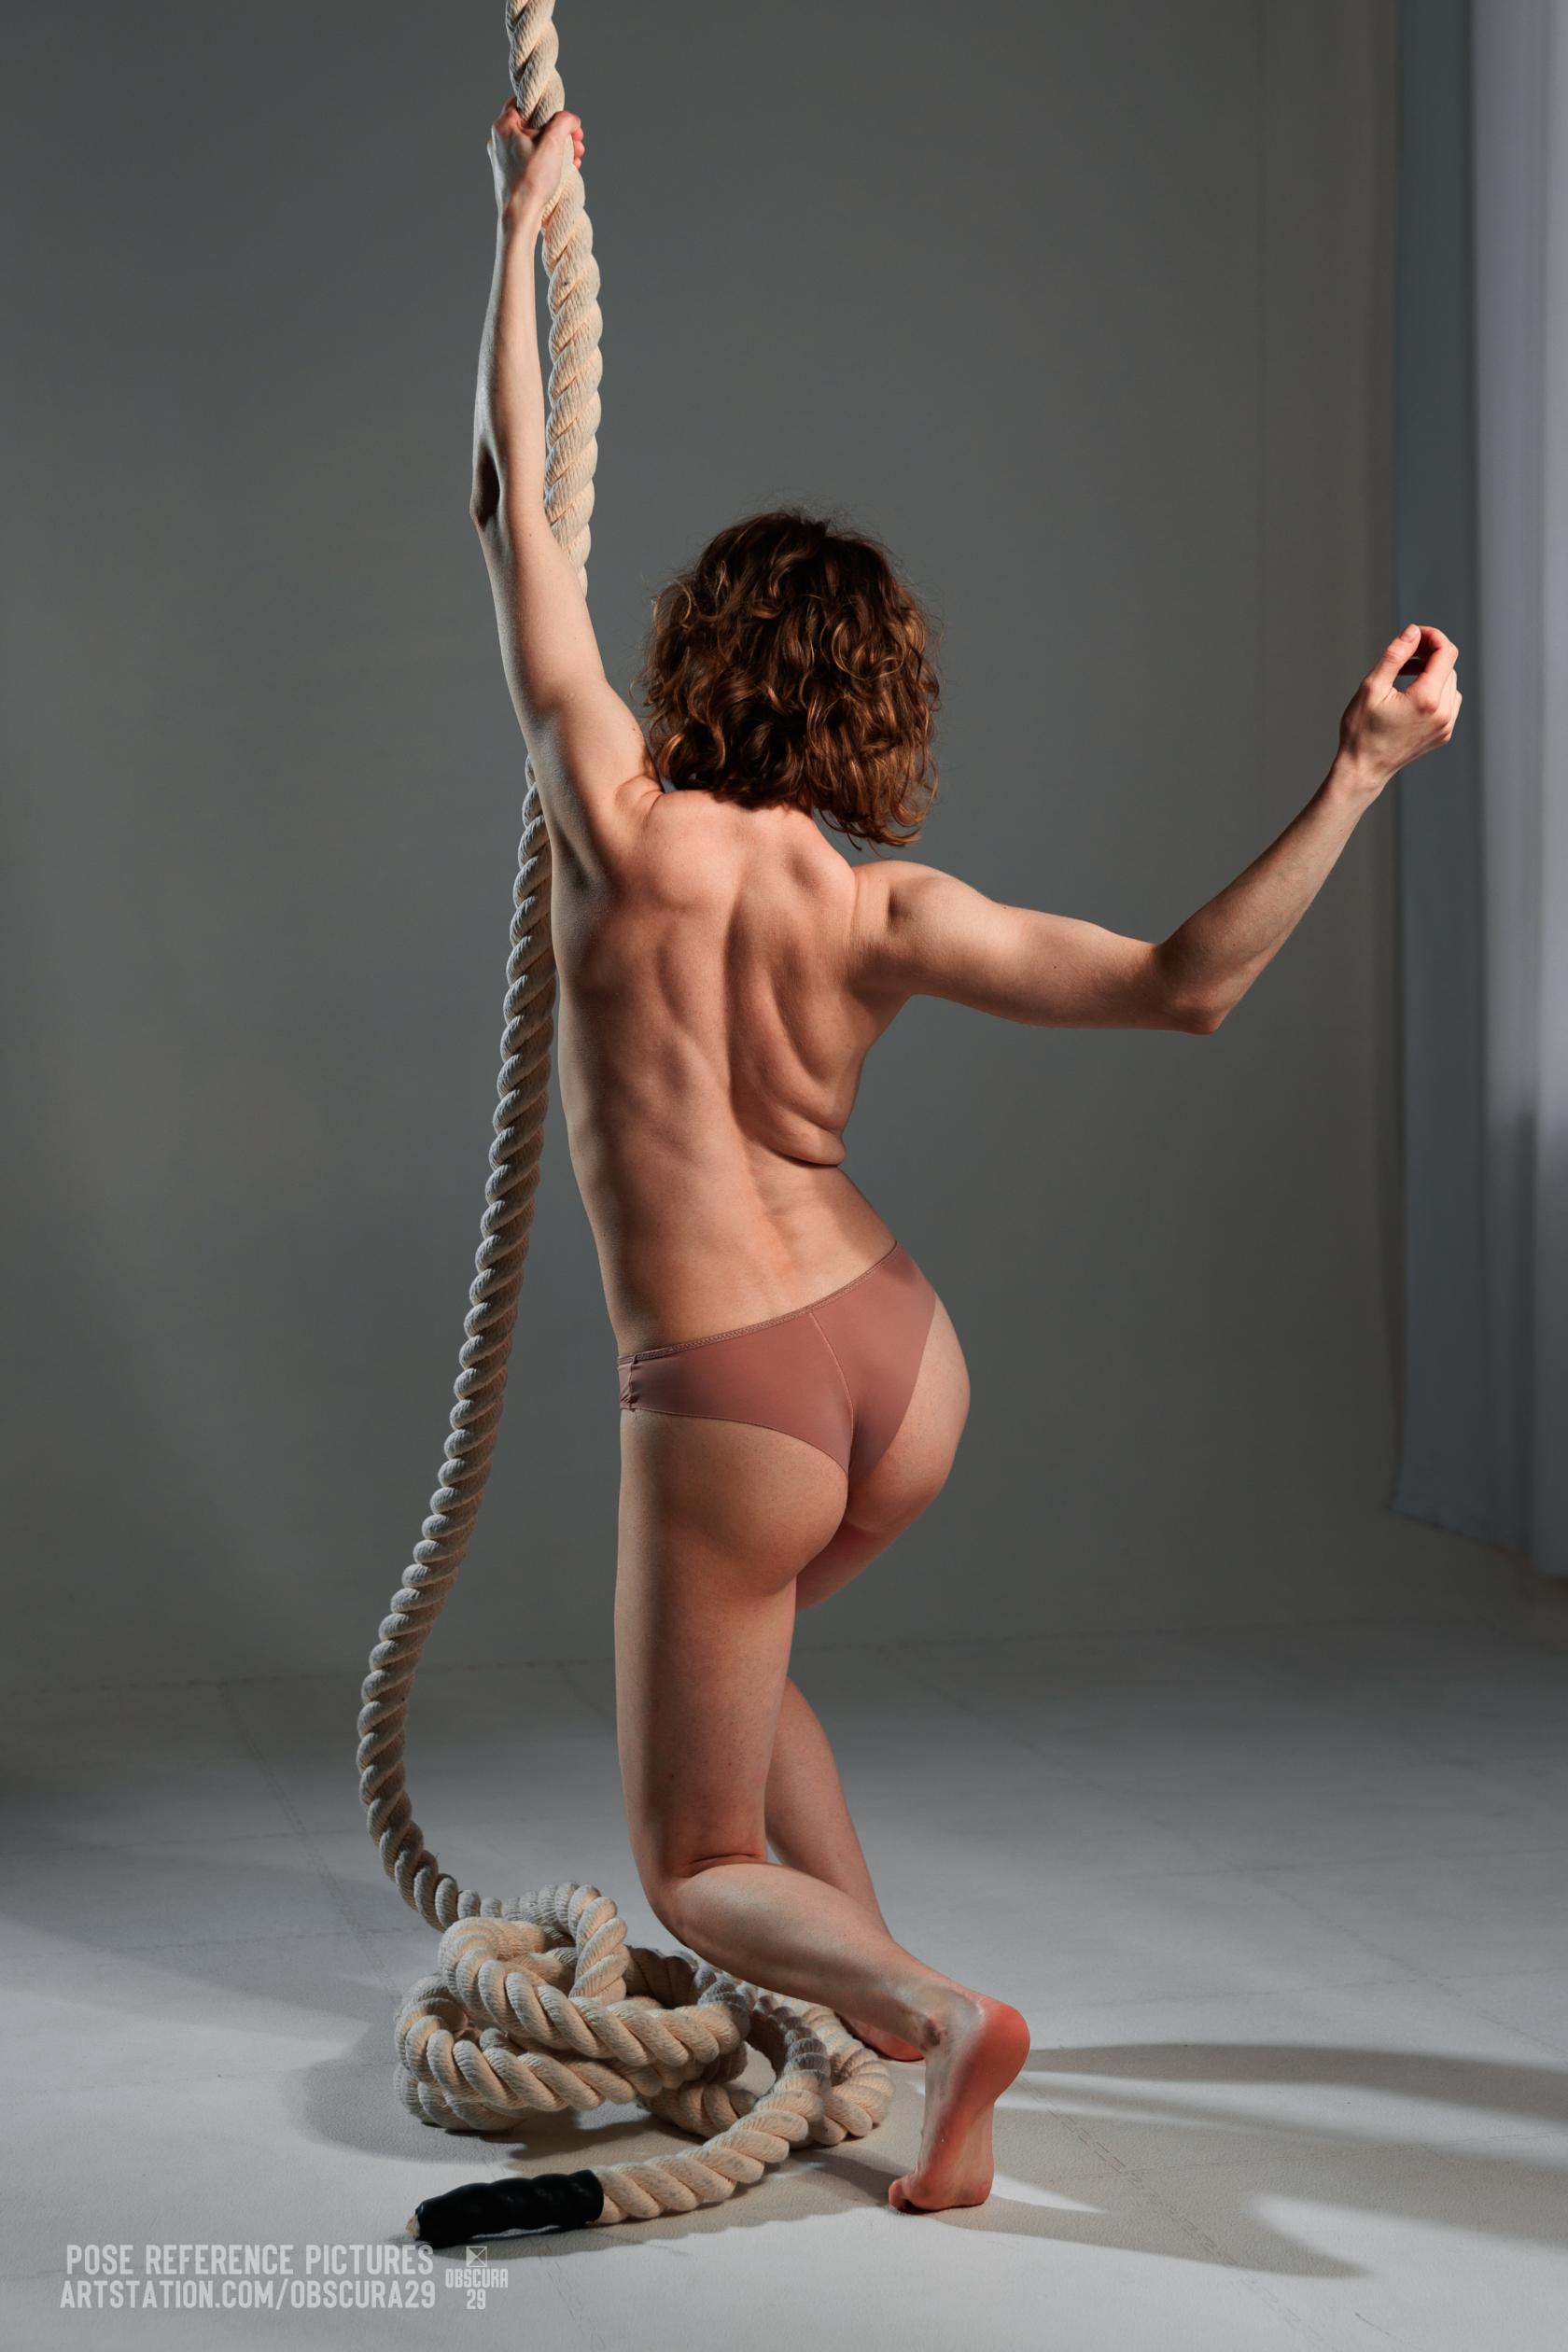
Learn more about the most important back and shoulder muscles.

</details>**Synonyms: deltoid muscle; trapezius muscle; latissimus dorsi muscle; infraspinatus muscle; teres major muscle**

---

### **Summary**

[Deltoid muscle](https://www.anatomyarchive.org/search?term=deltoid "More about the Deltoid")<span style="white-space: pre-wrap;"> : What are deltoid muscles? Your deltoid muscles are in your shoulder, which is the ball-and-socket joint that connects your arm to the trunk of your body. Deltoid muscles </span>**help you move your** [**arms**](https://www.anatomyarchive.org/search?term=arm "More about the arm") **in different directions**. They also protect and stabilize your shoulder joint.

[Trapezius muscle](https://www.anatomyarchive.org/search?term=trapezius "More about the Trapezius")<span style="white-space: pre-wrap;"> :Your trapezius muscles are two big muscles on either side of your upper back. They help you move your head, neck and upper back, and maintain and adjust your posture.</span>

[Latissimus dorsi muscle](https://www.anatomyarchive.org/search?term=Latissimus "More about the Lattisimus")<span style="white-space: pre-wrap;"> : The latissimus dorsi (or "lats") is a large back muscle crucial for arm movement like extending, adducting (bringing towards the body), and internally rotating the shoulder, essential for activities like climbing or pull-ups, and also helps with spine stability. and forced breathing (inspiration/expiration).</span>

<span style="white-space: pre-wrap;">Infraspinatus muscle : The infraspinatus muscle's action on the shoulder is primarily through its function as </span>**a rotator cuff muscle providing glenohumeral stability**. The rotator cuff applies compression upon the head of the humerus that allows for the stabilization of the humeral head during shoulder abduction.

<span style="white-space: pre-wrap;">Your </span>**shoulder joint**<span style="white-space: pre-wrap;"> (glenohumeral joint) is a ball-and-socket </span>[joint](https://www.anatomyarchive.org/search?term=joint "More about the joints")<span style="white-space: pre-wrap;"> that connects your upper arm bone (</span>[humerus](https://www.anatomyarchive.org/search?term=humerus "More about the Humerus")) and shoulder blade ([scapula](https://www.anatomyarchive.org/search?term=scapula "More about the Scapula")).

<span style="white-space: pre-wrap;">Teres major muscle : It's crucial for stabilizing the shoulder joint, helping to keep the humeral head in place, and assists in pulling the trunk upward during activities like climbing. </span>

#### **How to draw the muscles**

the first drawing shows the skeleton structure where the muscles are positioned.

The second drawing shows all the muscles stretched so they can be more easily identified.

The third drawing shows a closer look and the shoulder joint and its muscle group that help with the movement.

[![IMG_4265.jpeg](https://www.anatomyarchive.org/uploads/images/gallery/2026-01/scaled-1680-/NG7img-4265.jpeg)](https://www.anatomyarchive.org/uploads/images/gallery/2026-01/scaled-1680-/NG7img-4265.jpeg)

#### **Origin and Insertion**

<span style="white-space: pre-wrap;">Back muscles originate from various points, primarily the </span>[vertebrae](https://www.anatomyarchive.org/search?term=vertebrae "More about the Vertabrae")<span style="white-space: pre-wrap;"> (spinous &amp; transverse processes), ribs, </span>[skull](https://www.anatomyarchive.org/search?term=skull "More about the skull")<span style="white-space: pre-wrap;">, </span>[scapula](https://www.anatomyarchive.org/search?term=scapula "More about the scapula")<span style="white-space: pre-wrap;"> (shoulder blade), and the </span>**iliac crest**<span style="white-space: pre-wrap;"> (hip bone)</span>

All of these muscles are present in the back or dorsal part if the upper body.

#### **Function**

<span style="white-space: pre-wrap;">Strengthening of the dorsal upper body and helping with complex movements </span>

### **Advanced**

<details id="bkmrk-everything-beyond-th"><summary>Everything beyond the basics</summary>

No advanced section for now.

</details>#### **Reference Pictures (for study only)**

<details id="bkmrk-name-the-source-%28web"><summary>From Obscura 29, Grafit Studio, Reference.Pitcures</summary>

[![Grafit-Sample-010.jpg](https://www.anatomyarchive.org/uploads/images/gallery/2026-01/scaled-1680-/grafit-sample-010.jpg)](https://www.anatomyarchive.org/uploads/images/gallery/2026-01/scaled-1680-/grafit-sample-010.jpg)

**credit to:** [**Grafit Studio**](https://www.artstation.com/grafit/store?tab=digital_product "Grafit Studio")

[![Grafit-Sample-005.jpg](https://www.anatomyarchive.org/uploads/images/gallery/2026-01/scaled-1680-/grafit-sample-005.jpg)](https://www.anatomyarchive.org/uploads/images/gallery/2026-01/scaled-1680-/grafit-sample-005.jpg)

**credit to:** [**Grafit Studio**](https://www.artstation.com/grafit/store?tab=digital_product "Grafit Studio")

[![Reference-Pictures_High-Elf-0484 copy.webp](https://www.anatomyarchive.org/uploads/images/gallery/2026-01/scaled-1680-/reference-pictures-high-elf-0484-copy.webp)](https://www.anatomyarchive.org/uploads/images/gallery/2026-01/scaled-1680-/reference-pictures-high-elf-0484-copy.webp)

**credit to:** [**Reference.Pictures**](https://reference.pictures/ "Reference.Pictures")

[![Reference-Pictures_Figure-Drawing_Mage-3204 copy.webp](https://www.anatomyarchive.org/uploads/images/gallery/2026-01/scaled-1680-/reference-pictures-figure-drawing-mage-3204-copy.webp)](https://www.anatomyarchive.org/uploads/images/gallery/2026-01/scaled-1680-/reference-pictures-figure-drawing-mage-3204-copy.webp)

**credit to:** [**Reference.Pictures**](https://reference.pictures/ "Reference.Pictures")

[![Reference-Pictures_Dramatic-Figure-Lighting-3389 copy.webp](https://www.anatomyarchive.org/uploads/images/gallery/2026-01/scaled-1680-/reference-pictures-dramatic-figure-lighting-3389-copy.webp)](https://www.anatomyarchive.org/uploads/images/gallery/2026-01/scaled-1680-/reference-pictures-dramatic-figure-lighting-3389-copy.webp)

**credit to:** [**Reference.Pictures**](https://reference.pictures/ "Reference.Pictures")

[![Grafit-Sample-047.jpg](https://www.anatomyarchive.org/uploads/images/gallery/2026-01/scaled-1680-/grafit-sample-047.jpg)](https://www.anatomyarchive.org/uploads/images/gallery/2026-01/scaled-1680-/grafit-sample-047.jpg)

**credit to:** [**Grafit Studio**](https://www.artstation.com/grafit/store?tab=digital_product "Grafit Studio")

[![Grafit-Sample-029.jpg](https://www.anatomyarchive.org/uploads/images/gallery/2026-01/scaled-1680-/grafit-sample-029.jpg)](https://www.anatomyarchive.org/uploads/images/gallery/2026-01/scaled-1680-/grafit-sample-029.jpg)

**credit to:** [**Grafit Studio**](https://www.artstation.com/grafit/store?tab=digital_product "Grafit Studio")

[![obscura.jpg](https://www.anatomyarchive.org/uploads/images/gallery/2026-01/scaled-1680-/obscura.jpg)](https://www.anatomyarchive.org/uploads/images/gallery/2026-01/scaled-1680-/obscura.jpg)

**credit to:** [**Obscura 29**](https://www.artstation.com/obscura29/store?tab=digital_product "Obscura 29")

[![obscura 2.jpg](https://www.anatomyarchive.org/uploads/images/gallery/2026-01/scaled-1680-/obscura-2.jpg)](https://www.anatomyarchive.org/uploads/images/gallery/2026-01/scaled-1680-/obscura-2.jpg)

**credit to:** [**Obscura 29**](https://www.artstation.com/obscura29/store?tab=digital_product "Obscura 29")

</details>  
<span style="color: rgb(255, 255, 255);">Socials :)</span>  
[Instagram](https://www.instagram.com/alizz003/ "@alizz003 on Instagram")  
[TikTok](https://www.tiktok.com/@_toffiy "@_toffiy on TikTok")

# Bones

**(in alpha testing)**